Showing posts with label cake mix. Show all posts

Wednesday, 6 March 2013

Chocolate Peppermint M&M Bars (Easy Things to Do with Cake Mix #4)


Better late than never! This is a Christmas recipe, three months late. Which means, in fact, that I am getting worse, because my Thanksgiving recipes were only two months late. Oh well.

Incidentally, I think I'm going to change the tagline of my blog to: "Good food...crappy pictures." Seriously. I have no sense of artistry. I snap my pics on my iPhone, in my garish kitchen light, on a messy counter, on a paper plate. If there are Seven Deadly Sins of Food Photography, I commit them all. Simultaneously.

But, don't let my lack of artistic flair deter you from making these bars, because they are super quick and yummy. And like Thanksgiving, with my new kiddo, quick and easy was the name of the game this year.


I didn't intend to make these bars. In fact, I was at a loss for what to make this year for Christmas. Normally, my mom and I make scads and scads of Christmas cookies, but this year, I knew it wouldn't happen. Frankly, I was an overwhelmed FTM, and I was lucky to make it to the shower every day, let alone coordinate the 15+ varieties (no exaggeration) of cookies and cake balls this year.

But then I saw these babies at Target:


White chocolate peppermint M&Ms. Apparently they were a Target exclusive. So I snatched up a bag for baking without a clear idea of what I wanted to do with them. But then I decided to make bars -- they're easier than cookies because it involves one pan and one trip to the oven. And for these bars, I wanted to try something a little different, so I used Devil's Food cake mix as the base. Super easy!

Just combine cake mix, oil, an egg and water in a bowl and mix to combine (by hand is fine, I used a wooden spoon).


Then, add the mix-in, which in this case was the entire bag of M&Ms:

Note: the oil makes the batter, well, oily. The M&Ms get coated with oil and almost fall out of the batter as you mix. Don't worry, it will bake up just fine.
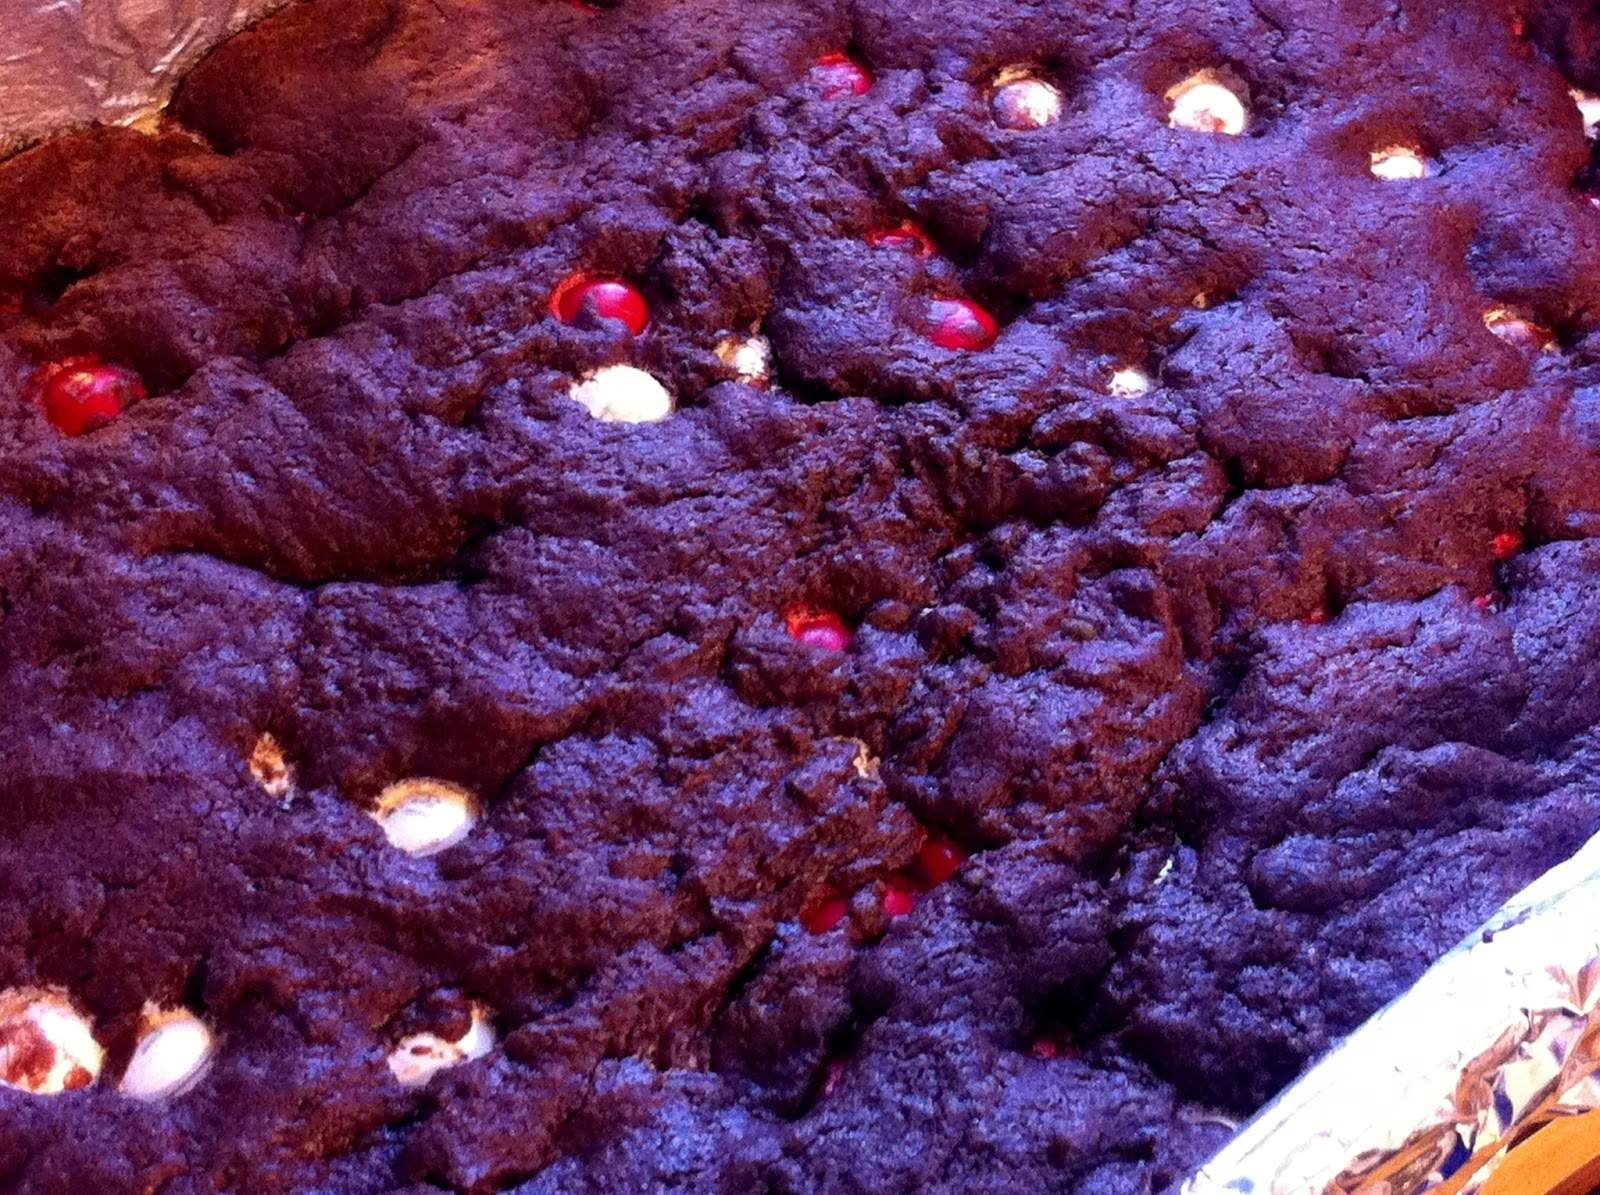
Then, spread it in a pan, bake, cool, and cut!


I managed to have the entire thing done before my little helper woke up!

Color-coordinated with Mommy's baking!
My family loved these things, they were quite tasty, and the bar consistency was perfect. Huge return on taste for a minimal time investment -- just the way I like it! The beauty is, you can use the basic cake mix recipe for any combo of batter and mix-ins! Next year, I think I will try white cake mix with these M&Ms, which should look stunning, visually. I'm also going to try a flavor variation for Easter which, based on my current posting schedule, probably won't make it onto the blog until Halloween. Oh well. Happy baking!

Chocolate Peppermint M&M Bars

Ingredients

  • 1 box chocolate cake mix (Devil's Food, Chocolate Fudge, etc)
  • 1/2 cup vegetable oil
  • 1/4 cup water
  • 1 egg
  • 1 bag of white chocolate peppermint M&Ms (or mix-on of your choice)
Directions
  1. Preheat oven to 350F
  2. Spray  9x13" pan with cooking spray (optional: line pan with aluminum foil before spraying, for easy lifting of bars from pan)
  3. Combine cake mix, egg, oil and water in bowl and mix well
  4. Add mix-ins
  5. Spread evenly in pan (you may have to press down a little to spread evenly) and bake for 20-25 minutes
  6. Cool and cut


Thursday, 24 March 2011

Lemon Blossoms (Easy Things to Do With Cake Mix #3)


And, with this post, I am finally done with the three boxes of yellow cake mix that I had left over from Christmas. The first two were used to make Pecan Cake Bars and Raspberry Oat Bars, respectively. Both recipes are delicious and quick ways to use cake mix, with the raspberry oat bars being a real stand-out in terms of flavor and ease of assembly. For this last box of mix, I decided to stick to the fruity route, and I chose a recipe called Lemon Blossoms from Paula Deen, which are tiny little lemon cakelets baked in a mini-muffin pan and covered in a lemon glaze. I had it in mind to test as a potential Easter recipe (for some reason, Easter and lemons are always associated in my mind), plus it sounded like a great, bright, spring-time recipe now that Spring is officially here.


Although, you'd never know Spring is here from all the snow I've been cleaning off of my car every morning, but that's another story.

This recipe starts with an ordinary box of yellow cake.

Normally, when I make a lemon cake from a mix, I buy the lemon-flavored mix, and dump in a box of lemon Jell-o to make the color bright and the flavor pop. It is an easy thing to do, and I recommend it for anyone who wants a quick lemon cake. This recipe, however, calls for a box of yellow cake mix, and a box of instant lemon pudding, so I was very interested to see how the flavor of this cake compared to my standard from-the-box lemon cake (Spoiler Alert: this recipe is divine).

Combine cake mix, pudding, lemon zest, eggs, and vegetable oil in the mixer until well-combined. The batter will be very thick, resist the urge to add extra liquid, these cakes are supposed to be dense, like a tea cake.

Fill a sprayed mini-muffin tin (no liners) with batter, filling the wells half full of batter. The blossoms rise a lot, and if they spill over the top of the well, getting them out of the pan might be harder, so make sure you only fill up half way.

Now, they bake in a pre-heated oven. The tops will spring back when they are done, mine took about 15 minutes, although the directions say 12.


When they come out, before they cool, invert the pan and turn them out onto a towel. Paper towels are fine.

You can right them if you want.

At this stage I was a little worried. Mine looked browner than Paula's -- baking them until the sprang back seemed to turn them into what felt like little hockey pucks...or so I thought.

Now it is time to dip them in the glaze. Paula calls for you to dip them as soon as you turn them out onto the towel. I didn't do this, because I didn't have my glaze made yet. I don't think the blossoms ended up any worse for wear, but that is your decision. So, prep your glaze (you can even do this before you assemble the dough, just be sure to cover the glaze, and stir it again before you dip): lemon juice, lemon zest, a little veggie oil (I didn't put as much in as she called for), and a little water.

There are two ways to dip: you can either dip the entire blossom, or just the top. It definitely affects the flavor, and both are yummy. The texture is a little softer if you dip the whole thing, but the lemon flavor is much stronger, so I recommend trying it both ways to see what you like better. If you intend to dip the entire blossom for most or all of them, I'd double the glaze, because I started running a little low.


Dip them, Put them on a rack on top of wax paper, so that the excess glaze can run off, and let them set for about an hour before you try to pack them for storing.

They look a little like glazed doughnut holes, and the taste is wonderful. The cake is dense, but the flavor is light and bright. The amount of cake you choose to dip will really affect the level of lemon. I loved them both ways, they are the perfect accompaniment to tea, and just a great addition to a dessert spread in general.

There's no reason why you can't substitute lime juice and zest, or orange juice and zest to change the flavor. You can use vanilla pudding in the mix, or you can use lime or orange Jell-o, respectively. There's also no reason why you can't substitute a chocolate cake mix and chocolate pudding, and make the glaze out of vanilla and water instead (or substitute a chocolate glaze).


Lemon Blossoms
(Printable Recipe)

Ingredients
Cake

  • 1 box of yellow cake mix (18.5)
  • 1 package lemon instant pudding (3.5 oz)
  • Zest of 1 lemon
  • 4 eggs
  • 3/4 C vegetable oil

Glaze *

  • 4 C confectioner's sugar
  • 1/3 C lemon juice
  • Zest of 1 lemon
  • 2 tbls vegetable oil
  • 2 tbls water

Directions

  1. Combine cake mix, pudding, zest, eggs and oil in mixer, and mix until combined, about 2 minutes
  2. Spray a mini-muffin tin with butter spray, and fill the wells half full with batter. This recipe makes 48 mini-muffins, and uses 2 pans
  3. Bake in a pre-heated 350F oven for 12-15 minutes
  4. Turn out immediately on a tea towel
  5. In the meantime, make the glaze, combining all glaze ingredients together
  6. Dip the blossoms, either by covering completely, or by dipping the tops (*double the glaze recipe if you want to completely cover all blossoms)
  7. Let glaze harden for an hour before putting away
  8. Can store at room temperature

Monday, 21 February 2011

Raspberry Oat Bars (Easy Things to do with Cake Mix #2)

As I mentioned in my previous post, I am currently baking my way through some of the excess baking supplies I purchased during the holidays, most notably several boxes of yellow cake mix. If the pecan cake bars of my previous post were easy, this next recipe is still easier, and quite tasty. It has a great fruit flavor, which makes it a perfect bar to make now that the weather is (supposed to be) getting warmer. It flurried by my house this morning, and I heard on the radio that there was 6" of snow on the ground in Bergen County. So maybe these bars can make you feel like Spring is coming (so long as you don't look out the window or go outside).


I originally modified this recipe from a posting I saw here, although I altered a decent amount of ingredients

You start with a box of yellow cake mix. Just plain old yellow, not the Butter Recipe yellow, which has artificial butter flavoring added to it. Trust me, we are putting almost 2 sticks of butter into the recipe, we don't need any artificial butter flavor on top of that.

Take that dry cake mix and add some quick cooking oats (1 minute oats, do not use slow cooking oats). Mix them around to combine them a bit.

Then, add melted butter, vanilla, and a little lemon zest.

Take half the crumbs, and pat them down into a sprayed 9"x13" pan. Pat it down firmly.

Next, take some seedless raspberry jam, and combine it with about 1 tbls of fresh lemon juice, stirring until smooth. Then, spread the jam on top of the base. I used a 12oz jar of jam, but you can buy a bigger jar if you want a thicker fruit layer.
Don't mind the crumbs, I started sprinkling before I remembered to take the pic of the jam layer...

Once the jam is down, take the remaining crumbs and sprinkle them on top. Once you are done sprinkling, you can pat the crumbs down semi-gently.

This gets baked for a little over 20 minutes.

When it comes out of the oven, let them cool completely, and then you can cut and serve!

Easy!! And tasty!! My favorite kind of recipe!

This recipe is actually very versatile, because you can vary the kind of cake mix, and kind of jam. How about chocolate cake with raspberry jam? Or lemon cake? White cake with cherry or blackberry jam? There are plenty of specialty jams out there at stores such as Wegman's or Harry & David's, and I'm sure most of them would pair wonderfully with a basic cake mix. Or, you can try lemon or lime curds, pumpkin or apple butters, or a combination of jam and curd -- maybe some nice lemon curd and blackberry jam?

And, this bar doesn't have to be refrigerated, which makes it a great take-along item for a party or picnic!

Raspberry Oat Bars
(Printable Recipe)

Ingredients

  • 1-18.5oz box yellow cake mix
  • 1 3/4 sticks butter (14 tbls), melted
  • 2 1/2 C quick-cooking oats
  • 2 tsp vanilla
  • zest of 1 lemon
  • 1-12oz jar of seedless raspberry jam
  • 1 tbls fresh lemon juice


Directions

  1. Preheat oven to 375F
  2. Combine dry mix and oatmeal in a bowl
  3. Add melted butter, vanilla and zest to oatmeal/cake mixture, and mix thoroughly
  4. Pat 1/2 of crumbs down in a 9"x13" pan, patting firmly
  5. Combine jam and lemon juice until smooth
  6. Spread jam on top of crumb layer evenly
  7. Sprinkle second 1/2 of crumbs on top of jam layer, patting down gently when finished
  8. Bake at 375F for 18-23 minutes, until golden brown.
  9. Take out and let cool
  10. Slice once cool. Can be stored, covered, at room temperature

Raspberry Jam

Sunday, 20 February 2011

Pecan Chocolate Cake Bars (Easy things to do with cake mix #1)

This post is short and sweet. After Christmas, I was left with an excess of certain baking ingredients that I intended to use over the holiday but never did. Things like 4 boxes of yellow cake mix, 2 boxes of pumpkin bread mix, 1 box of red velvet cake mix, 2 bags of bright red candy wafers, 2 huge jars of marshmallow fluff, a box of graham cracker crumbs, bags of chopped pecans, gads and gads of bittersweet chocolate chips, and 3 cans of pumpkin. Now, my apartment is the size of a shoebox, which makes my closet about the size of a postage stamp. I just can't possibly horde baking ingredients forever. Well, actually...I probably could, but according to my horrified husband, I just can't possibly horde baking ingredients forever. So I need to use up my supplies, pronto.

Red velvet cake mix and red wafers are already gone, as Valentine's Day cupcakes with red molded chocolate decorations on top. I made the pumpkin bread last week, and sprinkled on some pecans. One box of yellow cake mix had a hole in the plastic holding the mix, so when I went to open up the box, it poofed all over my clothes. Said box is now in the trash, potential morph into baked goodness unfulfilled. So sad.

But this is the story of Yellow Cake Mix #2.

Yellow Cake Mix #2 has become Easy Things to do With Cake Mix #1. Still with me? Good. This yellow cake mix was destined for great things, although not the thing I thought it was destined for. I thought it was destined to become a yummy pecan pie bar, like a shortbread bar with a buttery crust.  But instead, it turned out to be more of a yummy pecan cake, and I'm advertising it as such.


My usual historical interludes have been more sporadic of late, and this post will have to fall in the interlude-less category, because I've already covered the topic of pecans quite extensively.

Take out that cake mix and reserve 2/3 C. To the remainder of the mix, add 1 stick of melted butter and one egg, mixing well to combine (I did this by hand, btw).

Take this dough, and pat it into the bottom of a sprayed 9"x13" pan, and partially bake it.

Meanwhile, combine eggs, vanilla, corn syrup, brown sugar, and the reserved cake mix in a bowl.

When the partially baked dough comes out, it should be slightly golden.

Sprinkle pecans and chocolate chips onto the base, then pour over the lovely filling.

It'll bake up nice and yummy.

And there you have a minimal-effort pecan cake with chocolate.

It easily cuts into squares, so I guess it could be called a "bar" -- it looks like one. But this has a softer texture, and I always think of bars as firm and dense...so I consider this a cake bar, if that makes sense.

Whatever it is, it's good!!

The original recipe can be found here, although I tweaked my version slightly.

Pecan Chocolate Cake Bars


Ingredients
  • 1 (18.25 ounce) package yellow cake mix
  • 1/2 cup butter, softened
  • 1 egg
For the filling
  • 3 eggs
  • 1 teaspoon vanilla extract
  • 1  cups dark corn syrup
  • 1/2 cup packed brown sugar
  • 1 cup chopped pecans add chocolate chips!!!
  • 2/3 cup yellow cake mix

Directions
  1. Preheat oven to 350 degrees F (175 degrees C). Grease a 9x13 inch pan.
  2. Reserve 2/3 cup cake mix.
  3. Mix together remaining cake mix, margarine, and 1 egg. Pat in prepared pan.
  4. Bake at 350 degrees F (175 degrees C) for 15-20 minutes or until golden brown.
  5. Beat together 3 eggs, vanilla, reserved 2/3 cup cake mix, corn syrup, and brown sugar. Pour on cake in pan. Sprinkle pecans on top.
  6. Bake at 350 degrees F (175 degrees C) for 30-35 minutes.


Monday, 6 December 2010

Gingerbread Truffles (Gingerbread Cake Balls)


Because I'm on a roll, here's one more posting that is a cake ball variation. These are gingerbread cake balls, and I've been dying to try them ever since last year. 'Tis finally the season, so here they are, in an abbreviated posting, because I'm sure everyone is familiar with the basics of cake balls by now.


You start with gingerbread. From scratch if you'd like, but it really defeats the purpose of making an easy treat. I used 2 of these guys:


They are 14 oz each, a little more than the average cake mix when put together, so they need a little extra time baking. Combine the 2 mixes plus the ingredients specified on the box, and bake in a 9"x13" pan at 350F for about 45 minutes.


Once the cake is done and cooled (same day, next day, whenever), mash it up with a tub of vanilla icing. When it is well-combined, use the #60 scoop to scoop it into balls. Chill these for at least a half hour, if not a full hour.


Now comes the dipping. I'd recommend a variation on vanilla candy melts (the white and colored Wilton melts are all vanilla). Choose your color and one or two contrasting colors if you wish. Melt the main color, thin it with some vegetable shortening, and dip the balls. Wait for this to harden before you drizzle on one or two accent colors. For these, as you can see, I went with white for the main color, with red and green accents.


All in all, I am very pleased with the way these gingerbread truffles turned out. The spicy gingerbread flavor really comes through, they just taste like little bites of Christmas. Plus, not only does the recipe yield over 5 dozen, but they will be okay in the freezer for at least a month, and when they defrost, they don't have to be refrigerated.


If you like gingerbread at this time of year, I highly recommend these truffles, they'll go a lot further than a loaf of gingerbread!