Friday 5 September 2008

Rose Bouquet Cake (Wilton Course 1, Class 4)


Our last class of the Wilton Course 1, I decided to do the rose bouquet cake -- 6 roses arranged in a bouquet tied with a buttercream ribbon.

I dyed my roses delphinium blue. It is hard to see in the pics, but it is a lovely color. I made it the day before I assembled the cake, and it got a little more purple-y overnight, it was originally a lovely slate blue.

I frosted the cake in white, with a white shell border. I tried to use my icing comb to create a design around the perimeter of the cake, and while it didn't work as well as I would have liked, it wasn't bad.

My roses are okay, I was having a real problem getting smooth petals. My instructor and I troubleshot the icing consistency and everything else under the sun (she also had problems with my tip, no matter what whose icing we used) and she came to the conclusion that there might be a slight imperfection on the interior of my tip that makes the icing crack as it comes out. So, I am going to replace my tip 104 and see if that helps.

But anyway, I assembled my roses on the cake (center one first, on a dollop of icing), and then added the leaves and stems. I wasn't thinking, but I should have made all the stems intersect at a common point midway down. I added the ribbon with tip 104 in blue. And then I added rosebuds around the sides of the cake for a little added color, and wrote "Happy Birthday" in green out of sheer laziness because the class was almost over and I didn't feel like thinning down the blue and assembling another bag to write with.

I definitely was more into the last cake than this one, because it had a fun theme, and this cake frustrated me with the roses. But it still turned out decently

Wednesday 20 August 2008

Scarecrow Cake (Wilton Course 1, Class 3)


Today in class we made our "Scary Clown Cakes" (or in my case, "Scary Scarecrow Cake"). I wasn't able to use all of the elements I made, my cake was just too small, but the next fall-themed cake I make will be 9X13 minimum.

Icing my cake was tougher than in the second class (I ice my cakes at home, and do all the decorative elements in class) -- the cocoa powder I added to the buttercream made the icing very sticky, and it kept pulling up and just didn't want to ice smoothly. I had to keep wetting the knife to get the icing to stay put and smooth out, but eventually I got it to an acceptable point.


Bottom and top borders (#18 and #16, respectively) went on in class, and then I used #21 for the scarecrow bodies. This was a lot easier than I thought, and it took only a little practice on my board to get the bodies the way I wanted them. I opted for lying down and climbing the cake, purely because I wanted the scarecrows to survive the ride home. I did have to snip off about two thirds of the pick that came down from the scarecrow head, because it was far longer than the picks on the clowns, and was just making life difficult.

I used the #3 to put some vines on the bottom of my pumpkin patch, and then plopped the pumpkins on top. I used the #16 to put stems on (it was still on the bag with my chocolate border icing and I didn't feel like taking it apart), and I drew additional vines on the pumpkin tops. This could definitely look nicer, I'm not the best free-hander ever.

I used the #3 in green for crow eyes, since the bag was already assembled, and I placed those next. My haystack was more difficult because, once I put it on the cake, I really didn't have room to maneuver to get the grass tip all the way around. Next time, when my cake is larger and everything isn't squished together, that shouldn't be an issue. I did the best I could with the grass tip and my limited space, luckily haystacks don't have to be neat. Then I topped off the hands and feet of my scarecrows with hay.


I didn't have room for my apples, which is unfortunate because they would have added some nice bright red to the top of the cake. I originally wanted a tipped over apple basket, and a crow by it, but there just wasn't enough room. I toyed with the idea of just scattering them on the top, but honestly I didn't feel like washing and fitting the #3 tip with chocolate icing to make little stems on the apples.

I then adhered my leaves with icing to the sides of the cake (2 of my leaves broke in transit). I decided not to add the corn stalks to the sides as well, because they weren't turning out the greatest when I was practicing piping. I think it would have made the cake too busy anyway. Next time, with a bigger cake, I can add in that element, because I wanted more buttercream elements on the cake.

All in all I was pleased with how it turned out. A lot of things could have been done more neatly, but overall I think it had a nice festive fall effect, which is what I wanted.

Monday 18 August 2008

Class 3 prep for Scarecrow Cake (Wilton Course 1)

Class 3 of Wilton's first course is supposed to be the "Scary Clown Cake," which is essentially buttercream-formed clowns with clown pick heads. I am not scared of clowns, but they are definitely not my favorite thing. So, I figured that I would try to find an alternative to the clown head picks. I didn't find anything offered from Wilton, but at the ShopBakersNook (http://www.shopbakersnook.com/), they had quite a few 3-D head picks. I chose the scarecrow picks because I love fall, and because September is almost here. So I decided to make a scarecrow/harvest themed cake.

I envision a round cake (it would be better as a sheet, but I need a round cake for class) iced in light brown with a dark brown border. Then I can have my scarecrows as the focal point on the top or even hanging off the side. I also thought it would be cute to have some other elements on the cake to stress the autumn theme. The first element I found was cornstalks, off of the Wilton site, and I'd like to put those on the sides of the cake, maybe 3 or 4 times. I'd also like to make a little haystack using the grass tip (#233) and golden yellow icing (the same as the cornstalks). I am thinking of using a mini-muffin top as the base for this, but I haven't decided yet. I can also use this tip and icing to give my scarecrows straw hands and feet. In addition to the colors I need for icing, borders, the scarecrow bodies, stems and leaves, I also made some red and orange icing, for random things. I want to make sure everything isn't brown and yellow -- I want to make sure there is some red and orange too.

Some ideas I had for the top of the cake didn't seem viable to make with buttercream, so I turned to fondant and gum paste. The first element I tried was to make crows, since scarecrows are the focal point. I bought pre-dyed fondant from Wilton (the one for faces) because it was already black, and I knew I would never get the fondant such a pure black dying it myself. I practiced making birds with the other colors first, to perfect my technique. I basically settled on the following method: 1) form the fondant into a ball; 2) gently pinch the ball 1/3 of the way down, making almost a bowling ball shape, but making the neck more narrow than the ball of fondant above it; 3) push the head down a little bit to make the neck thicker; 4) decide which side will be the front, and start to pinch out a little fondant from the head for the beak, and form the beak. For the wings, I found a Wilton fondant leaf cutter, and I used the smallest one because it was wing-shaped. I attached them to the back of the bird, and I will pipe on eyes (probably green so they stand out, although crows naturally have dark eyes) when I put them on the cake.

I also decided that I wanted a pumpkin patch, so I made some pumpkins. I started off with gum paste that I dyed orange, but they started drying very light and cracking, so I made more in fondant (I actually used the pale pink fondant that was in the pack with the black, and it worked fine dying it colors). I rolled them into balls, used the "umbrella tool" in the Wilton Gum Paste and Fondant Flower Tool Set to score up the sides of the ball (bottom to top) for segments, and then pressed down on the top with the shaping ball from the same kit to give them that slightly squished pumpkin shape. When they go on the cake, I'll pipe on brown stems and leaves and winding vines.

While I was making these, I dyed a little of the fondant green (marbled with a tiny bit of lemon yellow) and made 2 gourds for my punpkin patch. I basically formed them into balls, made bowling pin shaped, and then curved the top of the pin.


And, because I wanted a little color, I dyed some fondant red, and made apples. They were very simple -- make small balls, and then push into the top with the narrow part of the umbrella tool -- this quishes it down just enough to give the ball an apple shape. Again, I'll pipe stems and leaves when I place them on the cake. I took dark brown fondant (pre-dyed from the pack I bought), rolled it out, and shaped it in a mini-muffin pan, to make a basket for the apples. I may leave it upright on the cake, but I kind of like the idea of an apple basket that tipped over, spilling apples out. I don't know if the basket will be firm enough to do that with however.


As a last touch, I marbelized the pink fondant from the pack with red, orange and yellow, and rolled it out. I then cut it with some little leaf cutters that I had as a part of an autumn-themed pie vent cutter set. They turned out pretty -- another splash of color for the sides of the cake, so I am going to incorporate them on the sides somehow.

Thursday 14 August 2008

Rainbow Cake (Wilton Course 1, Class 2)


Last night I completed class 2, where I made a rainbow cake. I used only 1 layer of a 9-inch round cake, so my cake wasn't as high as I would have liked, but it still worked. I leveled and iced my cake with light blue thin consistency icing (dyed from royal blue gel) before coming to class.

The rainbow stencil was in the back of the coursebook, so I traced it onto wax paper, and then traced that with clear Wilton piping gel. I then put that face down on the cake, and brushed over the piping gel on the drawing with my little decorating brush. The effect of all this was to make a light indentation in my icing -- I was surprised that no gel came off on the cake. To fill in the rainbow, I cheated a bit and bought the Wilton ready-made colored tube icing, because I didn't feel like dying icing so many different colors -- I chose pink, yellow, leaf green, and purple, since my base was already pale blue.

Using a #16 tip, I filled in the rainbow with stars in each of the 4 colors. I used #18 with medium white icing to do the clouds, which were just zig-zag lines layered. I used the same tip and icing to go around the base of the cake with a shell border. Then, I used a #3 and darker blue icing for the lettering. My hand is so unsteady, the lettering is pretty sloppy, but I didn't bring my new stencil so I had to do it freehand.

All in all, I was pretty pleased with my cake, but I didn't really care for the color the royal blue gel turned the icing -- it was more turquoise than royal blue. I am going to look and see what other blues Wilton offers.

Next week, we are going to be learning how to make figures out of buttercream icing with "Scary Clown Cakes." I bought the clown head picks, but I have to admit that I am not very fond of clowns, so I am looking around for another alternative. I found some scarecrow head picks, so I am debating whether to make a scarecrow cake instead -- maybe I could ice it it chocolate icing then...

Monday 11 August 2008

Anniversary Cake (pre-WIlton Course 1, Class 2)

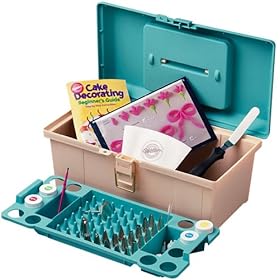
This weekend, I was making the Class Buttercream icing for the first time, as per my "homework" instructions for class 1. I made all 3 icing consistencies. I also decided to bake the cake I need for the next class this weekend, and I opted for the 9-inch cake, yellow. I decided that I could get away with only one layer for class, so I popped it in the freezer, and I decided to play with the other layer and the extra icing that I made. So I leveled the cake off (the first time I ever bothered to do this before), and then split the cake into 2 thin layers. I piped the medium consistency icing around the edge of the bottom layer, and then spread Hunt's chocolate pudding in the interior, before adding the top cake layer. Not my filling of choice, but this cake wasn't about eating, it was about experimenting.

Then, I covered the cake in thin while frosting using the mega-icing tip (#789) that I also picked up from the store this weekend, and it worked great!

Using medium consistency icing, I piped my approximation of a shell border using tip #21 around the bottom and then the top of the cake. The cake turntable I bought really came in handy for this part.

My handwriting is pretty sloppy, so I invested in the Wilton Script Message Stencil Set -- which has basic messages like "Congratulations" and "Happy Birthday" -- and I chose "Happy Anniversary" because it was long, and because my parents' anniversary was last week. I pressed the stencil into the top of the cake, off-center so that I would have room for decorations. I then took a little of the thin icing, and used the royal blue icing gel to dye it, and carefully traced the imprint left by the stencil with a #3 tip. Not too bad, although I was squeezing too hard on the bag, so the icing flattened out towards the end of "Anniversary." Since I had some leftover thin blue icing, I used the same tip to pipe dots between the shells on the top border.

Next came something I had been anxious to try -- the roses. We aren't supposed to do these until class 3, but I couldn't resist trying to make them. I dyed some stiff icing pink, and got to work. I used tip #12 to create a central cone, and then tip #104 for the petals, trying to follow the Wilton method for rose-making as best I could -- namely 3 petals high on the base, 5 below that, and 7 below that. I had 2 main problems: 1) my base cone did not stay put on the flower nail; and 2) my petals did not have smooth edges -- they were jagged. I have not explored the reasons for each of these yet, but I plan to ask my teacher. I will guess, however, that maybe putting a little powdered sugar on the nail will help with the sliding issue. I will have to ask and try this. As for the jagged edges, I thought that maybe the icing was a little too stiff, so I added a few drops of water. Didn't really take care of the problem, so I need to ask this question too. I know my teacher will probably give us lots of helpful hints when the time comes to learn.

Finally, however, I managed to get 3 roses that, although still somewhat jagged, didn't look that bad (if you looked at the cake from across the kitchen. I used my flower scissors to lift the flowers off of the nail, and place them as best I could.

Since I still had the #104 tip on the pink icing, I decided to try my hand at some 3-petal flowers, mine were supposed to be sweet peas, but they don't look like an identifiable flower to my eyes. I had the tip at the wrong angle, but I followed the instructions, and they came out rather spiky no matter how I held the tip.

For the leaves, I dyed some thin icing green, and used a #67 tip. The leaves were easy to form, but not easy to finish -- my leaves broke off instead of coming to a point when I moved the tip away. This is another problem I need to address with my instructor. Because I didn't feel like changing the tip, I used the same tip to make a "vine" connecting the sweet peas. Doesn't look the greatest, but this is my first ever attempt at cake decorating like this, so I'm not that fussed about it.

All in all, I was pleased with my cake, I don't think it is a bad first attempt. Really paying attention to which icing consistency is used for what decorating element is probably the single best technique I have learned so far. Now I know why my other attempts to decorate with tips have always ended as epic failures. Next time I decide to experiment and practice, however, I am definitely going to plan in my head how I want the cake to look beforehand. I'm not very artistically inclined, and planning what should go where is hard for me to do on the fly -- resulting in a rather haphazardly decorated cake with elements that don't really mesh well. I am looking forward to practicing my skills, and coming up with some great looking (and tasting) cakes!

Thursday 7 August 2008

Peanut Butter, Nutella, Cashews, Oh My! (aka My Quest for Viable Wedding Favors)

My wedding is December 6, 2009, but I am a notorious early planner, and right now I am trying to work out wedding favor details. My fiance and I are making a charitable donation to the Marine Toys for Tots Foundation in the names of our guests, which is technically in lieu of favors -- but I still want people to take home a little something. My friend Lauren did something similar at her wedding (donation to a youth reading program) and she made peanut butter balls for her guests. I didn't want to do the same thing, so I have been wracking my brain to come up with a small homemade edible favor that 1) can be made relatively easily and cheaply; 2) can be made in bulk; 3) can survive the freezer for 3 weeks to a month; and 4) can survive being left at room temp uncovered (favor boxes aren't exactly airtight) for about 3-4 days.

The first thing I thought of were traditional chocolate truffles -- ganache dipped in chocolate. But I was iffy about leaving them at room temp for 4 days. Even though, as a microbiologist, I know that there is probably enough sugar in the truffles to make them inhospitable to microbes, I have always been iffy about dairy products at room temp, so I decided to leave this well enough alone.

I thought maybe chocolate-covered brownies would be the thing, and they stood up well to being frozen, but even though they were enrobed in chocolate, the edges got slightly stale when I was testing them at room temp.

I finally came back to nut butter balls, but because my friend did peanut butter, I decided to try it with Nutella instead. I found a slightly different peanut butter ball recipe courtesy of the internet and I have made it with Nutella and peanut butter so far. Both were great (especially the Nutella -- better than Roche's in my opinion), and I bought a jar of cashew butter to try as well -- I am pretty sure it will work with any nut butter, and I'd like to try some others like macadamia nut butter, which is available online. Although, for favor purposes, I think Nutella and peanut butter are the only two nut butters that would be cost effective. The recipe breaks down like this:

2 C nut butter of your choice
2 C crushed graham crackers
2 C confectioner's sugar
2 C butter
chocolate of your choice for dipping -- I actually used the Wilton dark chocolate candy melts because they set up nicely and melt easily -- I don't want to mess around if I need to have a high-output production of nut butter balls
Then you just combine everything but the chocolate, scoop it into 1-inch balls and place on a cookie sheet lined with parchment, and chill for an hour. Then melt the chocolate and dip.

Admittedly, dipping is where I need the greatest amount of practice, because some of the balls looked great, but some looked like they had been dipped by chimpanzees. So I have decided that I will make a large batch for this Christmas, for cookie exchanges and other holiday get-togethers, so I can practice.

I've also started thinking about packaging. I'd like to have a small box of the balls at each place setting for each person, but since my guest list is going to be 180-200 ppl, I have decided to put 2 balls in a box per person. They are pretty big, that should be plenty. So the boxes I need are more rectangular than square (I have been keeping some balls in my fridge for size estimates while I check out suitable boxes), but I envision the packaging as looking something like this picture to the right. My colors are dark blue, white and silver, so I envision a white rectangle box with a dark blue ribbon like this. I am thinking an oval label would be a nice contrast, I just want to make sure that the label is big enough for a short message -- I want to tell people about the donation on the label.

I have determined that a 3"X 2 1/4" X 1 3/4" box worked great for the 2 truffles, but now I am having a problem finding those boxes :-( Good thing I am starting early...

Wilton Decorating Course 1, Class 1

I finally signed up for the Wilton cake decorating course 1 at my local Michael's Craft store, and my first class was last night. I have been wanting to do this for such a long time, but I just never got around to it. So now my future matron-of-honor and I are signed up.

For those of you who don't know, each course has a specific "class kit" which goes along with it. Instead, I opted to get the Wilton 50-piece tool caddy, because I read that it has everything for all the courses. I have since realized that this isn't entirely correct, and that I will need to supplement it with a few odds and ends, but I'm not really fussed about this. I bought it with a 50% off coupon (AC Moore "Super Tuesdays"!!), so it came to only $30, which is just a few dollars more than the Course 1 kit. It definitely has everything for Course 1, plus a lot for Courses 2 and 3, so I'm pretty sure I still made out. It has the added bonus of providing a convenient way to carry everything, plus extra space for a lot of the misc. decorating tips and icing gels that I have accumulated over time.


We didn't get to do much in the first class, we learned about the 3 different consistencies of icing, and how thick=stiff flowers, medium=borders and some other flowers, and thin=icing and writing. I've definitely attempted to decorate cakes before using purely icing, in a very rudimentary way, but I've never bothered with different icing consistencies, so I obviously have a lot to learn.
We were also given a recipe for "Class Buttercream" as follows:
1 C solid white veg. shortening
4 C confectioner's sugar
1 tbs powdered merengue
2 tbs water or milk
1 tsp extract (vanilla, almond or butter)

I've made homemade icing a lot -- I firmly believe that nothing jazzes up a cake like homemade icing, and I've tried many recipes for buttercream, but I've never made a buttercream with vegetable shortening in it before. I went on the Wilton site, and there is another recipe for "Snow White buttercream" which is slightly more complicated but has gotten better reviews on taste. I am going to stick with Class Buttercream for now, I'll make a batch over the weekend and see how it tastes. I bought the "butter" flavored extract, but I am slightly suspicious of synthetic butter flavoring. What I really want is a bakery quality buttercream (i.e. the recipe for Mendoker's buttercream icing -- if you're from central NJ, you'll understand). Taste is really still the most important thing to me, it is the soul of all baked goods -- I already know how to make a yummy cake, I just want to make it pretty. But the last thing I want to do is sacrifice taste for appearance. I figure that once I get used to working with the icing, and become comfortable judging the three different consistencies, then I can substitute another (tastier) buttercream in its place.

Luckily, my instructor informs me that the class buttercream is very hardy, and can be made a week or so in advance. This is happy news, because it means I can bake the cake and make the buttercream on the weekend when I have free time, and then bring them to class Wed night for assembly. For next class, our homework is to make icing, and bake a cake -- either from a character cake pan or a round cake. I am opting for the round cake, which means that I will be making the "Rainbow Cake" next Wednesday.

Friday 25 April 2008

Chocolate Grand Marnier Cake

I am not normally a fan of a chocolate/orange combination, and I have to admit I don't normally have much use for Grand Marnier, because I am not a huge fan of synthetic orange flavor, but my friend Frannie brought in this chocolate Grand Marnier cake into work about 6 months ago, and it was fabulous. She originally got the recipe from Epicurious.com, so I pulled the recipe, and began tweaking from there. I was sloppy when I was frosting, but the cake looks really nice, and I have gotten nothing but raves.

Cake:

1 1/2 sticks unsalted butter
1/2 C all-purpose flour
10 oz bittersweet chocolate, chopped and melted (I used bittersweet chips to make it easier)
1 C sugar
2 tsp vanilla
2-3 tbls Grand Marnier
6 eggs, separated

First, preheat oven to 350F, and butter a 10-inch springform pan (and put a round of parchment on the bottom of pan).

1) Cream the butter and sugar together for several minutes, until fluffy.
2) Beat in the egg yolks
3) Add in the chocolate, vanilla and Grand Marnier, and mix well
4) Add in the flour and mix until just combined
5) In a separate bowl, beat egg whites until stiff peaks form
6) Fold the whites (by hand) into the cake batter in 3 additions
7) Pour into pan and bake 35-45 minutes, until top is dry and starting to crack (it will have a flaky coating that will come off) and a toothpick comes out with a few wet crumbs. This cake has a fudge-like density.
8. Cool in pan on rack completely before running a butterknife around the edge of the cake and de-panning.

Chocolate Ganache
7 tbs unsalted butter
7 oz bittersweet chocolate
2/3 C heavy, whipping or light cream
2-4 tsps (go by taste) Grand Marnier

1) Put butter and chips into a heat resistant glass or metal bowl
2) Bring cream to a boil in a saucepan
3) Once it boils, remove from heat and pour over the butter/chocolate
4) Mix until smooth (I think a whisk is easiest for this step)
5) Add Grand Marnier to taste
6) Pour over the cake, and smooth over the top and sides, encasing the cake in ganache
7) Cover and keep refrigerated


Now that I have made this cake, I want to tweak the recipe more. I am going to make a variation that substitutes either Frangelico or Kahlua for the GM, and I am going to split the cake and fill it with an espresso buttercream. I have the recipes already worked out, but I won't post it until I have actually tried it.

Friday 28 March 2008

Giants Superbowl Cake! (A tardy post)

Like I said, my cake decorating skills are rudimentary at best, but I wanted to create something a little special for Superbowl since the Giants were in it, and since both they and I are from NJ (yes they are! they play in East Rutherford, that is NJ!). Believe me, if I could manage to do this cake, anyone can.

I started with 4 basic things: my cake, which was a simple devil's food cake from a mix; buttercream icing (recipe below), which I had mostly dyed green with Wilton's forest green gel, but I had reserved about 1/4 of it white; both blue and red Betty Crocker icing decorating tubes with the screw-on decorating tips; and a tub of rainbow sprinkles.

I made the cake as a 9x13 sheet cake, and since those mixes are a no-brainer, it turned out yummy (I like from-scratch cakes better, or at the least a cake mix that has been jazzed up in some way, but I didn't have the time). I then frosted the entire cake in green icing, as smoothly as I could manage (I really need to work on that!), and I went around the base of the cake using the star tip with the green icing, mostly just to cover my sloppy icing job, but it gave the cake a nice finished look. I wanted this to be from the perspective of the Giants' end zone, so I decided to make the cake like a zoom-in on that part of the field. I took my blue and red icing tubes, which I used to save me the time and trouble of having to make and dye more icing, and I approximated the Giants' logo as best I could free-hand. Then I took the white icing and, using the widest tip I had (damn, I forget what it is called, my next post will be more technical, I promise), to create rows of white icing along one of the 13" sides of the cake. I was trying to give the suggestion of stadium seating, so I did this as sort of a pyramid, but with one side (facing the "field") tiered up, and the other (along the cake edge) straight and high. It is easier to see what I mean in the picture. As an example, I think I laid down 5 or 6 initial icing rows, and decreased it by 1 each additional layer I applied. But be careful, because if you don't do this straight up, and it is leaning off the side of the cake, it might fall over. Then I took a narrow round tip and, with white icing again, drew lines on the field and added the numbers. Since this was only one end of the field, I only went up to 30 yards. My last touch was to sprinkle the rainbow sprinkles onto my "stands" to give the suggestion of spectators. They liked to roll off and onto the field, so I had to pat them into the icing a bit to get them to stick. At the last minute, I came across a package of sugar footballs, so I popped one into the center of the field.

Like I said, not complicated. But my friends were very happy, and it was very tasty. If I had given it more thought in advance, I could have jazzed it up with those little plastic football cake sets they have with players and the fieldgoal, but in the end it wasn't necessary, and it might have made the cake harder to transport. But this cake was pretty easy, convenient, and it didn't have to be refrigerated so it was a great choice to bring to someone's house.

Buttercream icing recipe:
7C confectioners sugar, sifted
4 sticks butter, unsalted
1 tsp vanilla
1 tsp almond extract
pinch of salt

-Beat the butter until light and fluffy on medium speed (you can't overdo it, so be patient, it will be worth it)
-Gradually add the sugar on low, and mix until incorporated
-Add the extracts and beat until smooth and creamy
This alone worked for me, but if you need it a little thinner, add milk 1 tsp at a time until you have the consistancy that you want...

Friday 29 February 2008

Let the blogging commence

Baking is my hobby, and I absolutely love it. I'm a decent baker, judging by taste, but I'd really love to be able to decorate beautiful cakes. My skills are not the most finely honed in the world (in fact far from it), due to my general lack of free time to pursue my hobby, but I have lots of enthusiasm and ideas!! In fact, I have tons of (untried) ideas, and am constantly looking for more. I want this page to be a stream of consciousness -- recipes I've made up, one's I've found elsewhere and tried, brainstorming for new recipes, brainstorming for decorating ideas, as well as interesting things I've found that just look nifty. And since I am getting married in a little under two years, wedding planning stuff might creep in now and again.

I'm not so diligent with my myspace page anymore, but I still manage to log on every few days: My Myspace.

Toodles.