Showing posts with label easy. Show all posts

Wednesday, 13 March 2013

Old-Fashioned Chocolate Pie (aka Minny's Chocolate Pie)


I read. A lot. So much that my house is currently overflowing with books, most of which live in cardboard boxes stacked to the ceiling. And that doesn't even count the books I left at my parents' house when I moved (much to their chagrin), which would easily double, if not triple, my collection. But I can't help it -- I love reading. But it got to the point where my husband put his figurative foot down and said that we couldn't possibly fit any more books in our house without the whole structure collapsing in on itself, creating some sort of biblio-singularity which would punch a hole in the space-time continuum and destroy the entire universe. Maybe not his exact words, but that was the general gist. However, being my husband, he came up with an elegant alternative: a brand new iPad with Kindle and Nook apps on them, and a gift card to Amazon. That was about a year and a half ago, and I have since become an e-book convert (although it took me a few days to get used to reading on a screen). I have 60+ books on my iPad already, because buying them when I have a whim to read or see something interesting is way too easy.

But why do I bring this up on a baking blog? Well, it just so happens that the very first e-book I downloaded was The Help by Kathryn Stockett. And in this book is a pivotal plot point which I won't spoil here, but it involves a chocolate pie. Minny's chocolate pie to be exact.

When the movie came out, I had my first good look at the movie-interpretation of said pie, and I was surprised to discover that it was not a chocolate cream pie like I had been imagining. It was some sort of baked confection, looking almost like a brownie pie, and I was intrigued. A year and a half later, on a whim, I google "Minny's chocolate pie recipe" and out pops this page -- the screen-used recipe for Minny's pie! Not only did it sound delicious, it sounded almost too easy, so I had to give it a whirl. And thank goodness I did!

I have made this pie several times already, because it is that fast. I did adjust the sugar somewhat, and the amount of evaporated milk. I also added peanut butter one of the times I made it.

The ingredients are sugar, eggs, evaporated milk, cocoa powder, melted butter, vanilla, and a crust. You can use prepared crust, frozen crust, from scratch crust, even a prepared graham cracker or cookie crumb crust (although the last two get a mite overdone, but they don't burn).

The order you add things in the bowl will make a difference, only because the cocoa powder can seize or separate out of the custard if it isn't incorporated well. Here is what I do:

Combine the sugar, salt and melted butter in a bowl, whisking well to combine. Add in the cocoa powder, whisking well. Add in the two beaten eggs, whisking well. Add the evaporated milk and vanilla, whisking well.

At this point it gets dumped into your crust. If you want, you can put a 1/2" layer of peanut butter down on the crust first like so:

 Just sayin'.

Then, it bakes up for 45 minutes.

This one was in a chocolate wafer crust
It needs to cool completely before cutting and eating, I suggest at least 6 hours or overnight, refrigerated. Then comes the fun part: cutting and eating!


This pie tastes so decadent, with or without the peanut butter. No one will believe how incredibly easy it is to put together! It has a wonderful consistency, more substantial than a custard, less firm than a brownie. It also goes great with whipped cream, and honestly would probably make a great bottom portion of a chocolate cream pie. All in all, two thumbs up! This has already become a go-to recipe for those times when I need an easy dessert, especially as a take-along!

Note: The original recipe calls for 6 oz of evaporated milk. However, evaporated milk comes in either 5 oz or 12 oz cans. I don't know about you, but I'm not opening a 12 oz can just for 6 oz. So I tested the recipe using just 5 oz and it works fine. BUT, you can also use 12 oz, double the rest of the ingredients, and just make 2 pies. It is just as easy to make 2 pies as it is to make one, so I normally do that! Trust me, they don't go to waste!

Old Fashioned Chocolate Pie

Ingredients

  • 1 pie crust
  • 1 C sugar
  • 3 tbls unsweetened cocoa powder
  • 4 tbls butter, unsalted, melted
  • 1/4 tsp salt
  • 1 tsp vanilla
  • 2 eggs, beaten
  • 5 oz evaporated milk*

*use a 12 oz can and double the remaining ingredients to make 2 pies

Directions

  1. Preheat oven to 350F
  2. Put pie crust in 9" pie dish (I found that there is no need to prebake the crust)
  3. Combine sugar and butter in a bowl, whisking to combine
  4. Add in cocoa powder, whisking to combine
  5. Add in remaining ingredients, whisking to combine
  6. (optional) Put a 1/2" thick layer of peanut butter on the bottom of crust
  7. Pour custard into pie crust
  8. Bake for 45 minutes, until center is set
  9. Cool completely, 6 hrs or overnight in fridge

Wednesday, 6 March 2013

Chocolate Peppermint M&M Bars (Easy Things to Do with Cake Mix #4)


Better late than never! This is a Christmas recipe, three months late. Which means, in fact, that I am getting worse, because my Thanksgiving recipes were only two months late. Oh well.

Incidentally, I think I'm going to change the tagline of my blog to: "Good food...crappy pictures." Seriously. I have no sense of artistry. I snap my pics on my iPhone, in my garish kitchen light, on a messy counter, on a paper plate. If there are Seven Deadly Sins of Food Photography, I commit them all. Simultaneously.

But, don't let my lack of artistic flair deter you from making these bars, because they are super quick and yummy. And like Thanksgiving, with my new kiddo, quick and easy was the name of the game this year.


I didn't intend to make these bars. In fact, I was at a loss for what to make this year for Christmas. Normally, my mom and I make scads and scads of Christmas cookies, but this year, I knew it wouldn't happen. Frankly, I was an overwhelmed FTM, and I was lucky to make it to the shower every day, let alone coordinate the 15+ varieties (no exaggeration) of cookies and cake balls this year.

But then I saw these babies at Target:


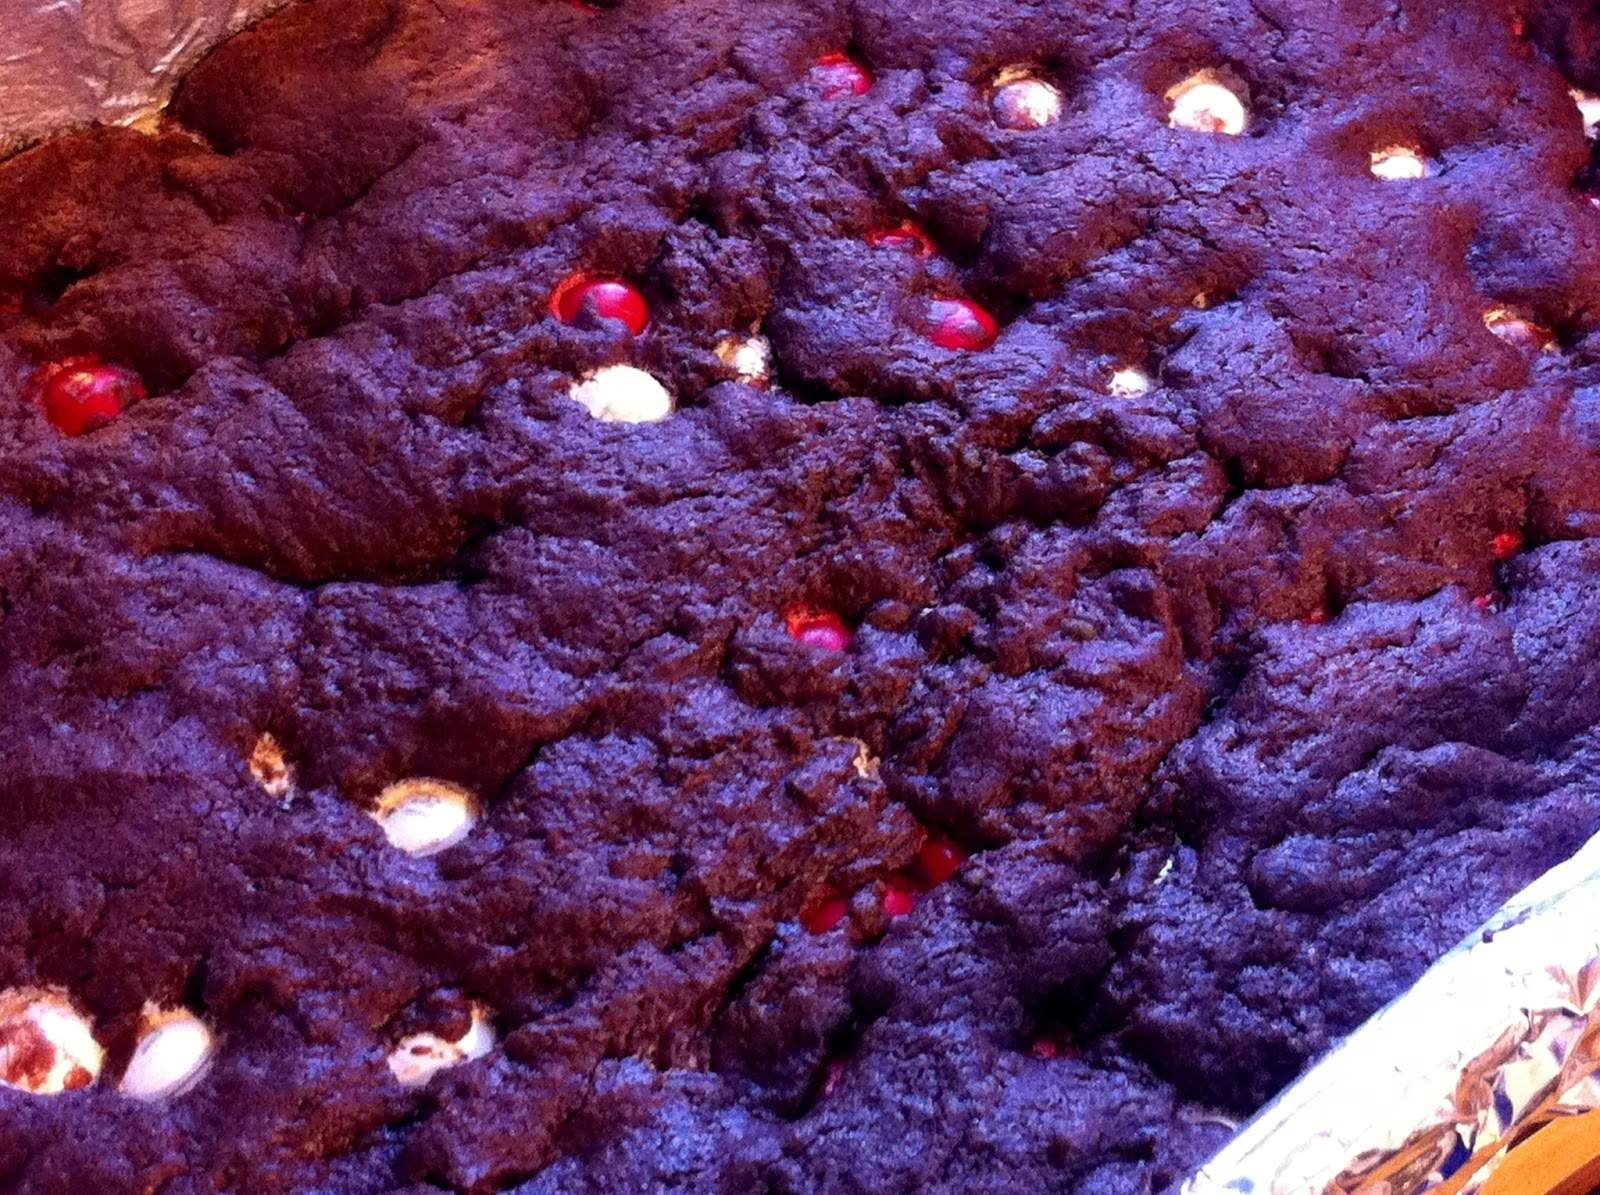
White chocolate peppermint M&Ms. Apparently they were a Target exclusive. So I snatched up a bag for baking without a clear idea of what I wanted to do with them. But then I decided to make bars -- they're easier than cookies because it involves one pan and one trip to the oven. And for these bars, I wanted to try something a little different, so I used Devil's Food cake mix as the base. Super easy!

Just combine cake mix, oil, an egg and water in a bowl and mix to combine (by hand is fine, I used a wooden spoon).


Then, add the mix-in, which in this case was the entire bag of M&Ms:

Note: the oil makes the batter, well, oily. The M&Ms get coated with oil and almost fall out of the batter as you mix. Don't worry, it will bake up just fine.
Then, spread it in a pan, bake, cool, and cut!


I managed to have the entire thing done before my little helper woke up!

Color-coordinated with Mommy's baking!
My family loved these things, they were quite tasty, and the bar consistency was perfect. Huge return on taste for a minimal time investment -- just the way I like it! The beauty is, you can use the basic cake mix recipe for any combo of batter and mix-ins! Next year, I think I will try white cake mix with these M&Ms, which should look stunning, visually. I'm also going to try a flavor variation for Easter which, based on my current posting schedule, probably won't make it onto the blog until Halloween. Oh well. Happy baking!

Chocolate Peppermint M&M Bars

Ingredients

  • 1 box chocolate cake mix (Devil's Food, Chocolate Fudge, etc)
  • 1/2 cup vegetable oil
  • 1/4 cup water
  • 1 egg
  • 1 bag of white chocolate peppermint M&Ms (or mix-on of your choice)
Directions
  1. Preheat oven to 350F
  2. Spray  9x13" pan with cooking spray (optional: line pan with aluminum foil before spraying, for easy lifting of bars from pan)
  3. Combine cake mix, egg, oil and water in bowl and mix well
  4. Add mix-ins
  5. Spread evenly in pan (you may have to press down a little to spread evenly) and bake for 20-25 minutes
  6. Cool and cut


Wednesday, 1 June 2011

Quick & Easy Dinner: Buffalo Chicken Breasts

Sorry for the crappy pictures in advance, I know they leave a lot to be desired. But, take it from me, this recipe is totally worth making!

Buffalo chicken breasts have fast become one of my favorite quick chicken recipes because it is a snap to put together. I've hardly had any free time lately due to work, and anything that is quick and tasty is at the top of my cooking list. This dinner is a no-brainer for anyone who likes buffalo wings -- but if you don't like regular hot sauce, substitute a mild version (or an even hotter version if you like more heat).

This dish only has a handful of ingredients: combine hot sauce, melted butter, onion powder and Worcestershire sauce together.


Set aside 1/4 C of the sauce, and use the rest to marinate chicken breasts (I used the thin sliced, as always) in a sealed ziplock bag for about 30 minutes at room temperature (it won't kill you, I promise). A little longer won't hurt, I think I actually marinated for closer to 45 minutes because I got side-tracked doing other things. But, if the thought skeeves you out, marinate it in the fridge for at least two hours.

Then, remove the breasts and discard the marinade. Saute the breasts in a cooking spray-coated pan over medium high heat for about 4 minutes per side (more for thicker breasts) until fully cooked.

And that is it! Such an easy, hassle-free recipe, and it's huge on taste!

...Incidentally, do you know what Worcestershire sauce is? I had heard of it of course, and even occasionally dabbed it on some steak, but I had never bothered to really find out what the heck was in it. Turns out, Worcestershire sauce was first made in Worcester, England by the pharmacists (or, in British lingo, "dispensing chemists") John Wheeley Lea and William Henry Perrins (of Lea & Perrins fame), and was first commercialized in 1837! It is a type of fermented fish sauce, believe it or not (I had no idea!) containing anchovies, malt vinegar (or white vinegar in the US), onions, garlic, molasses, cloves, soy sauce, and other spices.

Buffalo Chicken Breasts
(Printable Recipe)

Ingredients

  • Anywhere from 1 lb to 1.5 lbs of chicken breast halves, anywhere from 6 oz (regular thickness) to 3 oz per half (thin sliced)
  • 3/4 C hot sauce
  • 1/4 C butter, melted
  • 1/2 tsp onion powder
  • 2 tsp Worcestershire Sauce (aka Worcester Sauce)
Directions
  1. Combine hot sauce, melted butter, Worcestershire Sauce, and onion powder to make buffalo sauce
  2. Reserve 1/4 C marinade, and set aside
  3. Marinade chicken and remaining buffalo sauce at room temperature for 30-45 minutes
  4. Remove chicken and discard marinage
  5. Saute chicken in a cooking-spray coated pan over medium high heat for 4 minutes/side (thin breasts) until chicken is cooked thoroughly
  6. Serve with reserved sauce

Thursday, 7 April 2011

Quick & Easy Dinner: Goat Cheese and Prosciutto-Stuffed Chicken Breasts


Here is yet another easy, quick, and relatively light weeknight dinner recipe: chicken breasts stuffed with goat cheese and prosciutto. As with other quick chicken recipes I make, these are with thinly sliced breasts folded over a filling, but you can adapt it to work with full-sized breast halves by slicing into the breast and creating a pocket, then adjusting the cooking time accordingly (and perhaps finishing it in the oven for 10-15 minutes at 350F after sauteing)


The packs of thinly sliced breasts that I buy have 5 breasts per package. Accordingly, I split my goat cheese (Chevrai brand, 4 oz) into 5 slices, and buy a prepackaged proscuitto that also has 5 slices per package. Don't ask me if the prosciutto is domestic or imported, I have no idea. I'm a gourmand, not a gourmet (where cooking is concerned, anyway). All I know is: it tastes good and it is easy.

I always bread the chicken when I make this recipe. Because the chicken gets folded, I only bread one side. To do this, dredge one side of the chicken successively in flour, beaten egg and seasoned bread crumbs.

Then, lay the breast down, with the coated side face down. Lay the full slice of prosciutto on top of the breast, and then the slice of goat cheese on top of the prosciutto, on the lower half of the breast.

Fold over and secure with toothpicks.

Saute over medium-high heat in a cooking spray-coated pan, for about 4 minutes per side. Make sure that the fold on the side of the chicken (opposite the open end) is also cooked. You might have to get a pair of tongs and hold the chicken on-end to accomplish this.

And then it should be done, and ready to eat! Simple, and yummy!

If you want to make more, scale everything up depending on how much chicken you intend to use!


Goat Cheese and Prosciutto-Stuffed Chicken Breasts
(Printable Recipe)

Ingredients

  • 1 package of thinly-sliced chicken breasts (each breast is approximately 4 oz)
  • 1 block of goat cheese, 4 oz, sliced to match breast number (can use more cheese if making more than 5 breasts)
  • 1 package of prosciutto (enough for 1 slice per breast)
  • Seasoned breadcrumbs
  • Beaten egg and flour for dredging

Directions

  1. Coat one side of the breasts in breadcrumbs: first, dredge one side in flour; then beaten egg; then seasoned crumbs.
  2. Place breast coated side down
  3. Layer on one piece of prosciuto
  4. Place one slice of goat cheese on lower half of breast, and fold breast over, securing with toothpicks
  5. Saute with cooking spray over medium-high heat for about 4 minutes per side, until done. Don't neglect the fold.


Quick & Easy Dinner: Olive and Pimento-Stuffed Chicken Breast


Here is another quick and light weeknight chicken meal: chicken breasts stuffed with pimentos/olives, cheese and bacon.


The original recipe, which I modified a bit, calls for just pimentos. However, I had never bought "just pimentos" before, and didn't have a clue where the supermarket by my house was hiding them. I looked by the olives, which seemed logical, and also by the jars of roasted red peppers, garlic, sundried tomatoes, etc etc and no dice. So I bought a jar of sliced Spanish olives with pimentos (I think this is called "olive salad" sometimes), and this is why there are olives in my pictures. I have since discovered that jars of just pimentos were hiding in the Spanish food aisle, which was probably the only aisle I didn't go down for some reason. I think the recipe was very yummy with the olive/pimento mix, although the taste of olives was strong...and salty. If you don't particularly like green olives, I'd recommend using pimentos only.


Oh, and it goes without saying that my recipe list has all light ingredients, but you can certainly substitute full-fat counterparts as you see fit!


Combine the bacon, onion, pimentos and/or olives, mayo, lemon juice, hot sauce, and the shredded cheese (if you are using shredded), and set aside. 


A few points about this step:

  • I always cook my turkey bacon in the microwave to save time. Directions are usually on the package, but I always cook them on high for about 3 minutes on paper towels. Give them a minute or two to cool, and they will get crisp and easy to crumble!
  • Instead of using shredded cheese and mixing it into the filling, I used what I had on hand, which was presliced fat-free cheddar (Borden). This worked fine as well, so if you already have sliced cheese, don't think you need to run out and grab shredded too. You'll just add the cheese at a later step.

Then, decide whether you want your breasts coated with bread crumbs, which is totally up to you. If you decide yes, you can use preseasoned breadcrumbs, or season your own with some Italian seasoning, garlic powder and onion powder. This step is optional. If you are stuffing the breast, dredge the whole thing in flour, egg and then bread crumbs. If you are folding thin breasts over the filling, like what I did, you can just dredge one side, and have that be the outside that touches the pan.


Now it is time for assembly. If you are using a full-sized breast half, slice into it, creating a pocket, and stuff the filling in (stuff sliced cheese in there too if you are using it).  Secure with a toothpick.


If you are using the really thin breasts, lay the cheese slice (if you are using it) on what will be the interior side, then place the filling on top of the cheese, and fold the breast over, securing with one or a few toothpicks.


Now, saute over medium-high heat, about 4 minutes per side, adding additional spray as needed. If you have the thin breasts folded over, they should be fully cooked at this point. The thick breast will have to be finished in the oven for about 12 minutes.


Olive and Pimento-Stuffed Chicken Breasts
(Printable Recipe)


Ingredients

  • 2  slices turkey bacon, cooked and crumbled
  • 3/4  cup  shredded part-skim or fat-free cheddar cheese (or 1-2 slices per breast)
  • 2  tablespoons  minced green onions
  • 1 1/2  tablespoons  diced pimientos
  • 1  tablespoon  canola mayonnaise or light mayo
  • 2  teaspoons  fresh lemon juice
  • 1/2  teaspoon  hot sauce ** or to taste
  • 1/2  teaspoon  salt, divided
  • 4  (6-ounce) skinless, boneless chicken breast halves (or the thinly sliced chicken breasts that I used)
  • 1/2  teaspoon  black pepper
  • Cooking spray (olive oil)
  • Seasoned bread crumbs (optional)
  • Flour and egg for dredging breasts (optional)
Preparation
  1. Preheat oven to 350°.
  2. Cook bacon, either in a large ovenproof skillet, or in microwave until crisp. Crumble. 
  3. Combine bacon, next 6 ingredients, and 1/4 teaspoon salt.
  4.  Cut a 1-inch-wide slit into the thick end of each breast half; carefully cut down to the center of chicken to form a deep pocket. Divide filling mixture evenly among pockets. Secure with wooden picks. Sprinkle chicken with 1/4 teaspoon salt and pepper. OR follow directions for thin breasts, and fold breast over the filling
  5. Heat pan over medium-high heat. Spray pan. Add chicken to pan; saute 4 minutes. Turn chicken over and repeat.
  6. If using thin breasts, they are probably cooked through at this point. If you have thick breasts, bake at 350° for 12 minutes; let stand for 5 minutes.


Friday, 1 October 2010

Quick and Dirty Creepy Treats: Easy Halloween Food Ideas

Now that October is here, I'll still be posting Autumn-themed stuff, obviously, but I also wanted to get started on some Halloween-themed posts. So, for the next 4 weeks, my posts will be Halloween-centric with some smatterings of Halloween history and lore thrown into each post.

For this post, I am dusting off some really old ideas and pics (I was notoriously bad about documenting my creations before I became a blogger) of quick and easy Halloween treats that come together in a snap but are super fun to do. These treats are collected from ones that I and my friend Lauren made years ago when our lab hosted our Department's Halloween Social. Everyone in my lab pitched in and made Fall and/or Halloween-themed desserts, and this post is dedicated to just a few of them, the "quick and dirty" treats, to borrow a phrase we use often in lab. They are not very sophisticated, but they are cute and easy, and would make a great starting point for brainstorming new Halloween treats. These are all great ideas especially if you want something to do with little kids, because they are all decorating-oriented and not oven-oriented. For this post, we have quick Witch Hats, Critters, Ghosts, and Dirt. Unfortunately, I made these a while ago, so I don't have pictures of intermediate steps, but the directions are straightforward so this shouldn't be a problem. To be honest, they are so simple that, in most cases, you can just figure out how to assemble them from the pictures!


But before we get to that,  let's take a brief moment to chat about:
Halloween has its roots in the pagan Celtic harvest festivals of Samhain ("summer's end") and Nos Calan Gaeaf ("eve before the beginning of winter"), celebrated at the changing of the seasons and the start of winter -- literally going from the "lighter half" of the year to the "darker half" of the year. During this transition, the veil separating this world from the Otherworld was thought to be thin enough to allow spirits (both good and bad) to pass through. This supernatural association and its proximity to the Christian Holiday of All Saints Day (or All Hallows Day) on November 1st, led to a blending of the two into a kind of harvest festival of the dead: All-Hallows-Even (the night before All Hallows Day) became shortened to Hallowe'en and finally to Halloween sometime in the 16th century. Many of the traditional Halloween festivities that we engage in today have their roots in this blending of superstition and spirituality. Interestingly, many cultures hold festivals of the dead in the transition from October to November, including the Japanese, Incans, Hindus, ancient Romans, ancient Egyptians, ancient Persians, Mayans and modern-day Mexicans and most of northern Europe.


One of the most enduring traditions of American Halloween is the practice of Trick or Treating, knocking on doors in costume, and asking for treats in return for not performing a "trick" on the owner of the house. This tradition has several different origins that, over time, merged into one. The practice of dressing in costumes to fool the spirits, also known as "guising", is an ancient practice that has impacted many cultural traditions over the centuries, and was particularly prevalent in medieval times. Since Halloween was the one night of the year when spirits were most prone to walk the earth, it was doubly important on this night to fool them. The other part of the tradition, asking for food or "treats" also has several different predecessors. On Samhain, the Druids believed that any evil spirits walking the earth when the veil was thin would wreak havoc on mankind unless placated with food. In addition, there was the medieval practice (9th century onward) of "souling": when poor people went door-to-door on All Hallows Day (Nov. 1) and asked for food in return for saying prayers for the dead on All Souls Day (Nov. 2). Most of the early food given out were "soul cakes" -- bread squares with currants baked into them. Over time, this morphed into the modern day Halloween traditions we all enjoy.  In America (ever since at least 1927 which is the first example of the phrase in print), Trick or Treating has come to mean candy, candy, and more candy! Halloween traditions vary greatly by region -- some countries give out fruit and nuts, and some require children to actually perform a trick (like a riddle or a song). Interestingly, the medieval practice of dressing up in costume and going door-to-door performing tricks or services for food has another modern descendant -- Christmas wassailing, or Christmas caroling!

Stay tuned to future October posts for other tidbits of Halloween lore, including Jack-o-Lanterns, vampire lore, haunted houses and witches!! Now, on to the creepy critters!

Like I said, the pictures aren't great and I didn't document very well, because at the time it didn't occur to me that I might end up as a food blogger someday. None of these creations were original ideas, they have been floating around in various mini recipe magazines (like the ones by the checkout counters in supermarkets) for years. And if you look around online, you will see far more elaborate offerings in terms of decorating ideas, the ones that I posted are really the simplest iteration on the theme of quick Halloween treats -- the fastest way to put something together that works both visually and time-wise. If you are chronically short on time but over-extended, as I always seem to be, then these are the treats for you. And if you have a little more time, these treats offer many opportunities to be expanded upon.


For witch hats, you only need 3 Ingredients:

  • 1 package of Fudge Shoppe Fudge Stripe Cookies
  • 1 package of Hershey's Kisses, unwrapped (any flavor)
  • 1 package of Betty Crocker purple squeeze icing, or other color of your choice
The directions are very simple:

  1. Melt a few kisses in the microwave, you will need some melted chocolate to attach kisses to the cookies.
  2. Invert the cookies so that the chocolate coated side is facing up. Dip the bottom of a Hershey's kiss into the melted chocolate, and place in the center of the cookie, covering the cookie's hole. Don't use tons of chocolate, otherwise it will squish out the sides.
  3. Take your icing, and pipe a ribbon around where the edge of where the kiss meets the cookie, finishing off in a decorative bow if you desire. I made trailing ribbons on mine, but you could easily omit that and just pipe a band around the kiss and use a large yellow sprinkle for a hat buckle.
  4. Let them cool and harden, so they won't fall apart.
What you end up with is something like this:
Fast and easy witch hats that could easily be embellished if you so desire!


Creepy critters are also easy treats that come together in a snap! 

 Ingredients:
  • 1 package of Nutter Butter cookies
  • 1 package of pretzels
  • 1 package of M&M's (plain or dark chocolate, you want the round ones)
  • Melted chocolate or chocolate flavored wafers
Directions:
  1. Cut the pretzels with a knife so that each pretzel yields 3 curved pieces (follow the schematic left). Each pretzel will yield three legs (1-3) and two antennae (A)
  2. Dip the Nutter Butters into the chocolate so that they are completely covered. Set on wax paper when finished.
  3. For the legs, dip one end of the pretzel piece in melted chocolate, and attach to the body. Attach 3 legs per side of the critter.
  4. Choose an end to be the "front" and attach the antennae to the top of the critter using melted chocolate. They should stick out into the air.
  5. Dip one side of the M&M's in chocolate and attach to the critter on the front end, in front of the antennae. Let harden to set.
When you are done, you end up with something like this:
This particular picture doesn't have antennae, the critters look good with or without. The antennae take a little more time, because you have to hold them for a bit and let them set before you let go, otherwise they might fall over. I leave the decision up to you whether you want to use them. You could also make larger bugs by joining three or more coated Nutter Butters in a row, and although those would be easily breakable, they would also be easy to repair with some melted chocolate.


Making the quick ghosts is very similar to making the critters because they both use Nutter Butters dipped in chocolate, only this time it is white chocolate. And they both use M&M's. An easy thing to do is to split the package of cookies, and use half for critters and half for ghosts!

Ingredients:
  • 1 package of Nutter Butters
  • Melted white chocolate or white candy melts
  • M&M's, brown
Directions:
  1. Dip the Nutter Butters in the melted white chocolate to coat completely.
  2. While the coating is still wet, push 2 brown M&M's into one end for the eyes.
Following these directions, you get these googly-eyed ghosts, which can be embellished with more elaborate decorations if you wish! They could also easily be made into mummies from this point with some well-applied icing strips to look like bandages.
Nutter Butters are very versatile templates for easy treats, they can also be Santas and reindeer at Christmas, which I am hoping to demonstrate in 2 months!

Stick all the critters on the same plate, and you have a cute-looking tray of Halloween offerings:
Angela's pumpkin cheesecake is to the right. Some questionable brownies I made which were supposed to have orange swirls of cheesecake are to the left. They tasted fine, but didn't look like the vision that was in my head...


Like the others, this next entry isn't a recipe, but rather directions for assembly. Anyone can make easy "dirt" pudding using nothing more than chocolate pudding (ready-made or instant), crushed Oreos, and various other accoutrements such as tombstones, gummy worms, etc. The decorating techniques described here could also be used on an iced chocolate cake, covered with crushed Oreos. The particular Dirt pictured below is one that my friend Lauren made.

Ingredients:
  • Chocolate pudding (ready-made or instant)
  • 1 package of Oreos, crushed
  • Edible accessories: tombstones, gummy worms, etc
  • Creepy container
Directions:
  1. For this particular treat, the container matters. A lot. This is supposed to be dirt, or better yet a graveyard, so don't assemble it in a run-of-the-mill tupperware container. Try to find a nice Halloween-themed dish (or at least a plain black one), either round or square, and embellish as much as you can. The dollar store normally has several options. If you really want to get nuts, you can use glass and make a 3-dimensional space where you show the goings on underneath the surface (coffins, zombies in the process of climbing out of graves, etc). How great would it be to have the zombie hand sticking out of the surface of the "dirt" and have the rest of the zombie visible just underneath??
  2. Decide on a theme and plan it out first. Do you want to just have quick basic Dirt with worms? Do you want to do an elaborate haunted cemetery? A pumpkin patch? Gather what you need before you start.  You can even make use of the critters and ghosts you made from Nutter Butters! For the example below, Lauren used gummy worms, some of my critters, and tombstones that were really Milano cookies dipped in white chocolate.
  3. Layer the pudding on the bottom of your dish, and sprinkle the crushed Oreos on top so that the pudding is not visible.
  4. Add your decorations (i.e. worms poking out of the dirt, etc).
You end up with a version of this:


Depending on how crazy you want to get, the Dirt can be the quickest or the most time-consuming out of all the treats listed in this post. Lauren did a beautiful job! She also made a gorgeous pumpkin cake using the Williams-Sonoma Great Pumpkin pan, but that definitely doesn't qualify as a quick treat! Likewise for the pumpkin pie and pumpkin cheesecake Angela made, the chocolate and peanut butter fudge Jenny made, or the pecan pie I made. I also made chocolate chip cookies with black and orange M&M's substituted for the chips, which does qualify as quick and dirty but doesn't deserve its own entry. Everyone's effort was how our lab ended up hosting the best Halloween Social in the history of the Molecular Genetics, Microbiology and Immunology Department!

(L - R) Me, Angela, Nick, Lauren and Jenny.