I have always wanted to try my hand at making a King cake, that purple, yellow and green colored sweet confection traditionally served during Mardi Gras, and this year was finally the year I managed to work it into my schedule. This recipe is a yeast dough, and is a little advanced because of the extra steps involved in using yeast, but it is not difficult. I will try to be as explicit as possible for those who have never baked with yeast before.
But first, how about a little background info on these colorful cakes?
In the title, I specify that this recipe is specifically for a Mardi Gras-style King Cake. I have to make this distinction, because there are actually many different types of King Cakes in many different cultures. Typically, these cakes are associated with the Epiphany, the 12th day after Christmas (aka Twelfth Night) when the 3 Wise men (aka the 3 Kings) finally arrived in Bethlehem to visit the Baby Jesus. The King Cake "season" extends from the Epiphany all the way until the day before Lent (Shrove Tuesday, or Fat Tuesday).
Besides the famed (at least in the US) King Cake of New Orleans, King Cakes include the
vasilopita of Greece, the
roscon de reyes of Spain, and the
galette des Rois of France, amongst others.
All these cakes have several features in common: they are typically a variation of a sweet bread, occasionally with a filling, and they almost always contain a trinket of some sort. This trinket can range from a simple bean (the majority of European King Cakes), to a coin (
vasilopita), to a plastic baby representing the Christ Child (New Orleans). The person who gets the piece with the trinket either has special privileges for the day, special obligations, or both. In the case of New Orleans King Cakes, the finder of the trinket is usually declared King or Queen for the day, with the obligation to provide next year's King Cake, or host next year's Mardi Gras party. Some Mardi Gras krewes (parades and balls) also choose the monarch of their ball using the King Cake.
And speaking of

...
Mardi Gras is the New Orleans Carnival season, filled with parades, balls and King Cake parties, from the Epiphany until Fat Tuesday. In fact, for those of you who don't speak it, Mardi Gras is literally the French for Fat Tuesday. Although the whole season is referred to as Mardi Gras, it culminates on the literal Mardi Gras, the day before Lent, the idea being to eat and celebrate as much as possible before the fasting and deprivations of the Lenten season.
The practice of Mardi Gras was brought to New Orleans by its earliest French settlers, with the earliest recorded Mardi Gras in New Orleans taking place in 1699.
The three traditional colors of the Mardi Gras are purple (justice), gold (power), and green (faith).
Parades (Zulu, Rex, etc) and balls are the most common form of Mardi Gras celebrations, and they are run by Krewes, which are somewhere between social clubs and charitable organizations. These krewes run the gamut from super-exclusive to open membership (for a small fee). The oldest on record is the Mystick Krewe of Comus (1830). During these parades, "throws" are hurled from the floats into the waiting crowd -- the stereotypical beads and doubloons, although some krewes are starting to become more elaborate with their throws, offering limited edition items or krewe-specific trinkets. The most sought after throws are the Mardi Gras Coconuts, thrown during the Zulu parade.
The Mardi Gras style King Cakes feature prominently in all of these celebrations. They are brioche-type bread, traditionally twisted, but many varieties exist. They were also traditionally deep fried like huge doughnuts, but that has been changing. Now it is very common to find them baked and with a filling, which can be cinnamon, praline, fruit, cheese, or some combination of the above. A special subtype called the Zulu cake is iced with chocolate and filled with coconut as a nod to the coconut throws of the Zulu parade. Some New Orleans krewes use the King Cakes to choose a monarch for their parades and/or balls.
Incidentally, since there is bourbon in this recipe...the famous Bourbon Street in New Orleans is not named after bourbon the liquor, it is named after the House of Bourbon, the royal family of France which ruled from the 16th century (contemporaries of Henry VIII and Elizabeth I of England) until the two French Revolutions (in 1792 and 1830).
And now, back to the King Cake!!
The
recipe I chose to modify has a cinnamon praline filling. I was tempted to add cheese, but I didn't have room to store the cake in my fridge overnight, so I didn't. I'll provide a suggestion for a praline-cheese filling at the bottom of this post. I also chose to fold my dough into a cylinder as opposed to rolling it jellyroll style because of the thickness of my filling.
This recipe, as well as any other bread recipe involving yeast, starts with "proofing" the yeast, that is, making sure the yeast is active. Start by heating up the milk, you want it between 110F and 120F. This should feel like a temperature for a baby bottle or warm shower. If it is scalding hot, you will kill the yeast. If you aren't sure, do what I did, and check it with an instant thermometer. I found that 1 C of milk in a 1 C glass measuring cup nuked on high for 60" did the trick, but it will differ a bit based on your microwave.
Pour the milk into the bowl where you will be assembling the dough, sprinkle in one packet of yeast, and 1 tbls of sugar, stirring to combine.
Then, leave it alone for about 10 minutes. If the yeast is active, it will start to bubble a bit.
Now, add the sugar, salt, nutmeg and zest to your yeast, and mix (I just used a spoon).
Then add the yolks, bourbon, extract, OJ and mix again.
Now in goes the flour, cup by cup. At this point, I started using my paddle. Once the flour is in, I started adding the butter a few pieces at a time (in 1/4 tsp cubes), until it was pretty well incorporated, which took a few minutes with the paddle.
Now, turn it out onto your floured counter (or other floured surface) and knead until the dough is no longer shiny, is elastic, and springs back when pulled. Here is a simple but
great tutorial on kneading. Kneading by hand will take anywhere from 8-12 minutes, depending on how vigorous you are.
Put the dough in an oiled bowl (I used Crisco veggie oil), cover with a damp towel (I used paper towels that had been wetted and then squeezed out of excess water), and let rise for about 1 hour, until doubled in size.
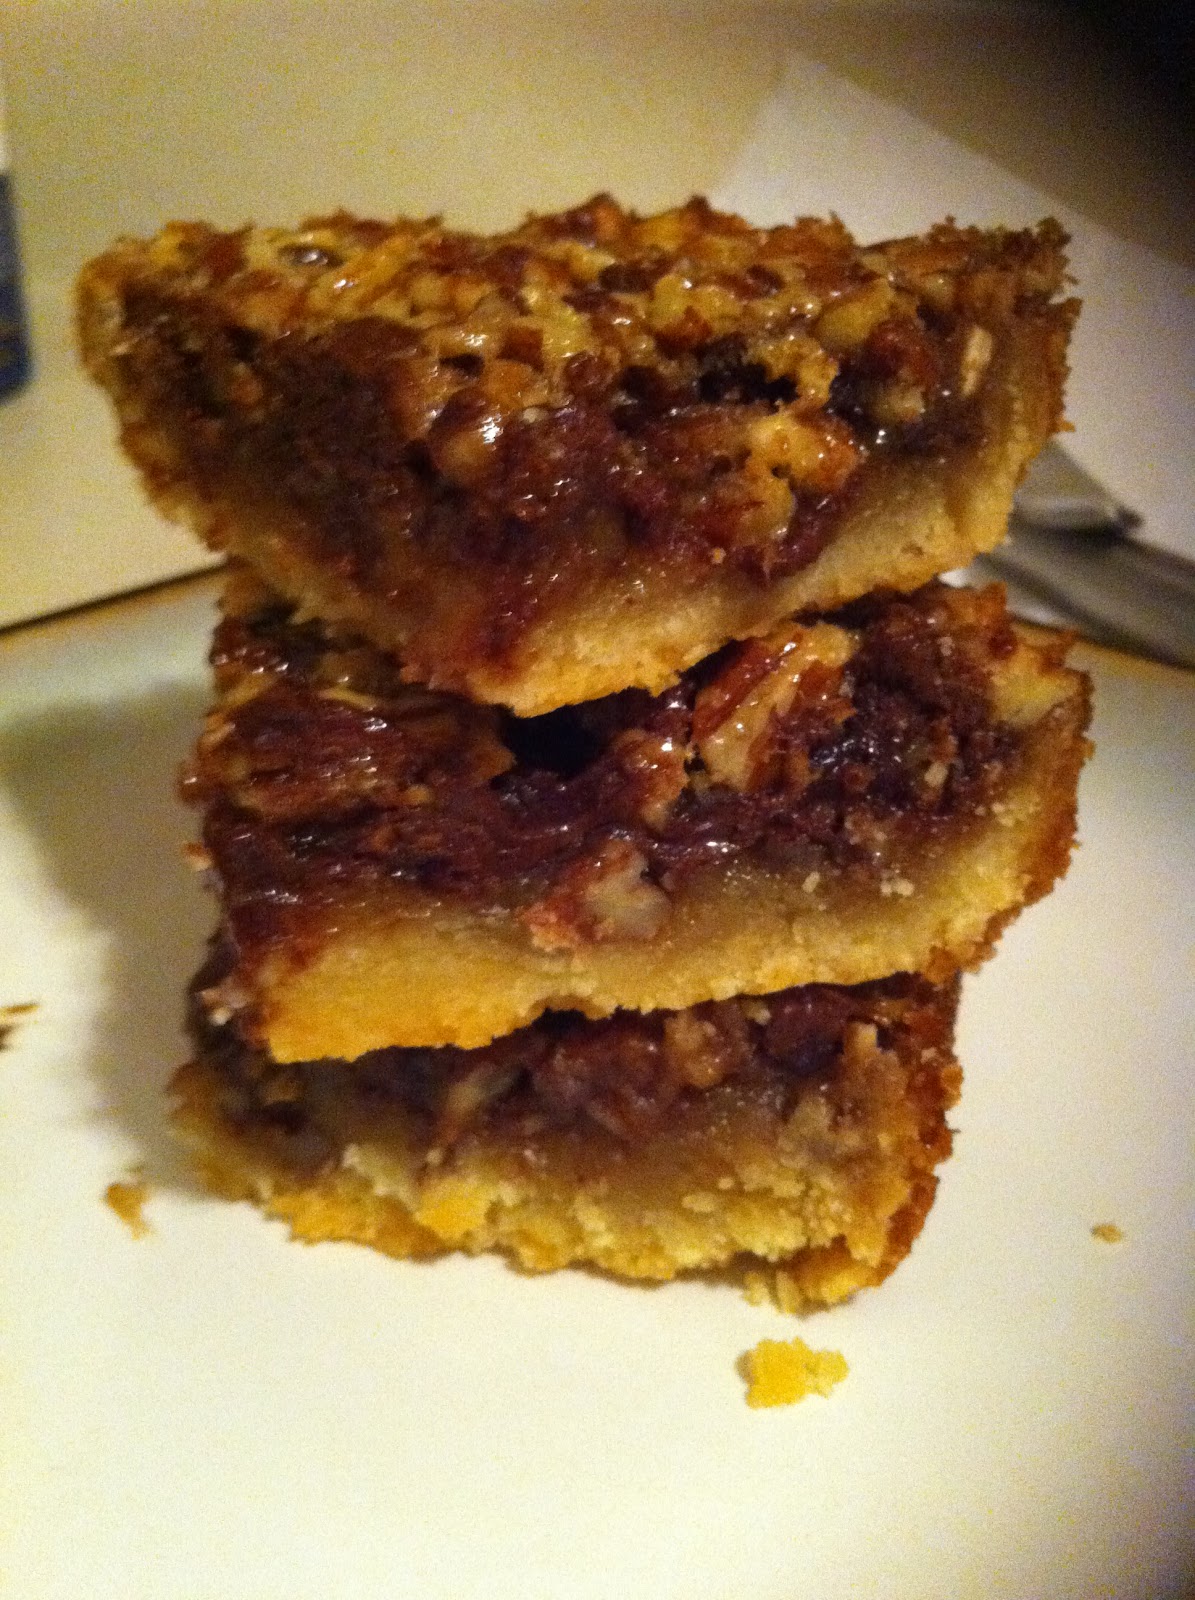
In the meantime, make the filling. Put the toasted pecans, brown sugar, nutmeg, cinnamon, butter and salt into a foo processor, and process until crumbly.
After your dough rises, punch it down.
This deflates the air pockets, and re-invigorates the yeast by redistributing them and exposing them to new food sources. Punching dough is used when you want an end product with a tender and fine crumb, a little denser, like cinnamon rolls, and cake-like pastries (FYI, folding at this stage will produce larger air pockets, and is used for things like rustic loaves, baguettes, etc). Then, let it rise again, and punch it down again (I admit, I skimped on this step, and I didn't notice any ill-effects of skipping the second rise/punch, so if you're short on time...)
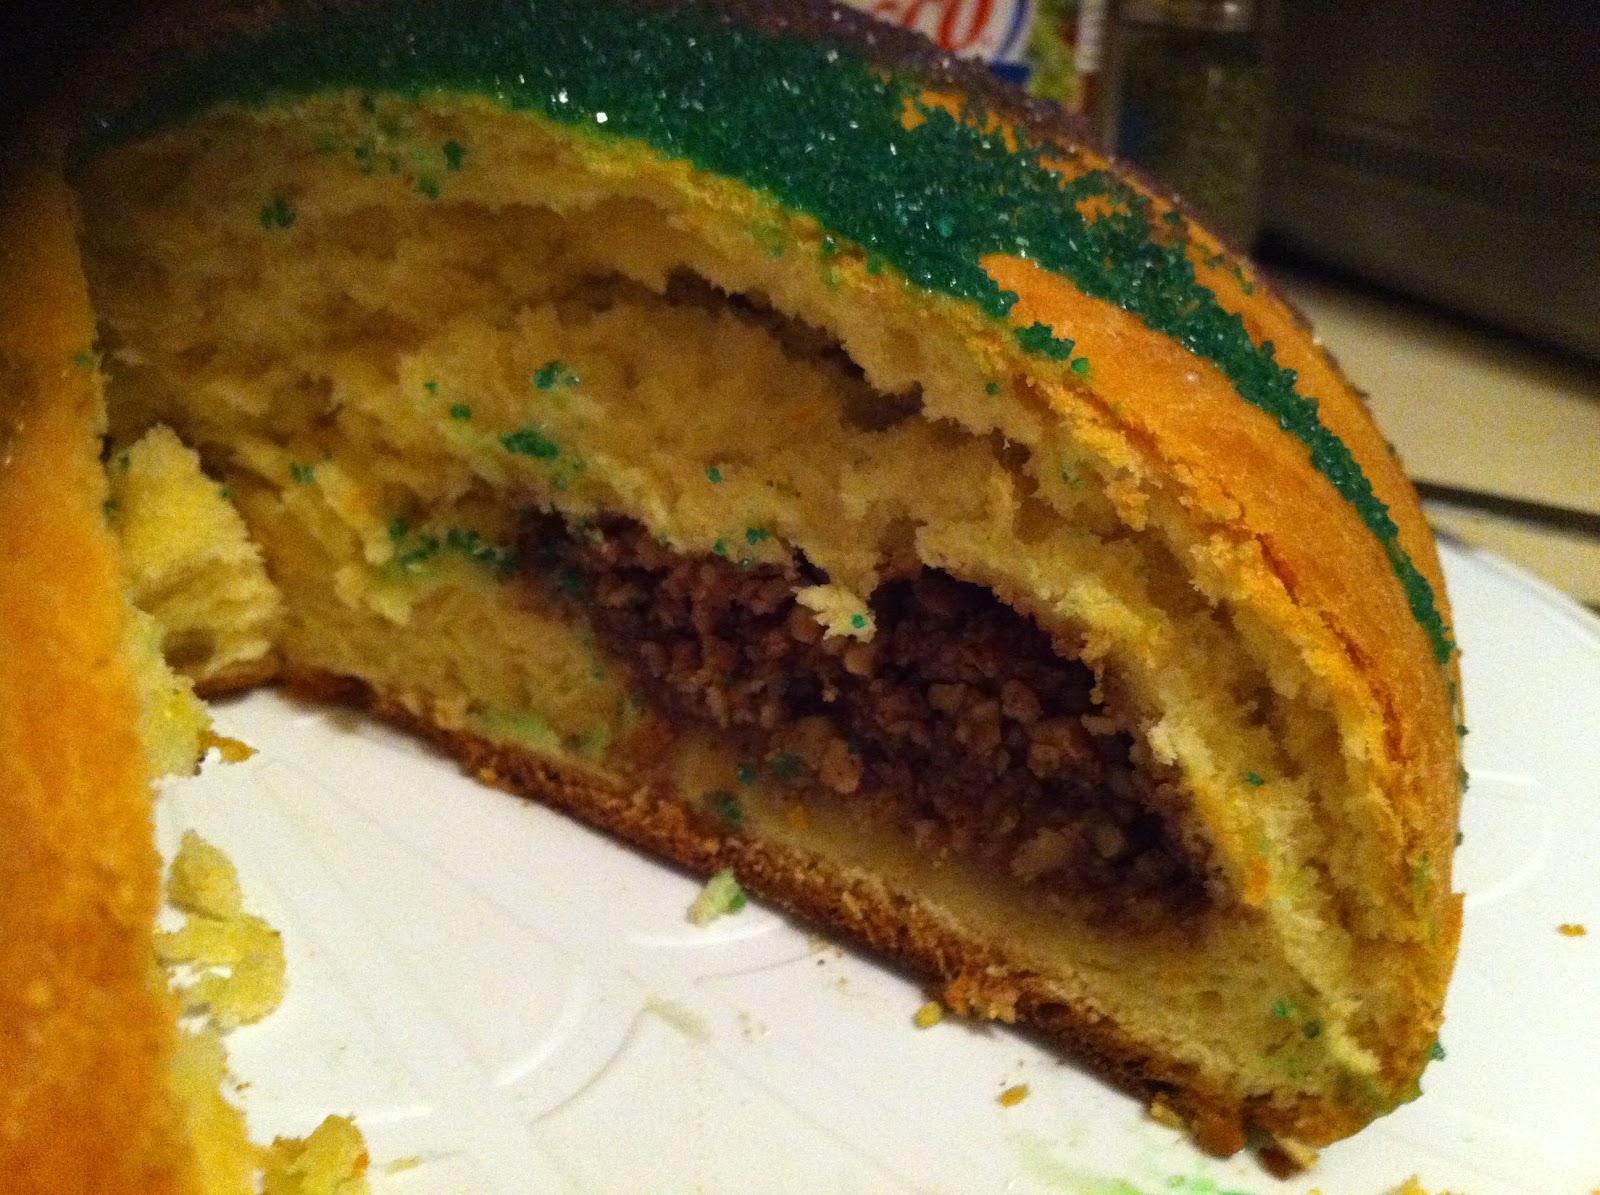
Now roll it out to a 28"x8" rectangle. I rolled mine out to an 18"x8" rectangle, because apparently I can't read. This is why my roll looks so fat, and why my finished King Cake was more like a disk than a ring...
Put on the filling (*see below for a note about cheese filling, if you want to use it), leaving a 1" perimeter. Brush this perimeter with an egg yolk/milk mixture.
Fold the dough over the filling and pinch shut along the sides, and on the two ends. Again, mine is too fat. At this point, roll it right onto some parchment, for easy transfer to a cookie sheet.
Form this cylinder into a ring, and pinch the two ends together. Don't be like, me, try to leave a circle in the center at least 3" in diameter. Slide the ring/parchment onto your waiting cookie sheet.
Cover with damp towel again, and let it rise again, for about 30 minutes.
Then, brush it with some of the remaining yolk/milk wash (which I forgot to do) and bake it until it is golden, and the underside is golden brown, about 30 minutes.
Let it cool for at least an hour. When it is cooled, you can make the glaze. To be authentic, have your colored sugars on hand.
Combine the confectioner's sugar, orange juice, bourbon until smooth. It'll be pretty thick, brush it on top or spoon it as best you can. Immediately after, grab your sanding sugars, and start sprinkling in alternating colors.
This cake, even though it didn't look quite like I pictured, turned out even better than I was expecting. The bread was subtly sweet, slightly buttery, and extremely tasty, while the pecan filling was absolutely delicious.
When I brought it to work, everyone devoured it. I definitely will be making this again next year for Mardi Gras, trying out the addition of cheese to the filling. The dough was so tasty on its own that I am thinking of using it as a base and experimenting with other kinds of breads to make some coffee rings and other pastries.
King Cake (Mardi Gras Style)
Ingredients
Dough
- 1 C warm milk (110F-120F)
- 1 packet of active dry yeast (1/4 oz)
- 1/2 C sugar
- 4 yolks
- 1 stick sweet butter, cold, cut into pieces
- 1 tsp salt
- 2 tsp vanilla
- 2 tbls orange juice
- zest from one orange
- 2 tbls bourbon
- 4 C flour
Filling
- 3 C toasted pecans
- 1/2 C brown sugar
- 1 tsp nutmeg
- 2 tsp cinnamon
- 1/2 stick sweet butter
- pinch of salt
Glaze
- 2 C confectioner's sugar
- 2 tbls orange juice
- 1 tbls bourbon
- 1 tbls water
- sanding sugars in purple, yellow and green
Directions
- Heat the milk to 100F-120F
- Pour the milk into the bowl where you will be assembling the dough, sprinkle in one packet of yeast, and 1 tbls of sugar, stirring to combine. Let it stand for about 10 minutes. If the yeast is active, it will start to bubble a bit.
- Now, add the rest of the sugar, salt, nutmeg and zest to your yeast, and mix (I just used a spoon).
- Then add the yolks, bourbon, extract, OJ and mix again.
- Add the flour, cup by cup.
- Add the butter a few pieces at a time (in 1/4 tsp cubes), until well incorporated
- Turn dough out onto floured counter (or other floured surface) and knead until the dough is no longer shiny, is elastic, and springs back when pulled, 8-12 minutes approximately.
- Put the dough in an oiled bowl, cover with a damp towel, and let rise for about 1 hour, until doubled in size.
- In the meantime, make the filling. Put the toasted pecans, brown sugar, nutmeg, cinnamon, butter and salt into a food processor, and process until crumbly.
- After dough rises, punch it down. Let it rise again for 30 minutes, then punch it down again.
- Now roll it out to a 28"x8" rectangle.
- Put on the filling, leaving a 1" perimeter. Brush this perimeter with an egg yolk/milk mixture.
- Fold the dough over the filling and pinch shut along the sides, and on the two ends.
- Form this cylinder into a ring, and pinch the two ends together.
- Transfer to cookie sheet, cover with damp towel again, and let it rise again, for about 30 minutes.
- Then, brush it with some of the remaining yolk/milk wash, and bake it until it is golden, and the underside is golden brown, about 30 minutes.
- Let it cool for at least an hour.
For Glaze: Combine the confectioner's sugar, orange juice, bourbon until smooth. It'll be pretty thick, brush it on top or spoon it as best you can. Immediately after, grab your sanding sugars, and start sprinkling in alternating colors.
For Cheese Filling: Combine 2-8 oz packages of softened cream cheese, 2 egg, 1 tsp vanilla, and 1 tbls of milk or cream in a mixer until well-combined and fluffy. Thin with more milk/cream if need be, and spread in a thin layer on the dough before spreading the pecan layer on the dough.