Thursday, 14 March 2013

Snoopy Baby Shower


I meant to write this post ages ago, my baby shower was back in September. But better late than never!

As anyone reading my previous posts on my bridal shower and the various baby showers that I've assisted with, I love event planning. And I've always known that, if I were lucky enough to have a baby, I would want a Snoopy-themed baby shower.

This presents its own difficulties, as many Peanuts-themed items are becoming rare and expensive. And the ones that are available are more naturally geared towards children's parties, and I didn't really like the look of them. So instead, most of the items at my shower were handmade by myself or my family. Here is a quick rundown of what we did, in case anyone else out there would like to do something similar.


First, the invitation. I made this myself, and I think it came out rather well:

I'm not much of a photo editor, and clearly not a graphic designer. But I was actually able to use PowerPoint for everything I needed. First, decide on the size of your invitation. I decided on 5x7", which is size A7. I ordered my paper products from Paper Source. Once you know what size you want, you can go into PowerPoint and adjust the slide height and width to match (Design --> Page Setup). I would suggest adding an extra 1/4" to each side (5.25x7.25") as a bleed section.

 I found a Peanuts font online, to get the lettering right. Unfortunately, this font has no numbers, and the numbers from fonts I already had on my computer didn't look right, so I used the Waltograph font for the numbers, which paired nicely with the Peanuts font.

I got all of the images on the invitation by googling "baby snoopy" and I used PowerPoint to remove the original color and tint everything blue (Format --> Recolor --> Light Variations, while clicked on the image, I chose the light blue option for everything here). I also used PowerPoint to adjust the contrast and brightness (also under Recolor), which helped to sharpen the edges of the images. Lastly, I made sure the backgrounds for the two images flanking the text were transparent (Recolor --> Set transparent color).

I added a border for the bleed section, so that variations in printing wouldn't cut into my actual design.

Once I had the design the way I wanted it, I saved the slide as a jpeg: make sure everything in the slide is grouped, then right-click the slide and select "save as picture." PowerPoint caps the resolution of jpeg exports, so I followed these instructions to change the resolution of jpegs saved in PowerPoint to 300 dpi, it was easy to do and made a huge difference in the quality of the invitation!

For the favors, I decided to make a Greek cookie called Kourambiethes, which I also made for my bridal shower. I'm pretty proud of the packaging, they are little Snoopy houses:
This is a demo bag. Yes, I know Snoopy's house is actually all red, but I couldn't find red bags that were a close enough match to the tops, so I went with white. Red, white and baby blue ended up being my shower colors, and they looked great.
The bottoms are small white paper bags (I think in the vicinity of 2x3"). The tops are made from red construction paper (basically a trapezoid butterfly that folds over the tops of the bags). The Snoopy and Woodstock image was downloaded from Google images and sized to match the scale of the bags. They were printed on white cardstock, and cut out by my Dad, before being attached to the red tops. The tops were then folded over the filled bags, and voila! Snoopy favors!

My dad made tons of these, this isn't even half of the favors, he made well over 100!
My MIL made centerpieces for the tables. She makes these neat centerpiece/favor combination using these:

Clear tubes filled with color-coordinated M&M's, topped with white carnations and color-coordinated curling ribbon. These treats go into a bowl, the top flowers present a unified front, and it looks something like this:


Then a themed object can be placed on a stalk in the center of the bowl. My MIL and SIL painted bird houses to look like Snoopy houses, and put little plush Snoopies and Woodstocks on them:


Beautiful! I don't have a full length pic of the centerpieces, but there were also Snoopy balloons from Amazon that looked like this:
Here is what the table looked like all set up:

I also made an Activity Booklet with puzzles and such. It is in pdf format, but anyone is welcome to take pages out of it as they wish:

You'll obviously want a different first page, but the rest of the pages can be used for anyone. It can be tinted purple for a girl.
I hope anyone out there looking to plan a Snoopy shower got some ideas! There are tons of other great ideas out there, I wish I could have done more!

Stuffed rolled pork loin


I woke up feeling terribly gloomy yesterday morning. I felt awful and depressed and really unable to get out of bed in a way that I haven't since I had morning sickness, what feels like several hundred years ago at the start of this wretched pregnancy.

My morale up until now has been based on doing the following:

1 Not counting down the days left. I stubbornly refuse to think or talk about how pregnant I am. I just say "It's due in May" and pretend to myself it is at least three weeks later in the year than it is. I have been 7 months' pregnant for at least 6 weeks. Otherwise you are like a prisoner, trapped in your huge, ungainly body marking time until your parole date. You may as well just scratch lines onto the kitchen wall with a fruit knife and be done with it.

2 Reading anything to do with fashion, clothes and weight loss obsessively and every so often suddenly spending a fortune on a pointless accessory. Once I am no longer pregnant I will go back to slopping about in bootcut jeans and grandad shirts - but for now the image of a slim and fashionable me stops me from lying down on the floor and screaming "I don't want to do this anymore!!!!!!"

I am so obsessed at the moment with clothes and accessories that I'm like an horrific pastiche of what people fear a Western woman is: just a goggle-eyed grasping lunatic, who actually believes that putting together a correctly fashionable outfit is an achievement, or sourcing a pair of absolutely au courant neon striped gym shoes for Spring/Summer constitutes "work". I went on a special trip to Selfridges to pick out a ruinously expensive charm necklace for my husband to buy me, according to the fashion for a husband to reward a wife with a present after she has had a baby. I cannot stop thinking about this necklace because when I have it, you see, my life will change for the better.

It's as if I unconsciously believe that the right clothes and accessories will make all this go away. My back won't hurt, my facial bloating will subside, I will be able to sleep, I will be able to bend down, my varicose veins will disappear. If I am dressed correctly the first few horrendous weeks of leaking bosoms and traumatised knicker-area, followed backbreaking months of still being overweight and creaky while hauling around a glassy-eyed newborn, stopping Kitty from killing it/herself/me, won't be so bad.

Ha! Haaaa haaa haaaaaaaaaaa.

Then I come away from the iPad or the laptop, having found myself almost buying a pair of shoes with cat faces on them for £500, (because they might be the shoes that change my life for the better, you see), and I feel guilty and sick.

3 Doing stuff with Kitty, no matter how much of a hassle it is. I allow indoor play and general telly-and-biscuit wallowing in the afternoons, but in the morning, I try to go out.

But I think I have hit a wall. I can't do anything anymore. I have to leave stuff scattered all over the floor for someone else to pick up because I can't. You will think: "That's fine, you're pregnant, enjoy not having to pick stuff up off the floor!!" but I don't like it. I don't like having to rely on other people. I don't like having to be helped up out of chairs, (my husband responds by trying to pick me up under the armpits, like a cat). And I don't like having to say to my husband, when he comes downstairs from having put Kitty to bed, "Sorry but can you put away those Megabloks?"

No matter how awful I feel I'd always rather do that sort of thing myself and enjoy the warm glow of martyrdom. Occasionally when I am on my hands and knees clearing up some awful spill to rival Exxon Valdez, usually also involving broken glass, I feel so sorry for myself that it's actually quite fun. But now I really just can't do any of it. I honestly think one wrong move and something will snap, or get squashed, or fall out, or tear.

And there's two months to go. TWO MONTHS!! And it won't stop fucking snowing. I don't know why I'm even bothering to despair. My own raging voice floats about my ears, getting fainter and fainter, further and further away like a tiny person trapped under some floorboards, far away and you think you can hear a voice and say "Can you hear that?" and everyone shakes their head and says "no". That's how futile my complaining is.

Just to make myself feel worse I decided to make one of What Katie Ate's recipes, torn jealously and resentfully out of The Times Magazine two weeks ago. I don't hate Katie Ate, but she did make me feel grossly inadequate for most of a weekend. But then, that's what weekend papers do - they make you feel a bit shit about your life, whether your are pregnant and miserable or not.

Anyway, so I made this stuffed pork loin thing as a kind of penance to atone for my sins of pride and envy, sloth and too much online shopping.

And it was terrific! Although overcooked and slightly shoe-like. But that is not Katie's fault as her cooking times specified were for a larger joint of pork than mine and I, like most English people am too sccaaarrrred of underdone pork to be bold about reducing the cooking times.

The really wonderful thing about this was the amazing stuffing - really, really delicious and magical.  Give this a go just for that.


2kg pork loin

For the stuffing
250g dried apricots
100g pistachios, shelled
2 apples, grated
50g butter, melted
1 onion
2 cloves garlic
chopped parsley, sage and thyme
salt and pepper
two handfuls of sourdough breadcrumbs (we happen to always have sourdough bread in the house but if you don't, I'm sure any old breadcrumbs would be fine).

1 Chop the onion and garlic and cook very gently for about ten minutes until just softening - don't let them take any colour at all and don't worry about them being raw because you're going to cook the shit out of them later. Take the pan off the heat and set to one side.

2 Chop up the apricot and pistachio reasonably small and put in a bowl. Then grate over the apple, throw in the herbs and the breadcrumbs, scrape in the onion and garlic, pour over the melted butter, season with a good pinch of salt and four or five turns of the pepper grinder and give it a good stir.

3 Unwrap your pork loin. If you can't see how in the hell you are going to get loads of stuffing in and then tie it back up again, you can always fillet off a bit of the underside of the joint with a sharp knife and put aside for another project (does that make sense?)

4 Flip the pork over skin-side up: if it has not already been scored, then score all over in a diamond pattern. Then rub with a lot of squashed sea salt.

5 Turn the loin back over and press in the stuffing. Roll up and tie as neatly as you can. The stuffing will inevitably clatter out of both ends, but just press it back in as best you can. I cooked my joint on its end, to stop the stuffing falling out and to get an even cook of crackling round the side but if you have a larger, long joint you won't be able to do this.

6 Put in the oven at 240C or top whack for 30 mins, then turn down the temp to 180C and cook for another hour. If you want to bake some apples alongside this for a kind of self-preparing apple sauce, put some small eating apples (naturally sweet so you don't have to faff about adding sugar to cooking apples) 30mins before the end of the cooking time.

This is hell to slice as the stuffing splurges out everywhere - you need a REALLY sharp knife, but it was very delicious.

Wednesday, 13 March 2013

Old-Fashioned Chocolate Pie (aka Minny's Chocolate Pie)


I read. A lot. So much that my house is currently overflowing with books, most of which live in cardboard boxes stacked to the ceiling. And that doesn't even count the books I left at my parents' house when I moved (much to their chagrin), which would easily double, if not triple, my collection. But I can't help it -- I love reading. But it got to the point where my husband put his figurative foot down and said that we couldn't possibly fit any more books in our house without the whole structure collapsing in on itself, creating some sort of biblio-singularity which would punch a hole in the space-time continuum and destroy the entire universe. Maybe not his exact words, but that was the general gist. However, being my husband, he came up with an elegant alternative: a brand new iPad with Kindle and Nook apps on them, and a gift card to Amazon. That was about a year and a half ago, and I have since become an e-book convert (although it took me a few days to get used to reading on a screen). I have 60+ books on my iPad already, because buying them when I have a whim to read or see something interesting is way too easy.

But why do I bring this up on a baking blog? Well, it just so happens that the very first e-book I downloaded was The Help by Kathryn Stockett. And in this book is a pivotal plot point which I won't spoil here, but it involves a chocolate pie. Minny's chocolate pie to be exact.

When the movie came out, I had my first good look at the movie-interpretation of said pie, and I was surprised to discover that it was not a chocolate cream pie like I had been imagining. It was some sort of baked confection, looking almost like a brownie pie, and I was intrigued. A year and a half later, on a whim, I google "Minny's chocolate pie recipe" and out pops this page -- the screen-used recipe for Minny's pie! Not only did it sound delicious, it sounded almost too easy, so I had to give it a whirl. And thank goodness I did!

I have made this pie several times already, because it is that fast. I did adjust the sugar somewhat, and the amount of evaporated milk. I also added peanut butter one of the times I made it.

The ingredients are sugar, eggs, evaporated milk, cocoa powder, melted butter, vanilla, and a crust. You can use prepared crust, frozen crust, from scratch crust, even a prepared graham cracker or cookie crumb crust (although the last two get a mite overdone, but they don't burn).

The order you add things in the bowl will make a difference, only because the cocoa powder can seize or separate out of the custard if it isn't incorporated well. Here is what I do:

Combine the sugar, salt and melted butter in a bowl, whisking well to combine. Add in the cocoa powder, whisking well. Add in the two beaten eggs, whisking well. Add the evaporated milk and vanilla, whisking well.

At this point it gets dumped into your crust. If you want, you can put a 1/2" layer of peanut butter down on the crust first like so:

 Just sayin'.

Then, it bakes up for 45 minutes.

This one was in a chocolate wafer crust
It needs to cool completely before cutting and eating, I suggest at least 6 hours or overnight, refrigerated. Then comes the fun part: cutting and eating!


This pie tastes so decadent, with or without the peanut butter. No one will believe how incredibly easy it is to put together! It has a wonderful consistency, more substantial than a custard, less firm than a brownie. It also goes great with whipped cream, and honestly would probably make a great bottom portion of a chocolate cream pie. All in all, two thumbs up! This has already become a go-to recipe for those times when I need an easy dessert, especially as a take-along!

Note: The original recipe calls for 6 oz of evaporated milk. However, evaporated milk comes in either 5 oz or 12 oz cans. I don't know about you, but I'm not opening a 12 oz can just for 6 oz. So I tested the recipe using just 5 oz and it works fine. BUT, you can also use 12 oz, double the rest of the ingredients, and just make 2 pies. It is just as easy to make 2 pies as it is to make one, so I normally do that! Trust me, they don't go to waste!

Old Fashioned Chocolate Pie

Ingredients

  • 1 pie crust
  • 1 C sugar
  • 3 tbls unsweetened cocoa powder
  • 4 tbls butter, unsalted, melted
  • 1/4 tsp salt
  • 1 tsp vanilla
  • 2 eggs, beaten
  • 5 oz evaporated milk*

*use a 12 oz can and double the remaining ingredients to make 2 pies

Directions

  1. Preheat oven to 350F
  2. Put pie crust in 9" pie dish (I found that there is no need to prebake the crust)
  3. Combine sugar and butter in a bowl, whisking to combine
  4. Add in cocoa powder, whisking to combine
  5. Add in remaining ingredients, whisking to combine
  6. (optional) Put a 1/2" thick layer of peanut butter on the bottom of crust
  7. Pour custard into pie crust
  8. Bake for 45 minutes, until center is set
  9. Cool completely, 6 hrs or overnight in fridge

Thursday, 7 March 2013

Peanut M&M Cookie Bars


Yes. These. These are my Peanut M&M cookies in a bar form. Identical batter, but a lot less time and fuss. They are chewy, so they do lack that cookie crunch, but they taste delicious nonetheless. I can't decide which I like better, in truth, but I know for certain that when I am short on time, I will definitely be making the bars.  I gave a detailed workflow of preparing the batter in my cookie post, so I won't rehash it here. Instead, I will pick up the recipe where it diverges from the cookie recipe:


Rather than use a cookie scoop to make individual cookies, evenly press the batter into a greased 9x13" pan like so:


Bake for about 30 minutes until golden:


Then you can cut into squares and enjoy. Easy! And yummy! The peanut M&Ms add a wonderful texture and taste to the bars. These were gone from the cookie platter in no time at all!


As you can see from my pics, I got 42 squares from the one pan. I know the squares are small if you cut so many, but honestly, they are pretty rich, so small ones work well. I think larger bars would be overwhelming to eat because they are so much thicker than cookies. But that's just a suggestion.


Peanut M&M Cookie Bars

Ingredients
  • 2 sticks of butter, softened
  • 1/2 C sugar
  • 1/2 C brown sugar, packed
  • 1 egg
  • 2 tsp vanilla
  • 2 C flour
  • 1/2 tsp baking soda
  • 1/8 tsp salt
  • 3/4 C pecans, chopped small (but not fine) -- optional
  • 1-12.6 oz bag Peanut M&M's in Christmas colors (or holiday colors of your choice)

Directions
  1. Preheat oven to 350
  2. Coat a 9x13" pan with cooking spray (optional: line pan with aluminum first for ease of lifting out bars)
  3. Cream softened butter and sugars until fluffy
  4. Add in egg, salt and vanilla and mix until combined
  5. Add in flour and baking soda, and mix until just combined
  6. Add in pecans and peanut M&M's, and stir until combined evenly
  7. Press batter evenly and gently into pan
  8. Bake at 350F for 30-35 minutes, until golden
  9. Cool completely, cut into squares (can lift out of pan after 10 minutes if you lined pan with aluminum)

Lamingtons


These are amazing! Lamingtons, they are called, and they are squares of plain sponge sandwiched together with raspberry jam, covered in chocolate and dipped in DESSICATED COCONUT. I mean how much more could you ask for??

Lamingtons were invented in Australia and I have never seen or heard of them before I came across them in Edd Kimber's very useful book Say It With Cake. I cooed over them yesterday with my mother, who has borrowed the book because she has to make 50 "finger food puddings" ?? WTF? for a Distressed Gentlefolk's Memorial Fundraising Curry Buffet (or something) and needed ideas, stat.

Anyway, I left the book with my mother but this afternoon on a whim, thought I would make them.

They are quite straightforward and I made them reasonably successfully with absolutely no recipe at all, having not photocopied Kimber's recipe before I handed over the book to mumsie.

There are proper recipes you can get for these, Edd Kimber has one in his book, obviously, and Dan Lepard has one on the Guardian website, which I will not reprint here because he once got in touch with one of my readers (who has her own cooking blog - who doesn't?) and asked her to take down a recipe of his that she had reprinted there. And the Lord knows I've got enough trouble without being sat on by Dan Lepard and his beard.

So this is my recipe, but it really is MY recipe, literally made up - it is entirely inauthentic so please don't all start telling me that these are not real Lamingtons because I don't really care and they worked for me.

For the sponge
110g butter
110g sugar
110g self-raising flour
2 eggs

For the chocolate dip
75g milk cooking chocolate
75g dark cooking chocolate
I used Menier cooking chocolate from Waitrose

200g bag dessicated coconut

Some raspberry jam, not much - probably 3 tbs in total

Preheat your oven to 170C, grease and line a small shallow baking sheet - mine was about 30cm by 23 cm. If you don't have one you could use a square cake tin with a loose base.

You may have your own way of making a basic sponge mix, in which case do that. I do this:

1 cut up the butter and put it in a bowl with the sugar. Stick this in your preheating oven for 2 minutes then cream together (snore... so boring) however you usually do this. I do it with a hand whisk.

2 Now whisk in the eggs, one at a time.

3 Now fold in the flour with a metal spoon until it has all mixed in; turn out into your tin/baking sheet and smooth the top as best you can, although it will even itself out in the oven so don't worry too much about it being perfect.

4 Bake for 10 minutes then take out and leave to cool.

5 Break up the chocolate and put it in a heatproof bowl over a pan of water and put it on your smallest burner turned to the lowest heat and let it sit there and melt for 20 minutes. Once it has melted, set it aside to cool for a bit.

6 Now turn your flat sponge out onto a board and peel off the greaseproof paper. Cut with a sharp knife into even squares the best way you can see how. I didn't want mine to be especially big and once they are covered in chocolate and then coconut they seem even bigger, so don't be afraid to make them quite dainty, like about 3cm x 3cm.

7 Make little square sponge sandwiches by spreading some jam on one square and topping it with another sponge square. Then you assemble the lamington by dipping it all over in chocolate, then pressing into dessicated coconut and then leaving on a cooling rack to dry.

You can do this the best way you can see how - if there's one thing I know for sure, it's that my readers are far more ingenious at working out how to do these things than I am - but if I have one suggestion, it is not to tip all your coconut out onto a plate at once.

Dipping the squares in chocolate is a terrifically messy busines and what you don't want is to spread chocolate all over your entire plateful of coconut because what you want is the brilliant white of the coconut against the dark brown of the chocolate - not brown-flecked coconut against brown chocolate.

Wipe your plate of chocolate smears inbetween dipping sessions if neccessary.

For each lamington, shake out some coconut onto a plate, and then turn and shake, turn and shake, until it is covered, then remove to a cooling rack.

Then stuff them ALL in your face, growling and drooling like Fantastic Mr Fox.

I don't know why my photos are coming out so blue at the moment

Wednesday, 6 March 2013

Chocolate Peppermint M&M Bars (Easy Things to Do with Cake Mix #4)


Better late than never! This is a Christmas recipe, three months late. Which means, in fact, that I am getting worse, because my Thanksgiving recipes were only two months late. Oh well.

Incidentally, I think I'm going to change the tagline of my blog to: "Good food...crappy pictures." Seriously. I have no sense of artistry. I snap my pics on my iPhone, in my garish kitchen light, on a messy counter, on a paper plate. If there are Seven Deadly Sins of Food Photography, I commit them all. Simultaneously.

But, don't let my lack of artistic flair deter you from making these bars, because they are super quick and yummy. And like Thanksgiving, with my new kiddo, quick and easy was the name of the game this year.


I didn't intend to make these bars. In fact, I was at a loss for what to make this year for Christmas. Normally, my mom and I make scads and scads of Christmas cookies, but this year, I knew it wouldn't happen. Frankly, I was an overwhelmed FTM, and I was lucky to make it to the shower every day, let alone coordinate the 15+ varieties (no exaggeration) of cookies and cake balls this year.

But then I saw these babies at Target:


White chocolate peppermint M&Ms. Apparently they were a Target exclusive. So I snatched up a bag for baking without a clear idea of what I wanted to do with them. But then I decided to make bars -- they're easier than cookies because it involves one pan and one trip to the oven. And for these bars, I wanted to try something a little different, so I used Devil's Food cake mix as the base. Super easy!

Just combine cake mix, oil, an egg and water in a bowl and mix to combine (by hand is fine, I used a wooden spoon).


Then, add the mix-in, which in this case was the entire bag of M&Ms:

Note: the oil makes the batter, well, oily. The M&Ms get coated with oil and almost fall out of the batter as you mix. Don't worry, it will bake up just fine.
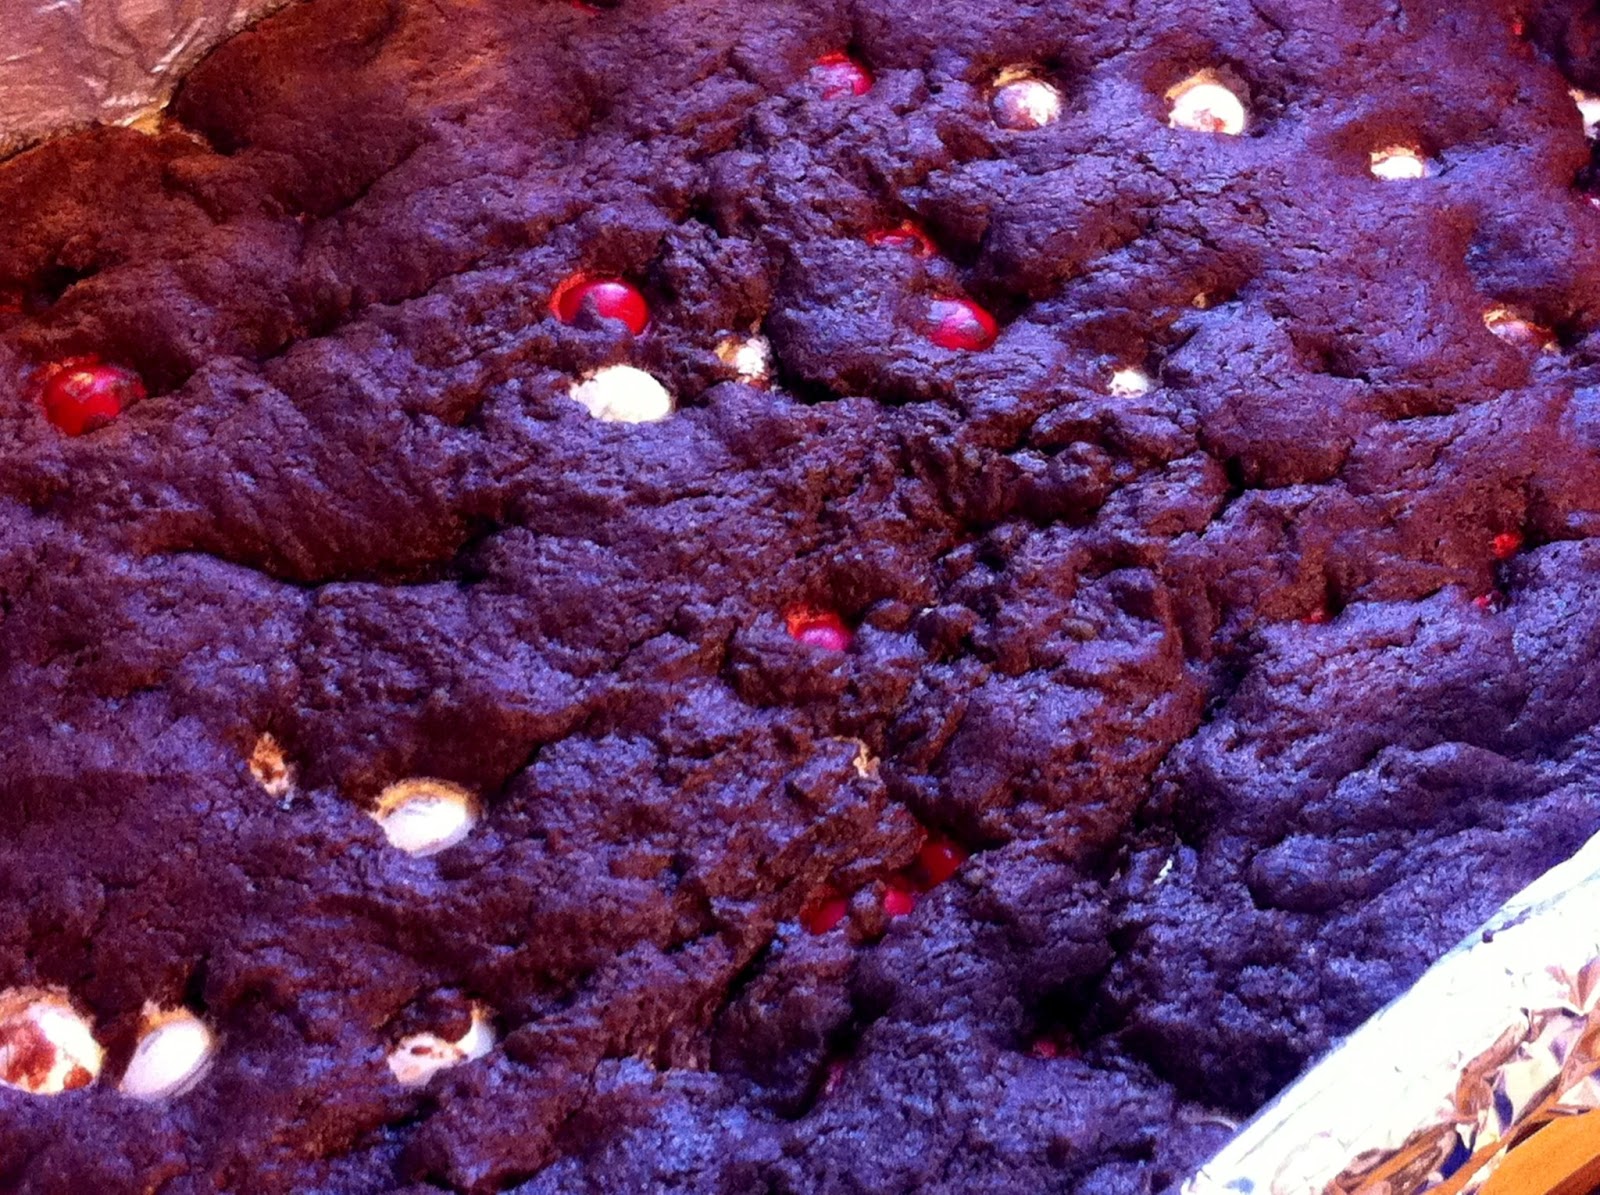
Then, spread it in a pan, bake, cool, and cut!


I managed to have the entire thing done before my little helper woke up!

Color-coordinated with Mommy's baking!
My family loved these things, they were quite tasty, and the bar consistency was perfect. Huge return on taste for a minimal time investment -- just the way I like it! The beauty is, you can use the basic cake mix recipe for any combo of batter and mix-ins! Next year, I think I will try white cake mix with these M&Ms, which should look stunning, visually. I'm also going to try a flavor variation for Easter which, based on my current posting schedule, probably won't make it onto the blog until Halloween. Oh well. Happy baking!

Chocolate Peppermint M&M Bars

Ingredients

  • 1 box chocolate cake mix (Devil's Food, Chocolate Fudge, etc)
  • 1/2 cup vegetable oil
  • 1/4 cup water
  • 1 egg
  • 1 bag of white chocolate peppermint M&Ms (or mix-on of your choice)
Directions
  1. Preheat oven to 350F
  2. Spray  9x13" pan with cooking spray (optional: line pan with aluminum foil before spraying, for easy lifting of bars from pan)
  3. Combine cake mix, egg, oil and water in bowl and mix well
  4. Add mix-ins
  5. Spread evenly in pan (you may have to press down a little to spread evenly) and bake for 20-25 minutes
  6. Cool and cut


Monday, 4 March 2013

Impossibly Easy Pumpkin Pie


I'm continuing to (slowly) slosh my way through a backlog of posts, and this is one that I have been meaning to get up on the blog for months.

Now, I love me some pumpkin, but oddly enough, I've never posted my go-to classic pumpkin pie recipe. And today is still not that day, unfortunately. But instead, I have another variation of pumpkin pie to post -- the "Impossibly Easy" kind.

Why? I'm glad you asked. Necessity. I needed a quick pumpkin pie recipe using the ingredients I already had on hand in my pantry, which did not include pie crust, or butter or shortening, which precluded me from making a from-scratch crust (also working against me was the time factor). But, what I did have on hand was Bisquick.


Ah Bisquick. Can we take a minute to talk about Bisquick? You'd love to? Great!

Bisquick, in a nutshell, is a pre-mixed baking blend that includes flour, a leavening agent, and a fat source. The brandname stuff uses baking powder, hydrogenated oil and salt, but you can actually make your own using one cup of flour, 1½ teaspoons of baking powder, ½ teaspoon of salt, and 1 tablespoon of oil or melted butter. And according to Betty Crocker, it can be used in pretty much any baked good from pancakes to sausage balls. I've had both of those, although I haven't tried the myriad of other Bisquick recipes. And they're good...especially the sausage balls. But that's for another day.

Back to the Impossibly Easy Pumpkin Pie.

The premise is this: impossibly easy because you mix every ingredient together in one bowl, then dump it into a pie plate and bake it. While baking, the Bisquick sinks through the custard and forms a crust (of sorts) on the bottom all on its own, and voila! A pie so easy that it is ridiculous (although I'm not sure about the "impossible"). By the by, this pie used to be called "Impossibly Pie," not "Impossibly Easy Pie" when it was first introduced in 1978. The original flavor was coconut custard, and I'm assuming the name was a reference to the surprising way the Bisquick settles into a crust. I'd love to be able to tell you why Bisquick does this (and I did try to find out) but I could not find a definitive answer. I'm assuming the Bisquick sinks because the flour granules are coated in fat...but don't quote me! Somewhere along the way, "Impossible" was remarketed as "Impossibly Easy," probably to emphasize the, you know, ease of it all. The recipes were expanded to include a number of different sweet and savory pies, including pumpkin.

Now, I have to admit that I didn't follow Betty's custard recipe here. It was enough for me to know that the Bisquick would sink through the custard, so I used my own custard recipe, and just added Bisquick. 

The recipe is just as easy as it sounds: mix,

and bake.


It is hard to see in the pictures, but it really does form a crust, albeit a thin one:


Since my custard was thicker that the original recipe, I toyed with the idea of adding more Bisquick, but I decided against it. I'm not sure if it would all have settled out, and I didn't want to take the chance.

The filling really is the star here, and that's just fine with me, although part of me missed a traditional crust. I don't think this would replace my go-to traditional pumpkin pie recipe (although the custard recipe I modified for this is almost exactly what I use in my go-to recipe). But for what it is -- an easy, quick pumpkin pie with minimal ingredients, it can't be beat!


Impossibly Easy Pumpkin Pie

Ingredients

  • 3/4 C brown sugar
  • 1 can (15 oz) puree pumpkin (NOT pumpkin pie filling)
  • 1 can (12 oz) evaporated milk (low-fat is fine, if you wish)
  • 2 eggs
  • 1/2 tsp salt
  • 1 tsp vanilla
  • 1/2 C bisquick
  • 2 tsp cinnamon
  • 1 tsp ginger
  • 1/2 tsp nutmeg
  • 1/4 tsp allspice (or cloves, if you prefer)
Directions
  1. Preheat oven to 425F
  2. Grease (cooking spray is fine) a 9" pie plate -- I used glass
  3. Combine all ingredients in a bowl and mix until combined. Pour into pie plate
  4. Bake at 425F for 10 minutes, then lower the oven temp to 350F (without opening oven), and continue to bake for an additional 40-50 minutes, until center is set and dies not jiggle.
  5. Cool on wire rack.