Showing posts with label strawberry. Show all posts

Thursday, 16 August 2012

Strawberry Rhubarb Oat Bars


I've had an unintentionally long hiatus from posting recipes. That is a combination of moving, working two jobs, and being pregnant. The frustrating this is  it's not so much finding the time to cook or bake (although I'm not doing either as often as I would like) as it is finding the time to organize and post a well thought-out entry. But I finally sat down today to write the first of about 30 some-odd entries that I have had back-logged and in the posting queue since last summer, so I'm posting these out of chronological order, but according to the season we are currently in, if that makes sense. I have about 6 baking entries that I consider "summer themed' so I am going to try to bang out as many of those posts as I can before the end of August.

I also have a huge number of backlogged cooking posts from the farm share I had last summer, which I suppose are "summer themed" as well, but I'd rather get the baking ones out of the way first, since I tend to be more enthusiastic about my baking than about my cooking.

Strawberry and rhubarb is one of my favorite summer flavor combinations, and this is not the first strawberry-rhubarb dessert I've posted on this blog, but it might just be my favorite. This particular recipe is a relatively simple bar recipe which I modified from a post on landolakes.com (don't ask how I ended up there browsing, I can't remember for the life of me!)

You start with the filling, which is made up primarily of sliced rhubarb and sliced strawberries.


Cook the fruit over medium heat with a little lemon juice until the fruit breaks down into a preserve of jam consistency. 

The original recipe said this would take about 8-12 minutes, but if I recall correctly, it took me about 20.

Then you add in sugar and cornstarch and bring it back up to a bubble, give it a chance to thicken, and set it aside.

While the fruit is cooling, start on the crust by combining oats, butter, brown sugar and flour in a bowl.

Pat about half of it into the bottom of a 9x13" pan.

Spread the fruit over the bottom crust (fruit does not have to cool completely, however long it takes you to make the crust and preheat the oven is good enough), and then sprinkle the reserve crust on the top evenly.

Bake at 350F for 30-35 minutes, until the top is a nice golden brown.

Cool completely before cutting and serving.

These bars were delicious, and a big hit when I brought them into work. They are sweet, tart, transport well, and don't have to be refrigerated. 
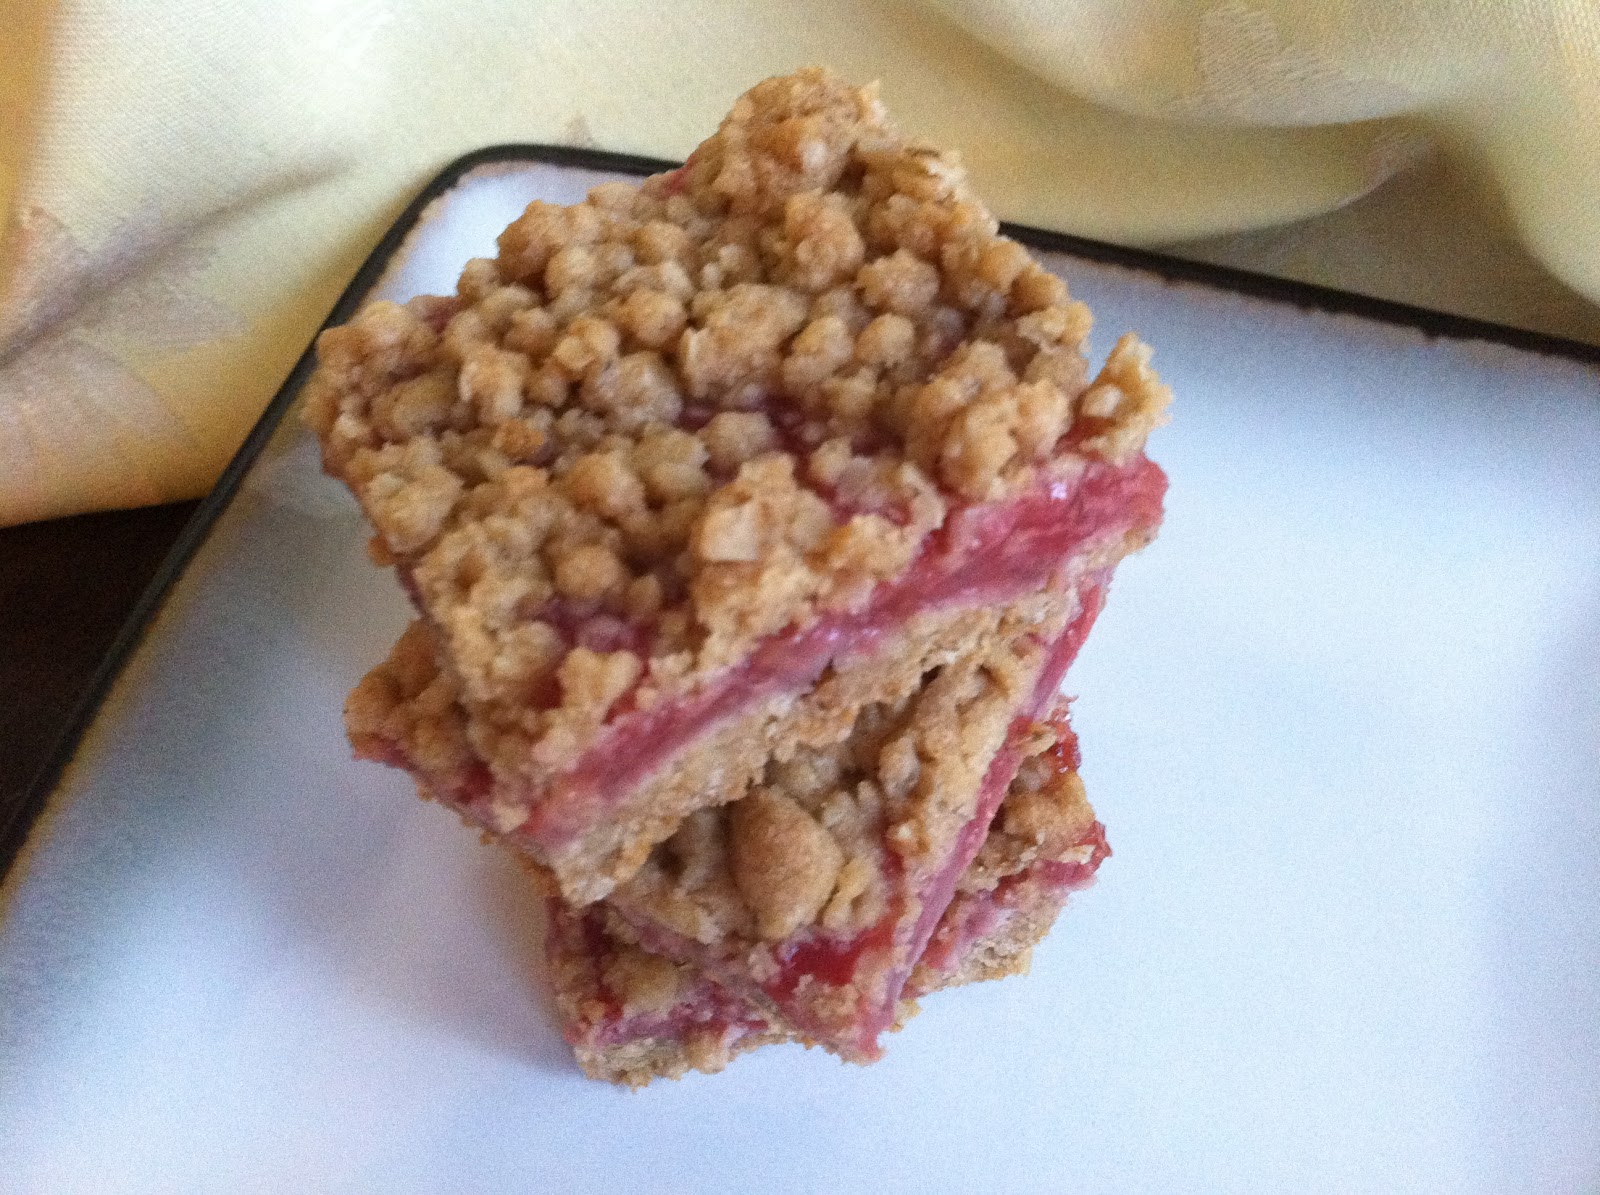
All in all, they are a great choice for a summertime treat, especially if you need a take-along dessert!!


Strawberry Rhubarb Oat Bars

Ingredients

Filling
  • 1 1/2 cups fresh or frozen unsweetened rhubarb, cut into 1-inch pieces
  • 2 1/2 cups sliced fresh strawberries
  • 1 tablespoon lemon juice
  • 1/2 cup sugar
  • 2 tablespoons cornstarch


Crust
  • 1 1/2 cups all-purpose flour
  • 1 1/2 cups uncooked quick-cooking oats
  • 1 cup firmly packed brown sugar
  • 3/4 cup butter softened
  • 1/2 teaspoon baking soda
  • 1/4 teaspoon salt


 Directions
  1. Combine rhubarb, strawberries and lemon juice in 2-quart saucepan. Cover; cook over medium heat, stirring occasionally, until fruit is tender (8 to 12 minutes). Basically the consistency of preserves, if not full-on jam.
  2.  Combine 1/2 cup sugar and cornstarch in small bowl. Stir into fruit mixture. Continue cooking, stirring constantly, until mixture comes to a boil (about 1 minute). Continue boiling until thickened (1 minute). Remove from heat. Set aside. 
  3.  Heat oven to 350°F. Combine all crust ingredients in large bowl. Beat at low speed, scraping bowl often, until mixture resembles coarse crumbs. Reserve 1 1/2 cups crumb mixture. Press remaining crumb mixture onto bottom of greased 13x9-inch baking pan. Spread filling over crust. Sprinkle with reserved crumb mixture.
  4.  Bake for 30 to 35 minutes or until golden brown. Cool completely. 

Wednesday, 9 June 2010

Celebrating National Strawberry Rhubarb Pie Day


Today, June 9th, is a notable day in history. Let's look back over the years. In 1822, Charles Graham received the very first patent for false teeth. In 1902, the very first Automat opened in Philadelphia, making today the actual birthday of modern fast food. Additionally, Donald Duck (the only classic Disney character I like) made his first appearance on this very date in 1934. But most importantly, today is National Strawberry Rhubarb Pie Day! In celebration, I present to you: Strawberry Rhubarb Pie!


Now, what exactly is rhubarb? From a strictly botanical standpoint, it is a vegetable. However, in the US it is legally a fruit, thanks to a decision by a NY court in 1947. In case you wonder why our legal system would bother getting involved in this botanical boondoggle, it was largely done for tax purposes -- tomatoes also went to court, in 1893, and were judged erroneously to be vegetables. Rhubarb has been used for medicinal purposes in Asia for millenia, which is counter-intuitive when you realize that rhubarb leaves contain oxalic acid and are in fact nephrotoxic (i.e. toxic to the kidneys). But rest easy, you'd have to consume about 5 kg of the leaves (which apparently taste horribly sour) to damage your kidneys. None of this matters, of course, because rhubarb stalks are the bits used in rhubarb-containing foods. Making good eats from rhubarb stalks dates back to 17th century England, coinciding with the time when sugar became more affordable and available to the general populace. And then, voila! Rhubarb-and-fruit jams, pies, crumbles, and sauces!

Rhubarb season in the Northeast US is pretty short, from April-May and fresh rhubarb is preferable when available. However, many grocery stores also carry frozen rhubarb, which will do nicely as well. I've read differing opinions on whether the rhubarb should be thawed first and patted dry of excess moisture, or whether it should just be dumped in the pie and cooking time extended. Not having tried this pie with frozen rhubarb, I'm not sure which is method is better for frozen rhubarb, but I have a feeling that either will work as long as you watch your pie to make sure the filling is bubbling and the crust edge isn't overly brown (use a shield or aluminum foil around the edge if necessary). If you choose to fully thaw rhubarb, however, definitely drain it or blot it before using. If you don't thaw first, I would toss the rhubarb (and strawberries) with the flour and cornstarch before doing anything else. To keep the bottom crust from getting soggy, these are 3 good options that should work, your preference: 1) bake the pie on the bottom rack; 2) pre-bake the bottom crust for about 10 minutes at 425F (with weights and an edge shield); 3) spread about 1/2 to 1 tbls of flour on the bottom of the bottom crust before adding the filling.

This pie is presented 2 ways: one version has egg beaten into it, which results in a slightly custardy and delicious pie; while the other leaves out the egg. I prefer the egg beaten in, but they are both delicious. I include both ways because I made the egg-less pie first, and then I tried the pie with egg in the filling. The remainder of the ingredients are the same (except for 1 additional tbls of cornstarch in the egg-less pie), and cooking times/temps are the same for both.

Here is the pie with the custardy filling, dotted with butter

Ingredients

  • Enough dough for a 2-crust pie. Ready-made or your favorite recipe (mine is here, courtesy of Alton)
  • 2 1/2 C sliced rhubarb 
  • 2 1/2 C sliced strawberries
  • 1 1/2 C sugar
  • 2 eggs (optional)
  • 2 tbls flour
  • 1-2 tbls cornstarch (2 if you omit eggs)
  • pinch of salt
  • 1/2 tsp ground cinnamon
  • 1 tsp vanilla
  • ~3-4 tbls cubed butter
  • 1 egg white + 1 tsp water, beaten
  • Additional sugar for sprinking
Directions
  1. Decide whether you want to pre-treat the bottom crust (see above)
  2. Pre-heat the oven to 425F
  3. If using egg, beat 2 eggs and the sugar until fluffy (I used a whisk). Combine in the flour, cornstarch, cinnamon and vanilla with the sugar mixture (or just the sugar if you don't want to use egg). Mix in the fruit and toss to coat. 
  4. Pour the filling into the bottom crust, and dot on the butter. Brush pie edge with egg wash.
  5. Cover with the top crust, crimping to seal. Brush egg was over the top crust and sprinkle with sugar.
  6. Collar pie with foil or shield, and bake for 15 minutes at 425F
  7. Without opening the door, lower the oven temp to 375F and bake for an additional 45 minutes or so, until the filling is bubbling and the crust is golden.
  8. Let the filling cool before serving. It needs time to thicken up a bit. 
  9. Slice and serve!

On left: true lattice pie without egg; on right: Lattice cut pie with egg

In addition to the 2 slightly different recipes, I also prepared the top crust differently. For the egg-less pie, I actually weaved a lattice crust, and for the other pie, I used one of those lattice crust cutters. The directions say to roll the dough over the cutter, but of course I tried to press it down into the dough like a cookie cutter and it didn't quite work right. I think if I use it as instructed, it'll be easier. I like weaving the lattice myself, but a fair amount of the filling leaked out. The lattice stencil was a bit of a pain, but seemed to hold the filling in better. Of course, that could also be due to differences in filling consistencies because of the egg.

That isn't crust in the center of the lattice holes, it is a little of the souffle-like filling from the egg

All in all, I highly recommend either version of this pie, especially in rhubarb season. I'm not sure just why strawberry and rhubarb complement each other so well, but yumminess is definitely the result.

Tuesday, 25 May 2010

Berry Buttermilk Cake


A slice of Strawberry Buttermilk cake!  


It's quick, it's easy, it uses up extra berries -- the Berry Buttermilk Cake! This is a great, light, fruit-based recipe for summer! I found it originally on Epicurious, paired with raspberries. You could use any type of berry however, and I made one version with sliced strawberries, and one with raspberries. Any berry would work here, including blackberries, blueberries, and (pitted) cherries.


Quick note about ingredients: you don't have to go out and buy buttermilk just for this recipe (or any recipe for that matter). I sure didn't. In order to make buttermilk, you just add 1 tbls of lemon juice or white vinegar to 1 C of milk, and let it clabber for about 10 minutes, until it thickens. Conveniently enough, this recipe already calls for lemon zest, so you can zest a lemon, squeeze it, and then add 1/2 tbls of the juice to 1/2 C milk to get the 1/2 C of buttermilk the recipe calls for. I even used 2% milk because it was all I had in the fridge, and it worked great!

Raspberry cake before baking

The ingredients list looks long, but it really isn't. This cake comes together fast, and bakes even faster. And then you get this:

Yum!


Strawberry...

or Raspberry~
Ingredients
  • 1 C AP flour
  • 1/2 stick unsalted butter, softened
  • 2/3 C sugar
  • 1 egg
  • 1/2 tsp baking powder
  • 1/2 tsp baking soda
  • pinch of salt
  • 1 tsp vanilla extract (if you are making a cherry cake, almond extract might work better)
  • 1/2 tsp lemon zest 
  • 1/4 tsp cinnamon (optional, best with blueberries or strawberries)
  • 1/2 C buttermilk (see above)
  • 1 C berries
  • additional sugar for sprinkling
Directions
  1. Zest your lemon. Squeeze the juice if you are making you own buttermilk, and clabber the milk (above)
  2. Preheat oven to 400F
  3. Butter and flour a 9" round pan
  4. Combine dry ingredients (flour, baking powder and soda, salt, and cinnamon) in a bowl and set aside
  5. Cream butter and sugar until light and fluffy, then add in vanilla and zest, then the egg
  6. Add flour in 3 batches, alternating with buttermilk (starting and ending with flour). Mix until just combined each time
  7. Pour batter into cake pan, smoothing out top if necessary
  8. Scatter berries over top (I ended up using a little less than a cup of strawberries, but about a cup of raspberries),and sprinkle with sugar (about 1 1/2-2 tsp)
  9. Bake for 20-25 minutes, until cake is golden and toothpick inserted comes out clean
  10. Cool in pan 10 minutes, then depan and cool completely. Invert onto a plate.
  11. Pair with whipped cream or Cool Whip and enjoy!
This cake is delicious. Moist, light, only slightly sweet, and pairs wonderfully with whipped cream or Cool Whip. In fact, both berry versions of this cake tasted even better the next day, when the flavors had a chance to meld a bit more. I could definitely taste the lemon zest more in the raspberry cake, presumably because I made that cake without cinnamon, and it was a wonderful pairing. I can't wait to try it with blueberries. This recipe is definitely a great go-to cake, light and refreshing. I got raves when I brought it into the office (both times). It disappeared before 9am.

Raspberry with a hint of lemon! Delicious!

I have a mind to double this recipe and make one cake with strawberries, and one with bananas, and then assemble the whole thing with whipped cream as a layer cake.

Tuesday, 30 March 2010

Thumbprint Cookies (Strawberry Rhubarb and Raspberry)

Last month, my cousin Jennifer brought cookies to my house, delightful little thumbprint cookies. They were perfect, with their jeweled colors and melt-in-your-mouth buttery goodness. But do you know what made them extraordinary? My husband loved them. My husband, who is indifferent to almost all baked goods known to man, not only ate them, but pronounced them his favorite cookie of all time.

Well.

That was that, as they say. I've never had any desire to make fruit thumbprints before (I inevitably lean towards cookies filled with chocolate etc), but I immediately requested the recipe from my cousin, so I could take a look at it. A little searching turned up the fact that this recipe originally came from the book Williams-Sonoma Collection: Cookies, under the moniker of "Ruby Jewels."


The recipe itself is very simple to put together, with one brief spell in the refrigerator. The cookie dough is close to a basic shortbread dough, meaning that it has a 1:2:3 ratio of sugar to butter to flour and no leavening agent. Incidentally shortbread gets its name from one of the original meanings of the word "short" -- crumbly. To "shorten" literally used to mean to make something crumbly, which is why we now call any fat that can be used to make a crumbly texture "shortening." Shortcake (as in strawberry, etc) is almost exactly like shortbread, except with a leavening agent, and potentially with vegetable shortening replacing some or all of the butter.

A brief word about jam choices. My cousin made these cookies with Smucker's Seedless Red Raspberry jam. I used the same, but I also wanted to try some different flavors. I really had my heart set on strawberry rhubarb, because I love strawberry rhubarb pie in the summer, but the rhubarb season is so darn short. When I tasted my cousin's cookies for the first time, I thought how perfect it would be to capture that flavor in a cookie that could be enjoyed all year round. There are several recipes out there for homemade strawberry rhubarb jam, but I admit, I was intimidated. Luckily, I found what I was looking for in the mall of all places, at Harry and David's. They carry a strawberry rhubarb conserve which is available all year. It has chunks of fruit in it, but they can be reduced with a few seconds in the food processor if you want (or you can do what I did and just scoop the jam out from between the fruit bits). If you have a store in your local mall, check them out. Besides the strawberry rhubarb, there were a few other jam varieties in there that I had my eye on for future cookie-making, including: bing cherry, marionberry, blackberry, and blueberry. There are also some lovely apple and pumpkin butters that might be good for the autumn, I'll be looking into those in a few months.

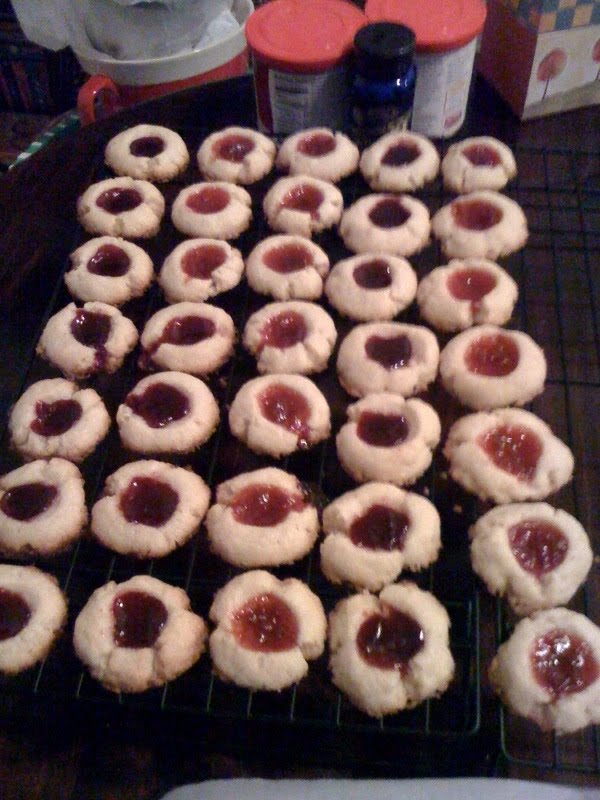
I only took one picture, of the finished cookie, but believe me, they are easy. I used a spoon instead of my thumb to make the indentations because I found that this way produces a well with higher walls, and I lose less filling during baking.

The dark filling is raspberry, the lighter one is strawberry rhubarb.

 Ingredients
1 C cold sweet butter, cut into pieces
2/3 C granulated sugar
2 1/4 C AP flour
2 egg yolks
1 tsp vanilla
fruit jam 

Directions
 * This recipe can be made entirely in a food processor, or with a stand mixer and paddle. I used the mixer because I didn't feel like cleaning my food processor. They came out great, so don't worry if you don't have a processor.*
  1. Preheat oven to 350°F
  2. In a small bowl, whisk the egg yolks and vanilla together, set aside.
  3. Combine the flour and granulated sugar in a mixer with the paddle attachment or in a food processor/mixer and process just to blend. For Mixer: Sprinkle the butter onto the flour/sugar mixture and mix on medium until the mixture looks crumbly, this won't take long. Add in the egg mixture and mix until the dough pulls away from the side of the bowl. For Processor: With the machine running, add the butter 2-3 pieces at a time and process until the mixture looks crumbly. With the machine still running, add the egg yolk mixture and process until blended and the dough begins to pull away from the sides of the bowl.
  4. Refrigerate until chilled, about 30 minutes. I leave it in the bowl and cover the top with saran wrap.
  5. Line cookie sheets with parchment paper.
  6. Using a #60 scoop, scoop out dough and roll it into a ball with your hands. Place dough balls on the sheet.
  7. Flour the back of a 1/2 tsp measuring spoon (you will have to keep reapplying the flour), and push the back of the spoon into the cookie until the dough is pushed up even with the rim of the spoon. Be careful not to push all the way through. The cookies will crack a little bit, which isn't tragic as long as the walls of the imprint are intact -- otherwise the filling will run out while baking. If they crack too much, repair as best you can, or re-roll the cookie and try again.
  8. Using a spoon or a pastry bag fitted with a plain tip, fill each indentation with about ¼ teaspoon jam.
  9. Bake the cookies until the edges are golden, 15-20 minutes.
  10. Let the cookies cool completely before transferring the cooled cookies to wire racks.
I had the fleeting thought that a dab of peanut butter underneath the jam would be perfection. My husband insists that this is over the top, but I think I will try it anyway...

    Tuesday, 28 April 2009

    Neopolitan Cheesecake (Daring Bakers' Challenge, April '09)

    Dispensing with the obligatory: The April 2009 challenge is hosted by Jenny from Jenny Bakes. She has chosen Abbey's Infamous Cheesecake as the challenge.


    This month's Daring Baker's challenge was cheesecake, and I know I say this about every challenge, but this one really excited me. I have made cheesecake countless times, but most of the time I stick with the tried-and-true basic cheesecake with a graham cracker crust (or occasionally a bittersweet chocolate cheesecake). Yummy to be sure, but I have been wanting to branch out for a while now. My mind was a-whirl of possibilities that I had spied over the years: pumpkin cheesecake, caramel turtle cheesecake, cookies-and-cream cheesecake, the possibilities are endless! I can truly say the most difficult part of this challenge was limiting myself to just one cheesecake. And that took a lot of deciding, because I wanted something rich and yet light, appropriate for spring.


    And I found my inspiration in a Starbucks, of all places, where my fiance and I went to grab some coffee one afternoon. He happily ordered a slice of neopolitan cheesecake (of which I took a bite), and as I enjoyed the yummy mingling of chocolate, strawberry and vanilla, I thought to myself: this is the one. Rich, yet with enough lightness from the strawberry and vanilla layers to make it appropriate for warmer weather, I decided this would be the cake.

    And now for a brief historical interlude: Neopolitan as we now know it, the mixing of strawberry, chocolate, and vanilla ice cream, is descended from spumoni, a traditionally cherry, chocolate and pistachio ice cream block originating in Naples. In the mid-19th century, this tri-flavored ice cream spead across Europe and came to North America, where it was christened "Neopolitan" by the Italian immigrants who brought their considerable ice cream making skills to this country, as a reflection of their origins. Strawberry, chocolate and vanilla became the flavors of Neopolitan ice cream in the U.S. since these were the most popular flavors at the time.

    Once I had decided on the delectable combination of chocolate, vanilla, and strawberry, I had to make a very important decision: should the chocolate layer be chocolate cheesecake, or made out of something else? I made a command decision: brownie bottom! This way, I would only have to fool with splitting the cheesecake batter 2 ways, plus, hey, brownies!

    Ingredients/Equipment


    • Springform pan (I used 9")

    For Brownie base:


    • 8'' X 8" brownie mix (I chose one without chips, but I think I will add chips next time
    • Ingredients to make brownie mix according to box (some combination of eggs, oil and water)

    For cheesecake:


    • 3 cream cheeses, softened
    • 3 eggs
    • 1 C sugar
    • 8 oz sour cream
    • 2 tsp vanilla extract
    • 1/2 vanilla bean (vanilla layer)
    • 1/2 C mashed strawberries, drained (strawberry layer)
    • 2 tbls flour (strawberry layer)
    Directions

    1. Butter or spray springform pan. Preheat oven to 350 F. Prepare brownie mix according to package.

    2. Bake 30-35 minutes (adjust for your size springform) until brownies are set and done. They need to be cooked through.


    3. Let brownies cool ~ 20 minutes. While they are cooling, prepare cheesecake: mix in 1 egg and 1 package of cream cheese at a time, beating until just combined. Beat in sugar, vanilla, sour cream until just combined, do not over-mix.

    4. Split the batter in half. To one half, add the scrapings from half a vanilla bean and mix until combined.


    5. To the other half of the batter, add the strawberries and flour, and mix until combined.

    6. Gently pour the vanilla layer over the brownie layer, and the strawberry layer over the vanilla layer. Bake at 350 F for about 50-55 minutes, until set but center still jiggles slightly (this will depend on your pan size, so watch it, and make sure it doesn't brown too much).


    I know a lot of directions call for a water bath. I have never personally done that, and my cheesecakes usually don't crack, but it really can help with the cooking. You know your own oven best, so if you think you need to, go ahead and use a water bath.


    I was very pleased with the way this recipe turned out. I think the only thing I would change would be to add chips to the brownies. I had originally bought some strawberries for garmish on the top -- I was going to dip them in chocolate and white chocolate and put them around the perimeter of the cake (in my head, this looked fantastic), but I had to abandon my artistic plans when my precious strawberries got chopped up into a fruit salad! I also had dreams of adding decorative swirls of whipped cream around the top edge, but time just did not permit.

    Despite the lack of decoration, however, this recipe is definitely a keeper, and a great option if you can't decide between a rich chocolatey cheesecake and a light fruity one.