Showing posts with label cookies. Show all posts

Friday, 24 August 2012

Lemon Ricotta Cookies


I do love my lemon, and I will not apologize. I like it strong and unabashedly tart, especially in desserts. So I decided to give this recipe by Giada a whirl -- lemon ricotta cookies. Now I've used ricotta cheese in desserts before, but never as part of a cookie batter, so I was anxious to try it out.


These cookies are fairly easy to assemble, just start by zesting and juicing some lemons.

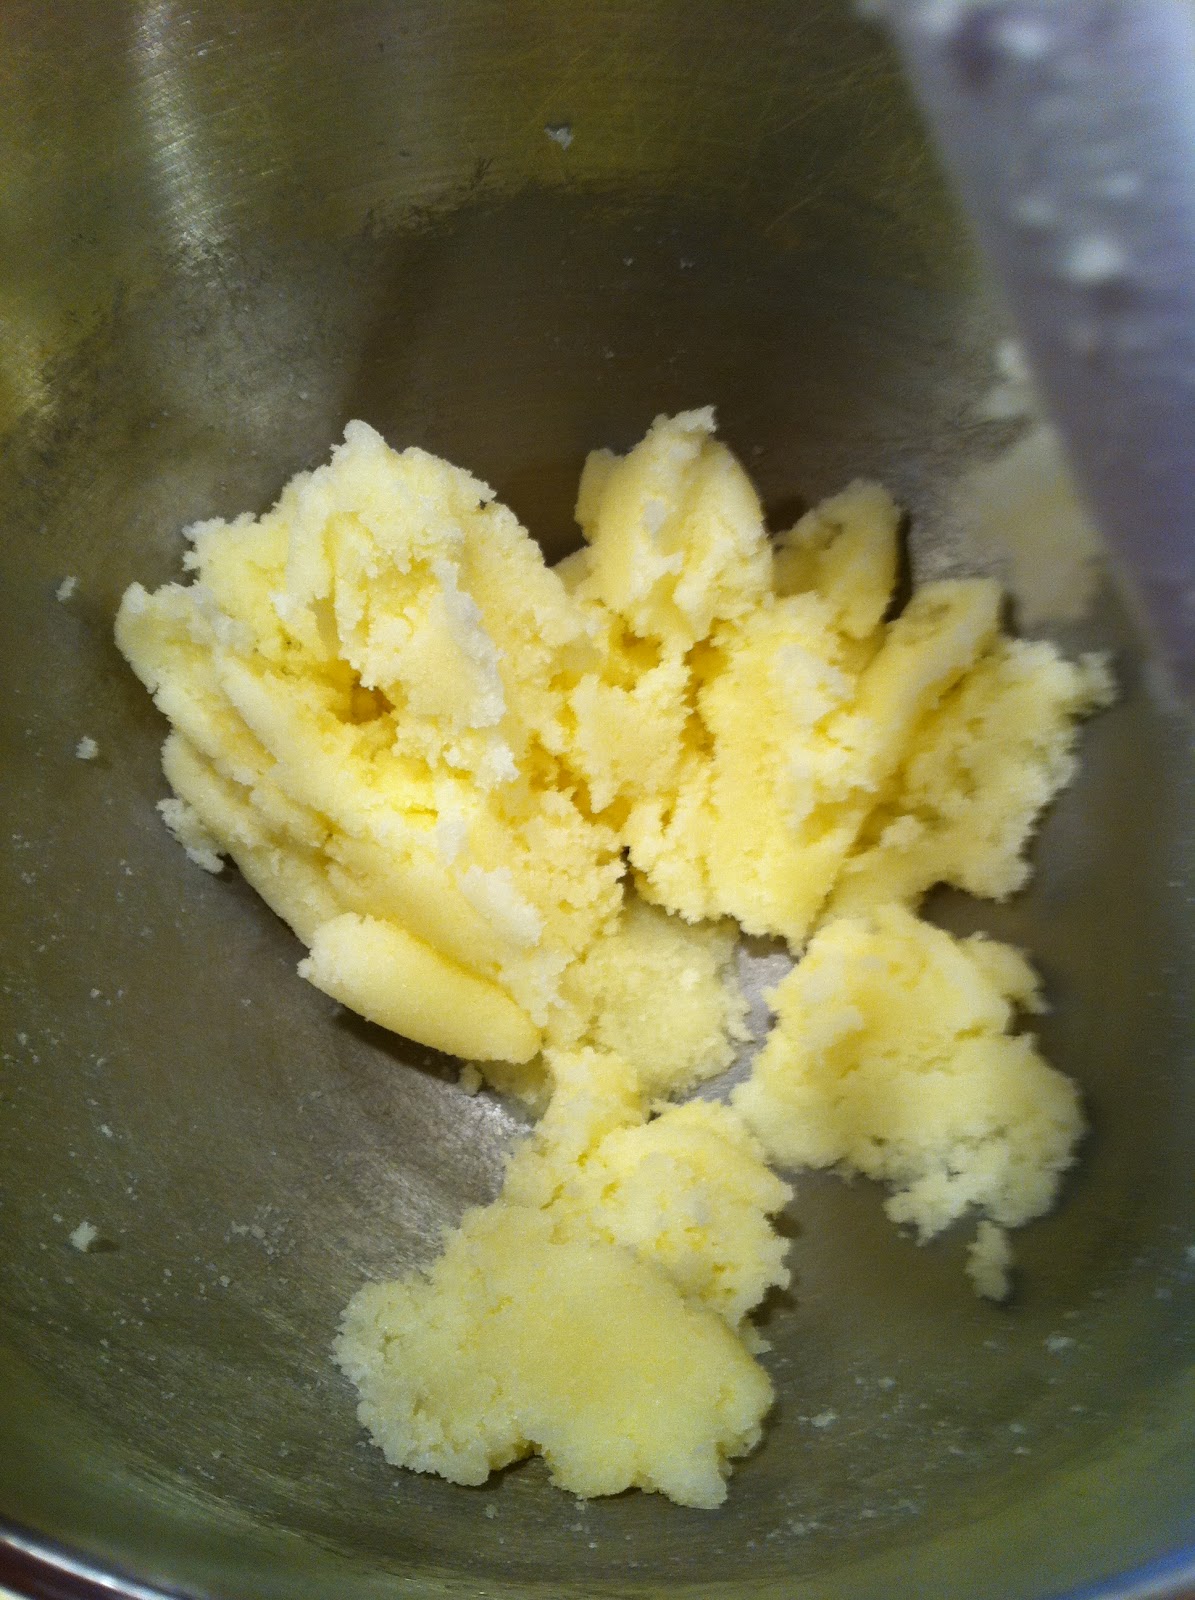
Cream butter and sugar.

Add the eggs, cheese, lemon juice and zest.


Add in the dry ingredients (premix the dry ingredients together in a separate bowl first).


Drop onto a parchment lined cookie sheet with a #40 scoop (or about 2 tbls per cookie)


Bake about 15 minutes but watch them carefully, it is easy to burn the bottoms. When the edges just start to turn golden, they are done. 

Have your glaze (powdered sugar, lemon juice, lemon zest) ready to go. The cookies need to set on the cookie sheet for 20 minutes before they can be moved to a cooling rack, and this is the perfect time to glaze them, while they are still warm (the heat will help you spread the glaze more easily). Spoon on the zest, and use the back of the spoon to gently spread the glaze. Be careful, the cookies are delicate, you don't want to rip the tops.


The glaze needs about 2 hours to fully set before you can think about packaging them. I was very surprised by the texture of these cookies. They were almost pillow-like, soft and chewy, with a great lemon flavor.


You'll notice on the bottom, there are two ingredients that I put a range for rather than an absolute value. The first is the amount of sugar in the cookie batter. Giada's original recipe called for 2 cups, but I (and some other reviewers) thought this was too sweet) used 1.5 cups of sugar instead. I really wanted the lemon flavor to shine through, so I dialed down the sugar. I loved how mine turned out, but I am really picky about lemon-flavored desserts, the cookies might have more general appeal with 2 cups of sugar in the batter, I don't know.

The second range is the amount of zest in the glaze. I have doubled the glaze recipe, because the amount Giada called for was rather small, and the bulk of the lemon strength comes from the glaze so I didn't want to skimp on it. Keeping the proportions the same as Giada's glaze, this glaze recipe should call for the zest of 2 lemons. I liked the zest at this strength, some found her glaze proportions too lemony, so if you just want a nice hint of lemon, use 1 lemon worth of zest in the glaze instead of 2.

Also, for giggles, I tried these cookies with lime juice and zest instead of lemon, and sprinkled some toasted coconut on top. These were also quite good, and in retrospect, toasted coconut would be a fine addition to the lemon version as well. Just make sure to sprinkle the coconut on before the glaze sets, otherwise it won't stick.


All in all, I was quite pleased with how these lemon cookies turned out. I think they are a great choice for a lemon cookie, especially if you want something that tastes a little fancier. These would be a great cookie to serve with afternoon tea!


Lemon Ricotta Cookies


Ingredients

Cookies:
  • 2 1/2 cups all-purpose flour
  • 1 teaspoon baking powder
  • 1 teaspoon salt
  • 1 stick unsalted butter, softened
  • 1.5-2 cups sugar
  • 2 eggs
  • 1 (15-ounce) container whole milk ricotta cheese
  • 3 tablespoons lemon juice
  • 1 lemon, zested

    Glaze:
    • 3 cups powdered sugar
    • 6 tablespoons lemon juice
    • 1 tbls vegetable oil
    • 1-2 lemons, zested
    • toasted coconut (optional)

    Directions
    1. Preheat the oven to 375 degrees F.
    2. In a medium bowl combine the flour, baking powder, and salt. Set aside.
    3. In the large bowl combine the butter and the sugar. Using an electric mixer beat the butter and sugar until light and fluffy, about 3 minutes. 
    4. Add the eggs, 1 at a time, beating until incorporated. 
    5. Add the ricotta cheese, lemon juice, and lemon zest. Beat to combine. 
    6. Stir in the dry ingredients.
    7. Line 2 baking sheets with parchment paper. Spoon the dough (about 2 tablespoons for each cookie or a #40 scoop) onto the baking sheets. 
    8. Bake for about 15 minutes, until slightly golden at the edges. 
    9. Remove from the oven and let the cookies rest on the baking sheet for 20 minutes.
    10. FOR GLAZE: Combine the powdered sugar, lemon juice, and lemon zest in a small bowl and stir until smooth. Spoon about 1/2-teaspoon onto each cookie and use the back of the spoon to gently spread. Sprinkle on toasted coconut if using.
    11. Let the glaze harden for about 2 hours. Pack the cookies into a decorative container.

    Friday, 18 February 2011

    Easy Favor Packaging

    I have now made cookies favors for two different events, both baby showers. The first was for my cousin, where I baked up really cute Mickey Mouse sugar cookies, and packaged them to be consistent with the Disney theme that her mom chose for the shower.


    The second were the Grover Cookies of my previous post, which were for my friend Allie's baby shower.


    Since the process of making these favors was pretty much the same both times, and since it really can be applied to almost any favor that you would like to make, I thought a separate post that just talked about favors and favor packaging might be useful to some people wanting to create tidy-looking favors for an event. The two examples I have listed here are both edible, obviously, but this method of packaging can also be used for non-edible favors, if you like the look.


    The Favors

    Let's start from the beginning: what to make? Cookies are an obvious choice, but candy, cake balls, mini-cakes, muffins, and even cupcakes (depending on the icing) are also potential choices with this type of packaging. Is there a theme, be it colors or characters?

    Whatever you choose, just keep in mind that, depending on the size of the function, you might be in for a lot of work if you choose a favor that is too complicated to make. So put some thought into a few things: 1) How many do you have to make (accounting for a few extras)? 2) How complicated are they to make? 3) Do they need to be decorated, and if so, how long will that take? 4) Can they be made in advance? 5) If so, how feasible is it to store them (i.e. how much room do you have in your freezer)? 6) Are they something that can stay out at room temperature for a considerable length of time post-packaging (at least a day or two)?

    Number 6 is particularly important, because this dictates how far in advance you can package the favors.Something like Oreo Balls would be exceptionally delicious as favors -- buuuuuut they have cream cheese in them and are thus perishable.  So if you want them as favors, you either have to package them the day before and find space in your fridge for all the favors in their packaging, or you have to commit to packaging them just before you leave when it will probably be highly inconvenient to do so. And then, they will be sitting at room temperature for an indeterminate length of time (some people might not eat theirs during the party, or even the same day, for that matter), so you'll have to run around encouraging people to gobble down their favors before they leave the party, lest they get sick later. My best advice, therefore, is to choose something that will freeze well, so that you can bake it in advance. Something that isn't too complicated to decorate, especially if you have a lot to make. And, finally, something that is perfectly stable at room temperature, so that you can package them a day or two in advance, pack them in a travel box, and leave them there until it is time to bring them to the party. It might not be exactly what you pictured in your head when you first start mulling over ideas for favors, but trust me,  this advice will reduce your stress-level by at least ten-fold.

    One of my favorite ways to make favors is to use a stamp cookie cutter -- one of those cookie cutters that comes with a little stamp that leaves a design in the dough. My Micky Mouse cookie cutter for my cousin's shower was a stamp cookie cutter.
    (I apologize in advance for the quality on some of the Mickey Mouse pictures, I don't know what is going on with my phone -- the details on the cookies themselves were clear as bells)


     First you use the outer cutter to cut into the dough:


    Then you use the inner stamp to create a darling little imprint in the dough which will still be visible after baking:


    Some cookie cutter sets also come with texture maps as an alternate way to press a design into the dough.  The great thing about these types of cookies is that the imprint itself is a decoration, so you don't necessarily have an additional step for decorating if you don't want it. For the Mickey Mouse cookies, I left them as-is and packaged them up.


    Alternatively, if you intend to decorate the cookies with royal icing or something like that, your job just got a whole lot easier, because now you have lines to trace and you don't have to freehand it!  A quick Google search will bring up hundreds of options like these. My personal favorites are the Star Wars Cookie Cutters from Williams-Sonoma. They have two sets, Heroes and Villains and Vehicles, and I own (and am in love with) both of them. How cute would those be, all packaged up for a birthday party??

    In the case of the Grover cookies, they were frosted and dipped in sprinkles -- nothing crazy.

    The Grovers weren't from-scratch dough, they were slice-and-bake, and you know what? Everyone just loved them, and thought they were both adorable and delicious. Remember, you're making these out of love for someone, so don't be afraid to make some decisions that ease some of the stress on yourself, too!

    The Labels

    Even though I have Labels and Packaging listed separately, you have to think about them together to some extent, at least for sizing, because they are a pair.  The labels on my favors are folded over the tops of the bags and stapled on. So, the first question is: what size labels do you need to make? And in order to answer that question, you need to know what size bag you want to use.

    For most things you will make, the best cellophane bag size to buy will be 4"x6" -- that should accommodate most things you would make. So, let's use that as an example, with the understanding that you can scale it up if you need a bigger bag.

    Aesthetically, I think a set up where the favor is 1/3 label and 2/3 bag is the most pleasing to the eye. For a 4"x6" bag that is 6" long, this means that you want the label to hang down 2 inches. Since the label will be folded in half horizontally over the top of the bag, figure 4 inches of height in order to get a 2" overhang on either side of the bag. Your bags are also 4" wide, so you will need a template that is 4.25"x4.25" (I always put a little extra on, so that the label extends past the sides of the bag ever so slightly, the last thing you want is a label that is more narrow than the bag).

    PowerPoint is a great option to make the labels in, if you have access to it, because you can freely move around words and text. Open a blank PowerPoint slide (in '07 version) and go to Design -> Page Set Up and select "Custom" in the pull-down menu, while making the Height and Width both 4.25".  Click show ruler, and keep in mind that the horizontal zero is the axis the label will be folded on.

    Now, make one half of the label with a mixture of fonts and pictures. There are plenty of fonts available online to tie into a theme. The font below on the Disney label was Waltograph. Once you have one side made, decide if you want the second half to be exactly the same, or if you want different things on either side. If you are doing the same combo of pics and text on both sides, it is easy to get it over to the other side. Select all of the pics and text on one half of the label, then go to Arrange -> Group together. Then, you can select the entire group, and go to Arrange ->Rotate -> Flip Vertically and  Arrange ->Rotate -> Flip Horizontally.   If you are using different pics (like I did below), you can do this with just the text, and arrange the pictures by hand. You end up with something like this:

     and


    Now, if you select the label, and hit the Shape Outline option, you can outline the labels in a very light grey, this will really help when you are cutting them. Then you can print them out, maybe 4 or 6 to a sheet -- regular paper is fine, but you can also use something more sturdy like card stock or photo paper. Cut them out with scissors or slice them out with a paper slicer, and the labels are all set!

    The Packaging

    I am very concerned with freshness. So I opt to heat seal the favor bags before putting the labels on, using one of these, an impulse heat sealer:

    These things are great! In order to activate the heat, there is a little metal piece under the handle that needs to connect to the screw at the end of the sealer, so it is only hot when you are sealing something. They run about $35-45 depending on the size you get. Mine is an 8" sealer, but if you want it for larger projects, they have sizes up to 16".

    You set the length of exposure with the knob in the front. I have found Level 2 to be perfect for the Wilton 4"x6" cellophane bags, but you might have to play around a bit to find the sweet spot for sealing the bags you bought. Here's how it works:

    • Put the favor in the bag.
    • Set the sealer to the proper level
    • Line up the edges of the bag a bit -- it doesn't have to be perfect, this will be covered by the label anyway. 
    • Drape the bag over the bottom of the element, try to make it straight. Make sure that you are positioning the seam somewhere that will be covered by the label.
    • Bring the top of the sealer down over the bag, and press down with the handle. This will complete the circuit and the sealer will turn on. The little red light above the knob will go on, and the machine will hum.
    • When the light goes back off (just a few seconds), the machine has done its business, but don't go lifting the handle immediately, you need to give the bag a few seconds to resolidify, so count to four first (as in one thousand one...etc).
    • Gently lift the top lever up. Most likely the bag will be stuck to the top.
    • Gently peel the bag off of the top, and voila! Heat sealed favors!


    Now you can fold and staple on those labels, and you have these:


    Beautiful favors in nice neat little packages! And the best part is, you can use the same basic process again and again to make favors unique to each event!

    Thursday, 10 February 2011

    Grover Cookies (Cookie Favors)


    Presenting the further adventures of everybody's favorite hero. A monster who is faster than lightning, stronger than steel, smarter than a speeding bullet. It's...SUPERGROVER! (And he's cute, too)!


    This posting is about a month overdue. I had some deadlines at work to deal with, and my baking/posting predictably suffered accordingly. But within the next few weeks, I hope to be entirely back on track.


    This posting isn't technically a recipe.It is a decorating and packaging idea for making Grover cookies (which could easily be adapted to make pretty much any Sesame Street monster into a yummy cookie. And, because of their very nature, they are also a great thing to make with kids!!!


    I also show a glimpse in an easy way to package cookies in general for favors, but I am saving the details of that for a different post.


    Now, onto the cookies, with some little-known Grover facts sprinkled in, such as:


    (Grover's official birthday is October 14th!)


    These cookies (along with a matching cake) were made for our friend Allison's baby shower which just so happened to be Grover-themed.  They were done primarily by my cousin, with yours truly assisting, and help from momma-to-be Allie herself!


    To make these cookies, you will need some 
    Basic Supplies (for Grover) colors will vary depending on the monster you are making:

    • Sugar cookie dough (store bought or your favorite recipe), for rolling
    • Frosting, dyed blue (from scratch or ready-made, we used tubs of BC Vanilla frosting dyed with blue gel)
    • Blue sprinkles (or jimmies, depending on which part of the country you are from)
    • White fondant (Satin Ice is an excellent brand. Stay away from Wilton, it tastes horrible)
    • Blue gel dye, for the icing
    • White, red, black and pink  candy coating melts (you can melt these yourself and use a small #2 or #3 decorator's tip, or buy These nifty candy coating pen writers that we found, in red and pink.
    • A circular cookie cutter, ion the 2" to 2.5" range. A set like this is particularly useful, and has every size you will probably ever need. You can find sets like this at your local craft store, as well as stores like Sur la Table, as well as online.
    • A small oval cookie cutter (for the eyes). You can find graduated oval cookie cutters at the stores above, or online.

    (Incidentally, all the links I provide above are for the specialty cake decorating store by my house, Candyland Crafts)


    (Grover's original name was Fuzzyface!)


    The workflow goes something like this:


    1. Roll out your cookie dough, and using a large circular cookie cutter, cut out your cookies and bake them according to the recipe specifications. I leave the specifics up to you, since it will depend on what dough you decide to use. We had a lot of cookies to make, so we opted for the ease of Pillsbury Slice and Bake sugar cookie dough, which is a great option, especially if you are short on time. If you have the time, feel free to make your own favorite rolled sugar cookie dough from scratch


    (The best-selling Sesame Street book of all time is The Monster at the End of This Book, first published in 1971!)


    2. When the cookies come out of the oven, after they've cooled for a few minutes, you can go ahead and use the same cookie cutter to recut the baked cookies. This step is entirely optional, but it will make the edges sharp and the sizes uniform. Since we were making favors, we wanted the cookies as uniform as possible.


    3.  Let the cookies cool completely. In the meantime, get your icing dyed to the proper color. 


    (Grover originally had dark green fur and an orange nose. This puppet later was used for Grover's mommy!)


    4. Roll out the white fondant and use the small oval cutter to cut out eye shapes (this is Grover-specific. For other monsters like Oscar, Elmo and Cookie, use a small round cutter). When eyes are cut, use melted black candy coating wafers to dot on the pupils. This is where the candy writer comes in handy, because it is a true black. Trying to dye melts black yourself usually results in a dark purple, and the only time I've seen black melts sold is at Halloween. You can get away with dark brown if you can't get a hold of the writer and can't find black melts. I wouldn't recommend using chocolate chips only because it needs a way to adhere to the fondant.


    Here is my cousin, hard at work on a tray-full of fondant eyes
    5. When the cookies are cool, frost the cookies.


    (Grover first appeared in 1967!)


    6. Then, dunk them in the sprinkles until the frosting is pretty much completely covered. 


    7. With a little melted candy coating (preferably white), attach the eyes to the cookie.


    8. Using melted pink candy wafers or the pink writer, draw on a circle for the nose below the eyes (you can try the more teardrop shape if you want, I am not much of an artist so I stuck with basic shapes).


    (SuperGrover might know how to fly, but he can never land without crashing!!)


    9.  Using your red candy writer or melted red wafers and a small round tip, pipe on a thin red mouth. All the cookies are smiling here, although having a nearly straight line going across would be a little more accurate.


    We made some labels, and packaged them up.


    Here's Allie, hard at work on the packaging details!
    And here is what the finished product looked like:


    The packaging itself is involved enough that it is in a separate post, if you are interested in the relatively easy way I package cookies for favors.


    (Frank Oz voiced Grover from 1967-2001, and he still occasionally does so. Grover is currently voiced most often by Eric Jacobson!)


    And here is a pic of the matching Grover cake that  my cousin also made. She used the same frosting and sprinkles for Grover's face. A larger oval cutter to cut out white fondant eyes. Fondant dyed black and a small circle cutter for the pupils, one of the sugar cookies frosted pink for a nose, and rolled fondant dyed red for the mouth.


    These cookies could also be done with royal icing, but I love the look of the frosting and sprinkles because it looks, well, fuzzy! Just as it should. These colors and shapes could easily be modified for any other monster. If you make Oscar, don't forget to draw in his brown unibrow!


    And last, but certainly not least, a huge congrats to Allison and her husband Mike, whose little boy was born on January 27th!!!!!


    Thursday, 2 December 2010

    Easy Pistachio Chip Cookies

    This is my first Christmas cookie posting of the 2010 Christmas Baking season, and I'm starting out with a brand-new cookie recipe that is super-easy but big on taste!


    My Christmas cookie baking is fairly constant from year to year in terms of variety, but I try to roll out at least one new variety per year, to test. Sometimes, the new ones make the cut and transition to perennial Christmas cookie staple...and sometimes they don't. These pistachio cookies definitely make the cut, for both their taste and ease of assembly. Let's face it, when you are making many different kinds of cookies, convenience definitely becomes an important factor. I tore the original recipe out of a Betty Crocker mini cookie magazine, but it is also available online here.  The original recipe calls for cranberries, but I modified it, because I prefer chocolate!


    These cookies start by using a Betty Crocker Sugar Cookie Mix pouch as a base. I rarely use a cookie mix as a base, but there are some cookies where it works beautifully, and this is one of them. Can you use from-scratch drop sugar cookie dough? Sure you can, with the understanding that you will sacrifice some of the convenience. The choice is yours. Me? I say why fix what ain't broke, and I just use the mix. 


    So, begin by combining all the dry ingredients in a bowl. This includes the cookie mix, a box of pistachio instant pudding, and a little extra flour.


    Then, you add in some melted butter (yet more convenience!) and eggs. Because the butter is melted, you should have no problem making these cookies with nothing more than a wooden spoon, no need to whip out the stand mixer for this one! If your butter just came out of the microwave, add it first and mix it into the dry ingredients for a few strokes before you add the eggs, so you can avoid the heat of the butter cooking the eggs.


    Once this is well-combined, stir in some salted, dry-roasted pistachios and semi-sweet chocolate chips. Try to make sure the pistachios are lightly salted, unsalted nuts will taste too bland in the final cookie.


    Now, you use the #60 scoop, and scoop cookies out onto a parchment-lined cookie sheet. Slightly flatten the tops, and bake until the bottoms are starting to brown.


    The first batch I baked, I forgot to flatten. It wasn't tragic. You can see the difference in the flattened vs not flattened look below. But if you forget to flatten, bump up the baking time a little, since the cookies are a little thicker.


    These cookies are definitely going into my permanent Christmas cookie rotation, I love all things pistachio-flavored. They were easy and super tasty. If your tastes run away from chocolate, you can always do what the original recipe calls for, and use dried cranberries and maybe even white chips instead of the dark chips.


    Easy Pistachio Chip Cookies
    (Printable recipe)

    Ingredients

    • 1 pouch Betty Crocker sugar cookie mix
    • 1 box (4-servings) pistachio instant pudding mix
    • 1/4 C flour
    • 1 stick butter, melted
    • 2 eggs
    • 1 C dry roasted, salted pistachios, chopped
    • 1 C semi-sweet chocolate chips
    Directions
    1. Preheat oven to 350F
    2. Combine cookie mix, pudding mix and flour in a bowl, mix to combine dry ingredients
    3. Add melted butter and eggs, mixing well to combine (can do by hand)
    4. Stir in the nuts and chips
    5. Using a #60 scoop, drop onto parchment-lined cookie sheet. Slightly flatten tops
    6. Bake for 9-11 minutes, until bottoms are browning
    7. Cool on sheet for 2 minutes before removing to wire rack

    Friday, 1 October 2010

    Quick and Dirty Creepy Treats: Easy Halloween Food Ideas

    Now that October is here, I'll still be posting Autumn-themed stuff, obviously, but I also wanted to get started on some Halloween-themed posts. So, for the next 4 weeks, my posts will be Halloween-centric with some smatterings of Halloween history and lore thrown into each post.

    For this post, I am dusting off some really old ideas and pics (I was notoriously bad about documenting my creations before I became a blogger) of quick and easy Halloween treats that come together in a snap but are super fun to do. These treats are collected from ones that I and my friend Lauren made years ago when our lab hosted our Department's Halloween Social. Everyone in my lab pitched in and made Fall and/or Halloween-themed desserts, and this post is dedicated to just a few of them, the "quick and dirty" treats, to borrow a phrase we use often in lab. They are not very sophisticated, but they are cute and easy, and would make a great starting point for brainstorming new Halloween treats. These are all great ideas especially if you want something to do with little kids, because they are all decorating-oriented and not oven-oriented. For this post, we have quick Witch Hats, Critters, Ghosts, and Dirt. Unfortunately, I made these a while ago, so I don't have pictures of intermediate steps, but the directions are straightforward so this shouldn't be a problem. To be honest, they are so simple that, in most cases, you can just figure out how to assemble them from the pictures!


    But before we get to that,  let's take a brief moment to chat about:
    Halloween has its roots in the pagan Celtic harvest festivals of Samhain ("summer's end") and Nos Calan Gaeaf ("eve before the beginning of winter"), celebrated at the changing of the seasons and the start of winter -- literally going from the "lighter half" of the year to the "darker half" of the year. During this transition, the veil separating this world from the Otherworld was thought to be thin enough to allow spirits (both good and bad) to pass through. This supernatural association and its proximity to the Christian Holiday of All Saints Day (or All Hallows Day) on November 1st, led to a blending of the two into a kind of harvest festival of the dead: All-Hallows-Even (the night before All Hallows Day) became shortened to Hallowe'en and finally to Halloween sometime in the 16th century. Many of the traditional Halloween festivities that we engage in today have their roots in this blending of superstition and spirituality. Interestingly, many cultures hold festivals of the dead in the transition from October to November, including the Japanese, Incans, Hindus, ancient Romans, ancient Egyptians, ancient Persians, Mayans and modern-day Mexicans and most of northern Europe.


    One of the most enduring traditions of American Halloween is the practice of Trick or Treating, knocking on doors in costume, and asking for treats in return for not performing a "trick" on the owner of the house. This tradition has several different origins that, over time, merged into one. The practice of dressing in costumes to fool the spirits, also known as "guising", is an ancient practice that has impacted many cultural traditions over the centuries, and was particularly prevalent in medieval times. Since Halloween was the one night of the year when spirits were most prone to walk the earth, it was doubly important on this night to fool them. The other part of the tradition, asking for food or "treats" also has several different predecessors. On Samhain, the Druids believed that any evil spirits walking the earth when the veil was thin would wreak havoc on mankind unless placated with food. In addition, there was the medieval practice (9th century onward) of "souling": when poor people went door-to-door on All Hallows Day (Nov. 1) and asked for food in return for saying prayers for the dead on All Souls Day (Nov. 2). Most of the early food given out were "soul cakes" -- bread squares with currants baked into them. Over time, this morphed into the modern day Halloween traditions we all enjoy.  In America (ever since at least 1927 which is the first example of the phrase in print), Trick or Treating has come to mean candy, candy, and more candy! Halloween traditions vary greatly by region -- some countries give out fruit and nuts, and some require children to actually perform a trick (like a riddle or a song). Interestingly, the medieval practice of dressing up in costume and going door-to-door performing tricks or services for food has another modern descendant -- Christmas wassailing, or Christmas caroling!

    Stay tuned to future October posts for other tidbits of Halloween lore, including Jack-o-Lanterns, vampire lore, haunted houses and witches!! Now, on to the creepy critters!

    Like I said, the pictures aren't great and I didn't document very well, because at the time it didn't occur to me that I might end up as a food blogger someday. None of these creations were original ideas, they have been floating around in various mini recipe magazines (like the ones by the checkout counters in supermarkets) for years. And if you look around online, you will see far more elaborate offerings in terms of decorating ideas, the ones that I posted are really the simplest iteration on the theme of quick Halloween treats -- the fastest way to put something together that works both visually and time-wise. If you are chronically short on time but over-extended, as I always seem to be, then these are the treats for you. And if you have a little more time, these treats offer many opportunities to be expanded upon.


    For witch hats, you only need 3 Ingredients:

    • 1 package of Fudge Shoppe Fudge Stripe Cookies
    • 1 package of Hershey's Kisses, unwrapped (any flavor)
    • 1 package of Betty Crocker purple squeeze icing, or other color of your choice
    The directions are very simple:

    1. Melt a few kisses in the microwave, you will need some melted chocolate to attach kisses to the cookies.
    2. Invert the cookies so that the chocolate coated side is facing up. Dip the bottom of a Hershey's kiss into the melted chocolate, and place in the center of the cookie, covering the cookie's hole. Don't use tons of chocolate, otherwise it will squish out the sides.
    3. Take your icing, and pipe a ribbon around where the edge of where the kiss meets the cookie, finishing off in a decorative bow if you desire. I made trailing ribbons on mine, but you could easily omit that and just pipe a band around the kiss and use a large yellow sprinkle for a hat buckle.
    4. Let them cool and harden, so they won't fall apart.
    What you end up with is something like this:
    Fast and easy witch hats that could easily be embellished if you so desire!


    Creepy critters are also easy treats that come together in a snap! 

     Ingredients:
    • 1 package of Nutter Butter cookies
    • 1 package of pretzels
    • 1 package of M&M's (plain or dark chocolate, you want the round ones)
    • Melted chocolate or chocolate flavored wafers
    Directions:
    1. Cut the pretzels with a knife so that each pretzel yields 3 curved pieces (follow the schematic left). Each pretzel will yield three legs (1-3) and two antennae (A)
    2. Dip the Nutter Butters into the chocolate so that they are completely covered. Set on wax paper when finished.
    3. For the legs, dip one end of the pretzel piece in melted chocolate, and attach to the body. Attach 3 legs per side of the critter.
    4. Choose an end to be the "front" and attach the antennae to the top of the critter using melted chocolate. They should stick out into the air.
    5. Dip one side of the M&M's in chocolate and attach to the critter on the front end, in front of the antennae. Let harden to set.
    When you are done, you end up with something like this:
    This particular picture doesn't have antennae, the critters look good with or without. The antennae take a little more time, because you have to hold them for a bit and let them set before you let go, otherwise they might fall over. I leave the decision up to you whether you want to use them. You could also make larger bugs by joining three or more coated Nutter Butters in a row, and although those would be easily breakable, they would also be easy to repair with some melted chocolate.


    Making the quick ghosts is very similar to making the critters because they both use Nutter Butters dipped in chocolate, only this time it is white chocolate. And they both use M&M's. An easy thing to do is to split the package of cookies, and use half for critters and half for ghosts!

    Ingredients:
    • 1 package of Nutter Butters
    • Melted white chocolate or white candy melts
    • M&M's, brown
    Directions:
    1. Dip the Nutter Butters in the melted white chocolate to coat completely.
    2. While the coating is still wet, push 2 brown M&M's into one end for the eyes.
    Following these directions, you get these googly-eyed ghosts, which can be embellished with more elaborate decorations if you wish! They could also easily be made into mummies from this point with some well-applied icing strips to look like bandages.
    Nutter Butters are very versatile templates for easy treats, they can also be Santas and reindeer at Christmas, which I am hoping to demonstrate in 2 months!

    Stick all the critters on the same plate, and you have a cute-looking tray of Halloween offerings:
    Angela's pumpkin cheesecake is to the right. Some questionable brownies I made which were supposed to have orange swirls of cheesecake are to the left. They tasted fine, but didn't look like the vision that was in my head...


    Like the others, this next entry isn't a recipe, but rather directions for assembly. Anyone can make easy "dirt" pudding using nothing more than chocolate pudding (ready-made or instant), crushed Oreos, and various other accoutrements such as tombstones, gummy worms, etc. The decorating techniques described here could also be used on an iced chocolate cake, covered with crushed Oreos. The particular Dirt pictured below is one that my friend Lauren made.

    Ingredients:
    • Chocolate pudding (ready-made or instant)
    • 1 package of Oreos, crushed
    • Edible accessories: tombstones, gummy worms, etc
    • Creepy container
    Directions:
    1. For this particular treat, the container matters. A lot. This is supposed to be dirt, or better yet a graveyard, so don't assemble it in a run-of-the-mill tupperware container. Try to find a nice Halloween-themed dish (or at least a plain black one), either round or square, and embellish as much as you can. The dollar store normally has several options. If you really want to get nuts, you can use glass and make a 3-dimensional space where you show the goings on underneath the surface (coffins, zombies in the process of climbing out of graves, etc). How great would it be to have the zombie hand sticking out of the surface of the "dirt" and have the rest of the zombie visible just underneath??
    2. Decide on a theme and plan it out first. Do you want to just have quick basic Dirt with worms? Do you want to do an elaborate haunted cemetery? A pumpkin patch? Gather what you need before you start.  You can even make use of the critters and ghosts you made from Nutter Butters! For the example below, Lauren used gummy worms, some of my critters, and tombstones that were really Milano cookies dipped in white chocolate.
    3. Layer the pudding on the bottom of your dish, and sprinkle the crushed Oreos on top so that the pudding is not visible.
    4. Add your decorations (i.e. worms poking out of the dirt, etc).
    You end up with a version of this:


    Depending on how crazy you want to get, the Dirt can be the quickest or the most time-consuming out of all the treats listed in this post. Lauren did a beautiful job! She also made a gorgeous pumpkin cake using the Williams-Sonoma Great Pumpkin pan, but that definitely doesn't qualify as a quick treat! Likewise for the pumpkin pie and pumpkin cheesecake Angela made, the chocolate and peanut butter fudge Jenny made, or the pecan pie I made. I also made chocolate chip cookies with black and orange M&M's substituted for the chips, which does qualify as quick and dirty but doesn't deserve its own entry. Everyone's effort was how our lab ended up hosting the best Halloween Social in the history of the Molecular Genetics, Microbiology and Immunology Department!

    (L - R) Me, Angela, Nick, Lauren and Jenny.