Showing posts with label fall. Show all posts

Monday, 4 March 2013

Impossibly Easy Pumpkin Pie


I'm continuing to (slowly) slosh my way through a backlog of posts, and this is one that I have been meaning to get up on the blog for months.

Now, I love me some pumpkin, but oddly enough, I've never posted my go-to classic pumpkin pie recipe. And today is still not that day, unfortunately. But instead, I have another variation of pumpkin pie to post -- the "Impossibly Easy" kind.

Why? I'm glad you asked. Necessity. I needed a quick pumpkin pie recipe using the ingredients I already had on hand in my pantry, which did not include pie crust, or butter or shortening, which precluded me from making a from-scratch crust (also working against me was the time factor). But, what I did have on hand was Bisquick.


Ah Bisquick. Can we take a minute to talk about Bisquick? You'd love to? Great!

Bisquick, in a nutshell, is a pre-mixed baking blend that includes flour, a leavening agent, and a fat source. The brandname stuff uses baking powder, hydrogenated oil and salt, but you can actually make your own using one cup of flour, 1½ teaspoons of baking powder, ½ teaspoon of salt, and 1 tablespoon of oil or melted butter. And according to Betty Crocker, it can be used in pretty much any baked good from pancakes to sausage balls. I've had both of those, although I haven't tried the myriad of other Bisquick recipes. And they're good...especially the sausage balls. But that's for another day.

Back to the Impossibly Easy Pumpkin Pie.

The premise is this: impossibly easy because you mix every ingredient together in one bowl, then dump it into a pie plate and bake it. While baking, the Bisquick sinks through the custard and forms a crust (of sorts) on the bottom all on its own, and voila! A pie so easy that it is ridiculous (although I'm not sure about the "impossible"). By the by, this pie used to be called "Impossibly Pie," not "Impossibly Easy Pie" when it was first introduced in 1978. The original flavor was coconut custard, and I'm assuming the name was a reference to the surprising way the Bisquick settles into a crust. I'd love to be able to tell you why Bisquick does this (and I did try to find out) but I could not find a definitive answer. I'm assuming the Bisquick sinks because the flour granules are coated in fat...but don't quote me! Somewhere along the way, "Impossible" was remarketed as "Impossibly Easy," probably to emphasize the, you know, ease of it all. The recipes were expanded to include a number of different sweet and savory pies, including pumpkin.

Now, I have to admit that I didn't follow Betty's custard recipe here. It was enough for me to know that the Bisquick would sink through the custard, so I used my own custard recipe, and just added Bisquick. 

The recipe is just as easy as it sounds: mix,

and bake.


It is hard to see in the pictures, but it really does form a crust, albeit a thin one:


Since my custard was thicker that the original recipe, I toyed with the idea of adding more Bisquick, but I decided against it. I'm not sure if it would all have settled out, and I didn't want to take the chance.

The filling really is the star here, and that's just fine with me, although part of me missed a traditional crust. I don't think this would replace my go-to traditional pumpkin pie recipe (although the custard recipe I modified for this is almost exactly what I use in my go-to recipe). But for what it is -- an easy, quick pumpkin pie with minimal ingredients, it can't be beat!


Impossibly Easy Pumpkin Pie

Ingredients

  • 3/4 C brown sugar
  • 1 can (15 oz) puree pumpkin (NOT pumpkin pie filling)
  • 1 can (12 oz) evaporated milk (low-fat is fine, if you wish)
  • 2 eggs
  • 1/2 tsp salt
  • 1 tsp vanilla
  • 1/2 C bisquick
  • 2 tsp cinnamon
  • 1 tsp ginger
  • 1/2 tsp nutmeg
  • 1/4 tsp allspice (or cloves, if you prefer)
Directions
  1. Preheat oven to 425F
  2. Grease (cooking spray is fine) a 9" pie plate -- I used glass
  3. Combine all ingredients in a bowl and mix until combined. Pour into pie plate
  4. Bake at 425F for 10 minutes, then lower the oven temp to 350F (without opening oven), and continue to bake for an additional 40-50 minutes, until center is set and dies not jiggle.
  5. Cool on wire rack. 


Monday, 28 January 2013

Applesauce Spice Cake


My LO was supposed to be a Thanksgiving baby, due to arrive on November 21st. But he had very different plans. I actually went into labor on Halloween, the day after Sandy passed through when we still had no power, and I didn't end up delivering until 2 days later courtesy of an emergency c-section.  Toss in coming home to 4 downed trees on our property after a week in the hospital, and it has been a very busy month!


Autumn is normally my favorite baking season, but this year, the season almost entirely passed me by, between the last few tiring months of my pregnancy, working at my two jobs until the last minute, and all of the events around my LO making his debut. Because he was so young, we just had a quiet Thanksgiving dinner at our house, with my parents and my FIL. And my parents cooked the whole thing and carted it to my house. Turkey, mashed potatoes, sweet potatoes, stuffing, cornbread pudding, veggies and cranberry sauce. Seriously, they are amazing.

But for the first time in a long time, I really really really felt like baking something. After all, it was Thanksgiving. And I hadn't had the energy to bake anything in forever. But I had to stick with things that I already had all the ingredients for, because at the time, I was still not allowed to drive after the c-section. Luckily I keep myself pretty well stocked in fall baking staples such as spices, etc. And I also had applesauce, because I was craving it late in my pregnancy. And that's when I remembered a recipe I had seen on Smitten Kitchen's website for a Spiced Applesauce Cake. I already had all of the ingredients, it featured one of my two favorite autumn baking ingredients, and it made an 8x8" cake -- a perfect size for an intimate dinner for five. I just adjusted the spices to suit my tastes, and in no time at all, I had a lovely and easy holiday cake from scratch.

First, you combine the dry ingredients (flour, baking powder and soda, salt and spices) together and set them aside. Then you cream together the butter, sugar and vanilla until nice and fluffy, a few minutes. Add the eggs one at a time, mixing well after each egg. After that, add the applesauce.

Then add the flour mixture slowly and mix until just combined, and then stir in any nuts (I like pecans, the original recipe called for walnuts). At this stage, the batter will look lumpy and curdled, which is how it should look.

Spread the batter into a sprayed pan and bake at 350F for about 35 minutes, until golden.

Once the cake is cooled, you can add frosting. There is a lovely homemade icing recipe on Smitten Kitchen's site, but I have to admit that I cut a corner here and used cream cheese frosting from a tub (Betty Crocker brand). And you know what? It was still delicious. So don't be afraid to save yourself some time.
This cake got great reviews from the attendees of my humble first Thanksgiving dinner post-birth. The texture was great, the prep was easy, the taste was pure autumn. All in all, a great little Fall cake, all the taste of an apple spice cake with a fraction of the work.

My son approves!

Applesauce Spice Cake

Ingredients
  • 1 stick unsalted butter, softened
  • 1 cup packed light brown sugar
  • 1 teaspoon (5 ml) pure vanilla extract
  • 2 large eggs
  • 1 1/2 cups (about 13 ounces or 365 grams) unsweetened applesauce
  • 2 cups flour
  • 2 teaspoons baking powder
  • 1/2 teaspoon baking soda
  • 1/2 teaspoon salt
  • 1-1/2 teaspoon cinnamon
  • 3/4 teaspoon ground ginger
  • 1/2 teaspoon ground nutmeg
  • 1 cup toasted and cooled pecans or other nuts, optional
Directions

  1. Preheat oven to 350F
  2. Combine the dry ingredients (flour, baking powder and soda, salt and spices) together and set them aside
  3. Cream together the butter, sugar and vanilla until nice and fluffy, a few minutes.
  4. Add the eggs one at a time, mixing well after each egg. 
  5. Add the applesauce, mix to combine
  6. Add the flour mixture slowly and mix until just combined, and then stir in any nuts
  7. Spread the batter into a sprayed pan and bake at 350F for about 35 minutes, until golden.
  8. Frost when cooled

                Thursday, 13 October 2011

                Cinnamon Apple Quick Bread


                I am waaaaaaay behind on the posts I had hoped to make. I still have an entire summer's worth of farm-share related blogs to get to, but I'm going to not even think about those until after this holiday season is done.

                Although I love yeast breads, the joy and simplicity of a simple quick bread never ceases to amaze me. After I went on my annual apple-picking excursion, I wanted to try some new things with my apples. The first recipe I settled on was an apple quick bread, which is a variation of Paula Deen's zucchini bread, which I became well-acquainted with this summer during my farm share, when I had zucchinis coming out of my ears. At the time, I thought the base would be good for other fruit or veggie mix-ins, and I was right. With a little tweaking, I made this recipe work beautifully for apples.

                But first, a little interlude (or skip down for more baking!):

                Halloween is my absolute favorite holiday, hand's down. Not only do I love Halloween-themed treats, but I love Halloween tradition as well.  Last year, around this time, I paired my Halloween and Fall-themed posts with little blurbs on the background of some common Halloween tradition and/or lore, including the history of Halloween and trick-or-treating, vampires, zombies, jack-o-lanterns, and bobbing for apples. This year, even though I am starting a little late, I am continuing that tradition with this latest topic:

                "So useful to have him swooping around like an overgrown bat."


                This is my 6 month old kitty cat, Severus (as in Severus Snape, because I'm a huge nerd), and he and his brother Magnus hold my heart in their paws. I've always been a dog person, growing up I had a wonderful German Shepherd, and I never seriously contemplated owning a cat. But, I always promised myself that if I did ever get a cat, he would be jet black from the tips of his ears to the bottoms of his paws. There's just something about them that draws me in. So what more perfect Halloween interlude than to examine the superstition surrounding Halloween and
                Throughout history, the attitude towards cats in general has been one of dueling extremes. In ancient times, particularly in Egypt and Rome, cats were revered. In Egypt, they were the earthly representatives of the goddess Bastet, while in Rome, they were often worshiped as household gods. The ancient Christians had a tradition that a tabby cat kept the baby Jesus warm when he was born, and in gratitude, the Virgin Mary bestowed the characteristic "M" on his forehead.

                But during the Dark and Middle Ages, this began to change. In 1232, the Pope suggested that cats might in fact be agents of the Devil. Although no one is sure what caused this shift in attitudes, the fact that cats are nocturnal animals with highly reflective eyes that seem to glow and aloof demeanors probably didn't help matters any! Many cats were burned at the stake along with their owners during medieval witch hunts. One high-profile example in the 17th century was the story of Charles I and his favorite cat, which happened to be black. Charles I was very attached to his kitty, so the story goes, and even assigned guards for its protection.  When it died, he allegedly exclaimed that his luck had gone, and the very next day, he was arrested. His subsequent execution resulted in the (temporary) overthrow of the British monarchy, and only did more damage to the reputation of black cats. In the latter part of the 17th century, New England witch hunters in Salem and elsewhere became convinced that cats, particularly black ones, were familiars -- that is, the spirits in animal form that collude with and assist witches.  These early attitudes gave rise to most of the black cat superstitions we are familiar with today, such as: having bad luck if a black cat crosses your path; a black cat at a funeral meaning another family member will die; and just the general bad luck that was believed to follow black cats around. It also gave rise to the classic Halloween icon of a black cat silhouette. 

                Even though we live in modern times, some superstitions unfortunately die hard, because a study in the Journal of Applied Animal Welfare Science looking at adoption rates in  CA animal shelters found that black cats have the lowest adoption rate out of all coat colors. All Halloween playfulness aside, this is heartbreakingly unfortunate for all the sweet black kitties out there that desperately need love. If you're ever in a position to welcome a cat into your home, and you have a choice of a black one, please seriously consider taking him or her since statistics show that it is unlikely that someone else will come along to adopt him. :-(

                And now, back to baking!

                Cinnamon Apple Bread

                This recipe is ridiculously easy. So easy that I hardly have any pics to go with the post. First, start with some apples. I used Fuji exclusively, because that is what looked good at the orchard, but generally I like to have a mix of apples.  Either dice them up or shred them using the biggest openings on your shredder. I chose to shred because it goes quickly, and I always get lazy when I'm dicing, and I end up with progressively larger and larger pieces...

                Mix a little lemon juice into those cut apples, to slow down the oxidation (browning).

                Pre-combine the dry ingredients: flour, sugar, baking soda, salt, and spices. A note about the sugar: I've made this bread using a variety of sugar amounts, from 1 cup to 3 cups, which is why there is a range in the recipe listed below. It depends on what taste you are going for. 1 cup of sugar is hardly sweet at all, and would pair well with a glaze or icing. 2 cups is moderately sweet, and 3 (what the original recipe called for) is very sweet, like apple pound cake. I personally like 2 cups the best, half brown and half white, but that is my tastebuds. My husband prefers 1 cup.

                Beat the eggs together with oil and water in a separate bowl, then mix in the apples (and nuts if you want them).

                Combine the dry and wet ingredients together.

                Then, take 2-9x5" loaf pans, spray them with butter spray, and line the bottom with parchment. Spraying before you put the parchment on the bottom helps it to stick to the metal. Then give the top of the parchment a little spray as well. Don't skip the parchment step, believe me, I only tell you to parchment-line something if it is really necessary. Then, divide the batter between the two loaf pans, and bake at 350F for about 50 minutes (as a range, I'd say anywhere from 45 minutes to an hour). Keep baking until a tester comes out clean.

                Cool in the pan for ten minutes before de-panning and cooling fully.

                This bread is a yummy and fragrant bit of Fall, studded with apples and walnuts, and swirled with spices. It would probably be delicious with a caramel glaze, but that involved going to the store, so I didn't bother. As-is, however, 2 loaves got devoured in a single day at my work. If you have apples, and you want to make more than just pies and crisps, consider making this bread!

                Cinnamon Apple Bread

                Ingredients

                • 2 C apples, shredded
                • 1 tsp lemon juice
                • 4 eggs
                • 1 C vegetable oil
                • 1/3 C water
                • 3-1/4 C AP flour
                • 2 C sugar (1C brown, 1C white)
                • 2 tsp baking soda
                • 1 tsp salt
                • 2 tsp ground cinnamon
                • 1 tsp ground nutmeg
                • 1 C nuts, pecans or walnuts


                Directions

                1. Preheat oven to 350F
                2. Shred or dice apples, and mix with lemon juice
                3. Beat together eggs, oil, and water. Stir in apples and nuts
                4. Combine flour, sugar, salt, baking soda and spices in separate bowl
                5. Combine wet and dry ingredients
                6. Line the bottoms of two 9x5" loaf pans with parchment, and spray bottom and sides of pans
                7. Divide batter evenly between 2 pans and bake for about 50-60 minutes, until tester comes out clean 
                8. Cool in pan for ten minutes, then de-pan
                9. Enjoy!


                Wednesday, 17 November 2010

                Pumpkin Pecan Cheesecake Pie


                I. Love. Pumpkin. Pie. In fact, let’s be honest: I love pumpkin anything. But pumpkin pie is the very pinnacle of all pumpkin desserts as far as I’m concerned. I used to make a traditional pumpkin pie every year, but last year I went in a different direction, rolling out a brand-new type of pie, and haven’t looked back since. This new pie, the Pumpkin Pecan Cheesecake Pie, is my definitive holiday pie. It is like three desserts wrapped into one, and although it might sound busy, this pie has the most wonderful blending of flavors that results in my favorite Thanksgiving dessert.


                I had always been intrigued with pumpkin cheesecakes, but I had never tried to make one before. The pie I am going to describe is a little different from a regular pumpkin cheesecake in that the cheesecake layer and the pumpkin pie layer are kept separate, with a pecan layer on top. This concept was originally inspired by Bakerella, who made a similar pie on her blog. But after reading the comments posted about that recipe, a lot of people complained that the recipe failed to give a filling that solidified properly. So I decided to try my hand at making this pie, keeping the distinct pumpkin, pecan and cheesecake layers, but completely revamping the recipe itself, starting from the ground up. The results I got were just wonderful, and that’s what I’ll be sharing in this post.

                First, you need a pie crust. Deep dish if you can, there will be a lot of filling. I used the Sarah Lee 9” deep dish frozen pie crust, and it was still frozen when I filled it (although it sat on the counter after I had filled it with the cheesecake layer, and while I was assembling the pumpkin layer – maybe 10 minutes. Feel free to use your own recipe if you want, just keep a closer eye on how the crust browns, because my directions are for a crust that is partially frozen.

                The first layer that goes down is the cream cheese. Start with your cheese softened, maybe sitting out at room temp for 30-45 minutes or so, cut up into cubes in your mixing bowl. Once the cheese is a little softer, you beat it with the sugar until it is well combined and not lumpy. 


                Add the vanilla and a dollop of sour cream (a slightly rounded tablespoon), and beat until incorporated. Add the egg, and beat until combined and the lumps are pretty much gone. Try not to overbeat. Then, pour the cheesecake layer into the bottom of the crust.


                Now for the pumpkin layer. I personally like adding each spice individually, as opposed to the pumpkin pie mix. I also freshly grate the nutmeg before I use it, and although that isn’t strictly necessary, it smells and tastes wonderful.  Combine the pumpkin, sugar, spices, salt, egg and whites in a bowl, and whisk until thoroughly combined. 

                You can do that by hand, it is easy enough to combine. Then, layer the pumpkin mixture on top of the cheesecake mixture carefully. I would spoon it on gently, and then spread it out. Gently.


                At this point, you put some aluminum on the crust to protect it from over-browning, and pop it into a 400F oven. After 5 minutes, and without opening the door, turn the oven down to 375F and keep baking for 25 minutes.

                While it is baking, assemble the pecan topping. Combine the pecans, brown sugar and maple syrup in a bowl.


                 Be sure to use real Grade A maple syrup, not the stuff you typically buy for pancakes. No Log Cabin or Aunt Jemima!

                After the 25 minute bake time is up, take the pie out of the oven. You are going to be putting the pecan topping on quickly, you don’t want the pie to cool down too much. Remove the shield so that you can sprinkle pecans right to the edge of the crust, and start sprinkling the topping evenly all over the pie. I typically use all or almost all of the topping. Taking the shield off will also give you an idea of how much the crust still needs to brown. I leave those judgments up to you, because each crust and oven might be slightly different.


                Put the shield back on if you think it is necessary, and pop the pie back in the over for another 20 minutes. After that time is up, try to take a peak (without opening the door if you can manage it) and see how the crust is doing. If you took the shield off, is it browning nicely or getting overdone. If it is getting overdone, put the shield back on. If you left the shield on, is it not browning enough? If not, take the shield off. This will really depend on your oven. Using the same exact crust, at my parents’ house, I had to leave the shield on the entire time to prevent excess browning, but in my apartment I took the shield off after the topping went on, and they both turned out great. The best advice I can give is just pay attention to the crust.

                Let the pie bake for a further 10 minutes (so, 1 hr total bake time), then remove it from the oven and place it on a wire rack for cooling. 

                Let the pie cool down at room temperature for at least an hour, if not more. If you cover it to put it in the fridge while it is too warm, you will end up with condensation building up on the inside of the cover, making the crust and pie top soggy. It doesn’t have to be completely 100% room temp before you put it in the fridge, but make sure the bottom is no more than slightly warm. If you are worried, you can do what I do and check the cover about an hour after I put it into the fridge. If there is condensation building, wipe it off with a paper towel.

                This pie needs to chill for maybe 5 hours minimum, but I highly recommend overnight. It’ll make slicing and serving so much easier, plus, it just tastes better when it is thoroughly cold.


                Again, this pie: my favorite rendition of pumpkin pie. The flavors are complex, and so are the textures, but you have the strong pumpkin coming through, complemented by everything else. If you are a pumpkin pie fan, consider adding this to your holiday baking list this year!


                Pumpkin Pecan Cheesecake Pie

                Ingredients
                •  1-9” deep dish pie crust, frozen or fresh (see notes in above text)

                 Cheesecake Layer
                • 8 oz cream cheese, softened
                • 1/3 C sugar
                • 1 tsp vanilla
                • 1 slightly rounded tbls sour cream
                • 1 egg

                 Pumpkin Layer
                • 15 oz can of pumpkin (not pumpkin pie filling)
                • ¾ C sugar
                • 2 tsp cinnamon
                • 1 tsp ginger
                • ½ tsp nutmeg
                • ¼ tsp allspice or cloves
                • ¼ tsp salt
                • 1/3 C evaporated milk
                • 1 egg
                • 2 egg whites

                 Pecan Layer
                • 1 ½ C pecans, chopped
                • ½ C brown sugar, packed
                • 2 tbls pure maple syrup


                Directions 
                1. Preheat oven to 400F
                2. Beat cream cheese with the sugar until it is well combined and not lumpy.
                3. Add the vanilla and a dollop of sour cream (a slightly rounded tablespoon), and beat until incorporated.
                4. Add the egg and whites, and beat until combined and the lumps are pretty much gone. Try not to overbeat.
                5. Pour the cheesecake layer into the bottom of the crust.
                6. Combine the pumpkin, sugar, spices, salt, egg and whites in a bowl, and whisk until thoroughly combined (can do by hand).
                7. Layer the pumpkin mixture on top of the cheesecake mixture carefully. Spoon it on gently, and then spread it out.
                8. Put some aluminum on the crust to protect it from over-browning.
                9. Bake it into a 400F oven for 5 minutes then, without opening the door, turn the oven down to 375F and keep baking for an additional 25 minutes.
                10. While it is baking, assemble the pecan topping. Combine the pecans, brown sugar and maple syrup in a bowl and stir to combine well.
                11. After the 25 minute bake time is up, take the pie out of the oven.
                12. Working quickly, remove the shield and start sprinkling the topping evenly all over the pie.
                13. Put the shield back on if you think it is necessary
                14. Put the pie back in the over to bake for another 20 minutes.
                15. After the time is up, try to take a peak (without opening the door if you can) and see how the crust is doing. Decide whether to use the shield or not based on the level of browning
                16. Let the pie bake for a further 10 minutes
                17. Remove it from the oven and place it on a wire rack for cooling.
                18. Let the pie cool down at room temperature for at least an hour before covering and storing in the fridge
                19. Overnight chilling yields the best results

                Tuesday, 16 November 2010

                Cranberry Upside Down Cake

                This year, I decided to add some desserts to my Thanksgiving repertoire, and after spying this eye-appealing recipe on the Williams-Sonoma site, I decided to try my hand at a cranberry upside down cake. So with a few ideas taken from a similar recipe from Martha, I concocted my own version of this recipe that combined what I felt were the best elements of both, plus some additional mods from moi.

                But before we get to that, let’s talk cranberries!


                Cranberries get their name from the distinctive shape of their open flowers, which look like the head of a crane.  They are one of the three native fruits found in North America (the other two being blueberries and Concord grapes), and the Algonquins were among the first to harvest them, as components of both food and medicine. The first English settlers learned about cranberries from the Native Americans, and it is believed that they were served as the very first Thanksgiving dinner, and have been a holiday staple ever since. Here are some more fun facts:

                The first NJ cranberry grower, John Webb, was also the first to notice that good cranberries bounce. He discovered this because, with his wooden leg, he had difficulty carrying his berries down the stairs, so he would drop them. Webb noticed that the good berries would bounce to the bottom, while the rotten berries would stay on the steps.  Incidentally, good berries bounce because they contain small pockets of air that rotten ones lack. These pockets of air are also what makes good cranberries float, the rationale behind the “wet harvest” you have probably seen pictures of in cranberry bogs filled with floating cranberries. Contrary to popular belief, cranberry beds are only flooded at harvest time.

                White cranberries are the same species as red cranberries, they are just harvested before the deep red color has a chance to develop.

                Ocean Spray, the largest manufacturer of cranberry-related products in the US, is actually owned as an agricultural cooperative of cranberry and grapefruit growers, and has been around since 1930.

                Now, back to the cake!

                Fair warning: cranberries are tart. Delicious. But tart. This may look like a cake with cherries on top, but it sure doesn’t taste like it. This cake is a mature flavor best suited for adults. Kids will love the look of the cake, but probably not the taste, so although I highly recommend this cake, I’d also recommend making sure it isn’t the only dessert offering if there are lots of kiddies at your holiday table. Fair enough? Good. Who ever heard of too many desserts anyway, right? Psssht. Not me, that’s for sure.

                Now, this cake makes for a beautiful presentation that is actually very simple to assemble.  The whole process begins with an orange. Zest and juice it. Then, throw some of the juice and half the zest in a saucepan with some brown sugar and butter, which you keep on medium heat until the butter is melted and the sugar is dissolved. 


                Throw in some cinnamon and a pinch of allspice right before you are done. Then, you pour it into a 9” round cake pan that has been butter sprayed, with a parchment round on the bottom that has also been butter sprayed. Trust me, you’ll thank me later on. I hardly ever heed directions that recommend parchment-lining cake pans, and honestly I rarely have an issue…but for this cake, I truly believe depanning it would be very difficult without the parchment round on the bottom. So, pour the sugar/butter/orange/spice mixture into the pan, and spread it over the entire bottom (you can probably just tilt the pan to do this, it worked fine for me). Once that layer is down, it is time to sprinkle on the cranberries. You will use nearly all of the ¾ lb bag, less a few berries. Sprinkle them on so that there is complete coverage over the bottom of the pan, but only a single layer of berries, like this:

                Now, you can start assembling the dough. First, combine the dry ingredients (flour, baking powder, salt) in a bowl. Separately, cream together butter and sugar, then add yolks(one at a time), vanilla and the remaining orange juice and zest. Then,  start adding the dry ingredients, alternating each addition of the flour mixture with an addition of buttermilk.

                Whip the whites and the cream of tartar with a hand mixer until stiff peaks form, and then fold the whites into the batter with your spatula or a wooden spoon. 


                Then, spoon the batter over the cranberries and spread it evenly.


                Bake at 350F for 55-60 minutes, until cake bounces back and a wooden skewer comes out clean. Now, when I made this, my batter overflowed just a tad. I’m not 100% sure why, and it was nominal, but do yourself a favor and put the pan on a cookie sheet while you are baking it.


                Then, you cool it 15 minutes in the pan, invert it and leave it for another 5, and then finally de-pan it. Is all that necessary? I’m not sure, but I can tell you that the cranberry topping came out of the pan perfectly using this method, so I’m sticking to it!


                Although it isn’t pictured, this cake is best served with some sweetened whipped cream (recipe below) or some Reddi-Wip, which will cut through the tartness of the berries.


                This cake is quite tasty and definitely different. The orange comes through nicely and adds depth to the flavor, as does the hint of cinnamon and allspice in the berries, the cake is yummy and moist, and the cranberry layer combines both sweet and tart. Visually, the ruby red jewel-like topping is a stunner. Again, the cranberries are still on the tart side, even smothered in sugar and butter, because they are whole berries and not a sweetened sauce. But between the sugar, orange and whipped cream, I think the tartness is at an acceptable level (although this might vary from person to person). If you hate cranberries, this might not be your dessert. But if you want a little sumpin’ sumpin’ different from the usual offerings that still screams “holidays!” then this is it!

                Cranberry Upside Down Cake

                Ingredients
                Topping
                • ¾ lb (12 oz) bag of fresh (or thawed frozen) whole cranberries
                • 1 C brown sugar
                • ½ stick unsalted butter
                • 2 tbls orange juice
                • Half of the orange zest
                • ½ tsp cinnamon
                • Pinch of allspice

                 Batter
                • 1 ½ C AP flour
                • 2 tsp baking powder
                • ¼ tsp salt
                • 1 stick unsalted butter
                • 1 C sugar
                • 2 eggs, separated
                • 1 tsp vanilla
                • 2 tbls orange juice and remaining zest
                • ½ C buttermilk (you can clabber your own with 1/2 tbls of lemon juice or white vinegar and ½ C milk for about 10-15 minutes)
                • 1/8 tsp cream of tartar

                 Whipped Cream
                • 1 C heavy cream
                • ¼ tsp vanilla extract
                • 1 tbls confectioner’s sugar


                Directions
                  
                1. Preheat oven to 350F
                2. Butter a 9”-round cake pan. Put a parchment round onto the bottom of the cake pan, and butter that as well
                3. Place brown sugar, ½ stick of butter, 2 tbls of orange juice and half of the zest of one orange in a saucepan. Heat on medium until butter melts and sugar dissolves. Add cinnamon and allspice about halfway through heating.
                4. Pour the topping into the bottom of the pan, and tilt pan to ensure full coverage
                5. Sprinkle a single layer of cranberries on top of the sugar/butter mixture, packed tightly, but no more than one berry layer thick
                6. Combine the flour, baking powder, and salt in a bowl and set aside
                7. Cream together the butter and sugar used for the batter. Add egg yolks one at a time and mix until thoroughly combined.  Add in the vanilla and remaining juice/zest, and mix until combined
                8. Add the flour mixture in 3 additions, alternating with the buttermilk, starting and ending with the flour. Beat each addition until just combined
                9. In a separate bowl, combine the egg whites and cream of tartar, and whip with a had mixer until still peaks form
                10. Fold whites into batter by hand, and spoon onto the cranberry layer, spreading batter until even and touching all sides of the pan
                11. Place pan on a cookie sheet, and bake for 50-60 minutes, until golden, cake springs back, and toothpick inserted comes out clean
                12. Transfer cake pan to wire rack and cool in-pan for 15 minutes
                13. Invert onto serving plate, and let stand inverted for 5 minutes before removing the pan
                14. For the whipped cream: Using the whisk attachment on your mixer, or a hand mixer, whip the cream until soft peaks form, then stir in the vanilla and sugar

                  Cranberry

                Honey Cornbread Muffins


                I love multiple iterations of a holiday. You know, when you celebrate the same holiday several times in a given season? Take Thanksgiving, for example. I just celebrated it (with friends) last week, and I’ll be celebrating it again (with family) next week. In my family, because of everyone’s schedules and obligations, it isn’t unusual to celebrate Christmas, and then “Second Christmas” and occasionally “Third Christmas.” As an avid baker and budding chef, I relish the multiple opportunities to not only make the staples that people expect year after year, but also to change things up a bit or try out new recipes. Multiple holiday celebrations are like gigantic experiments where I can field test different creations.


                Every year, my friends and I have our own Thanksgiving, typically one or two weeks before the real deal. This year was my first time hosting, since it was mine and my husband’s first November as a married couple (and the first where we had our own place). Traditionally in my circle of friends, the host provides the turkey, while the bulk of the side dishes are provided pot-luck style by the guests.

                This was a daunting task for me…I’ve never made a turkey. Roasted a chicken, yes, but never a turkey. I was not intimidated, but I was a little stressed about the timing of everything. I was also in charge of making various desserts (including Nutella Balls, Pumpkin Cheesecake Pie, and Cranberry Upside Down Cake), and the cornbread.

                Now, I don’t have the steps for what I did with the turkey, which is unfortunate since it turned out really well. But I was too hyper to think about recording what I was doing for future blogging – maybe for the real Thanksgiving I’ll be calmer. The reason I bring the turkey up at all was because I was anxious about space – oven space, that is. I had no idea how long the bird would take to cook, and no clue when the oven would be free. Now, normally for holidays I make a really easy and tasty cornbread pudding (which I will in fact be making next week), but I was afraid the oven wouldn’t be free to bake or reheat it, so I started looking for cornbread alternatives.

                That’s when I stumbled on this:  Honey Cornbread Muffins, courtesy of the Neely’s. As a Yankee, I like my cornbread on the sweet side, plus this also looked like something that could be made the day before without too many repercussions, so I decided to give it a whirl. And let me tell you, I’m so glad I did! My only experience with cornbread comes out of the blue Jiffy box, but these from-scratch muffins are not only delicious but extremely easy to make. The only special ingredient they require is cornmeal, which is available at any supermarket I’ve ever been to, so it shouldn’t be hard to get a hold of. I tweaked the recipe just a tad, with more honey, and it came out wonderfully.

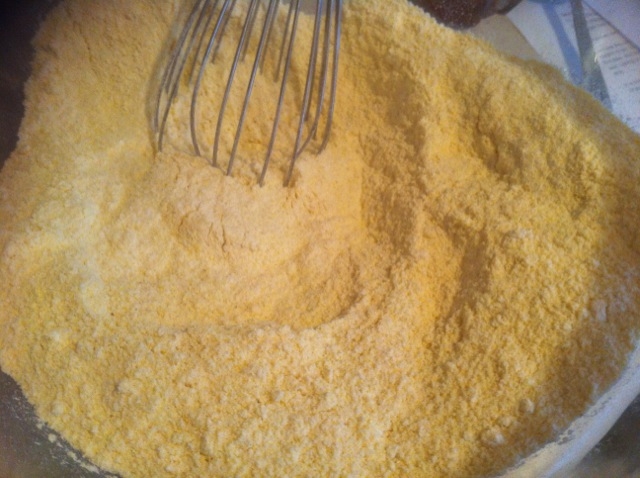
                The process is very simple. First, you mix together the dry ingredients: corn meal, flour, baking powder, sugar and salt.

                Then, you whisk together the wet ingredients: melted butter, milk, eggs and honey. Dump the wet ingredients into the dry and whisk around until well combined. Literally. I did not bother with a mixer, the whisk works just great.

                Then, you evenly distribute the batter amongst a paper-lined muffin tin, and bake for about 15 minutes.


                When they come out, they will be nice and golden, with a beautiful consistency. Serve up with some whipped butter, and mmmm mmmm!


                Now, everyone has their own ideas about how cornbread should taste. Me, I like it a little sweeter. If you know you don’t like it sweet, you can halve the honey for just a hint of sweetness.


                This recipe is easy, yummy, and a definite keeper. Obviously, they are best the day of baking, and they only take 15 minutes, so it is doable once the turkey comes out of the oven. But, they can also be made at least one day ahead (and probably more if you freeze them) so consider adding them to your baking arsenal as a convenient and delicious addition to any holiday meal. 


                Honey Cornbread Muffins
                (Printable recipe) (recipe makes 24 muffins, but is easy to halve if you want only 12)

                Ingredients
                • 2 C cornmeal
                • 2 C AP flour
                • 2 tbls baking powder
                • 1 C sugar
                • 2 tsp salt
                • 1 C whole milk
                • 4 eggs
                • 1 stick of butter, melted
                • 1 C honey

                 Directions
                1. Preheat oven to 400F
                2. Line 2-12 C muffin pans with paper liners
                3. Combine dry ingredients (cornmeal, flour, salt, baking powder, sugar) in a bowl
                4. Whisk together wet ingredients (melted butter, milk, eggs, honey)
                5. Add wet ingredients to dry ingredients and whisk until combined
                6. Distribute batter evenly amongst liners
                7. Bake for 12-15 minutes, until golden