Showing posts with label christmas. Show all posts

Wednesday, 27 March 2013

Coconut Macaroons


I'm always on the lookout for a good coconut macaroon recipe, and this is definitely a great one. It is Alton Brown's Paradise Macaroon recipe (with minor modification), which was his contribution to Food Network's 12 Days of Christmas Cookies circa 2008.

Now, these are coconut macaroons, which are the most common kind of macaroon in the US, although I am sure everyone is also familiar with the French cookies of the same name as well. Why two such variant desserts under the same name? Well, it turns out that "macaroon" is a rather loose term: it can be used to describe a light, small cookie or cake(ish) baked good, commonly with egg whites, some kind of nut and/or almond paste, sometimes coconut, and sugar. The coconut macaroons are most common in the US, while French macaroons, also called macarons, are meringue cookies filled with some type of ganache or buttercream. People tend to use the term macaroon interchangeably for either the coconut or cookie macaroons, and while some people try to exclusively use macaron when talking about French-style macaroons, there isn't a universal convention for distinguishing between the two

These cookies are fairly easy to put together, although there is an egg-whipping step in the middle. Trust me, it is well worth the extra work.

First, combine the coconut, condensed milk, salt and vanilla, mixing well to coat.


Then, in a separate bowl, whip the eggs until foamy, the slowly incorporate the sugar, whipping until medium (aka firm) peaks form (the peak has a gentle curl to it when you lift the beaters out, check this out for a visual reference).  Fold the egg whites into the coconut mixture:


Using a tablespoon or a #40 scoop, scoop out the coconut mixture onto parchment-lined cookie sheets...


And bake for 20-25 minutes at 325 until golden brown.


Take them off the pan and put them on  wire rack to cool immediately, and let them cool down completely. Then, you can melt the chocolate and shortening together (I melted the chips in the microwave in 15-30 second increments,stirring after each time, with the oil), and dip the top of each completely cooled macaroon into the chocolate.

Before the chocolate sets, sprinkle on some chopped macadamia nuts, and DONE!


I used bittersweet chocolate, which I prefer to semi-sweet, and it was lovely. But semi-sweet is just fine, and if you want more of a sweet Almond Joy taste, you can even use milk chocolate. And almonds, for that matter. But I love macadamia nuts with coconut, so tropical!

These cookies are rich and decadent, and the chocolate/macadamia nut combo on the top adds just the right amount of contrast and salt. The extra whipped egg whites gives them a slightly lighter consistency than the usual wet, dense macaroon, but doesn't sacrifice any of the richness and flavor. You won't be disappointed in these!

Coconut Macaroons

Ingredients
  • 15-16 oz sweetened shredded coconut (depending on the size package(s) you find)
  • 2 oz sweetened condensed milk
  • Pinch kosher salt
  • 1 tsp vanilla 
  • 4 large egg whites
  • 5 oz sugar
  • 12 oz semisweet or bittersweet chocolate chips
  • 1 oz vegetable shortening
  • 2 oz finely chopped dry-roasted macadamia nuts
Directions

  1. Preheat oven to 325F
  2. Combine coconut, condensed milk, salt and vanilla in bowl, mixing well to combine
  3. Whip egg whites until foamy
  4. Add sugar slowly to egg whites, continuing to whip until medium (firm) peaks form, about 6 minutes
  5. Fold egg whites into coconut mixture
  6. Scoop coconut mixture onto parchment-lined cookie sheet using a #40 scoop or rounded tablespoons
  7. Bake 20-25 minutes, until golden brown
  8. Remove cookies/parchment immediately to wire rack and allow to cool completely before topping
  9. Melt chocolate (microwave is fine) and oil until smooth
  10. Dip the top of each macaroon into the chocolate, and sprinkle macadamia nuts over the chocolate before it sets
  11. Let chocolate set before storing and/or eating


Thursday, 7 March 2013

Peanut M&M Cookie Bars


Yes. These. These are my Peanut M&M cookies in a bar form. Identical batter, but a lot less time and fuss. They are chewy, so they do lack that cookie crunch, but they taste delicious nonetheless. I can't decide which I like better, in truth, but I know for certain that when I am short on time, I will definitely be making the bars.  I gave a detailed workflow of preparing the batter in my cookie post, so I won't rehash it here. Instead, I will pick up the recipe where it diverges from the cookie recipe:


Rather than use a cookie scoop to make individual cookies, evenly press the batter into a greased 9x13" pan like so:


Bake for about 30 minutes until golden:


Then you can cut into squares and enjoy. Easy! And yummy! The peanut M&Ms add a wonderful texture and taste to the bars. These were gone from the cookie platter in no time at all!


As you can see from my pics, I got 42 squares from the one pan. I know the squares are small if you cut so many, but honestly, they are pretty rich, so small ones work well. I think larger bars would be overwhelming to eat because they are so much thicker than cookies. But that's just a suggestion.


Peanut M&M Cookie Bars

Ingredients
  • 2 sticks of butter, softened
  • 1/2 C sugar
  • 1/2 C brown sugar, packed
  • 1 egg
  • 2 tsp vanilla
  • 2 C flour
  • 1/2 tsp baking soda
  • 1/8 tsp salt
  • 3/4 C pecans, chopped small (but not fine) -- optional
  • 1-12.6 oz bag Peanut M&M's in Christmas colors (or holiday colors of your choice)

Directions
  1. Preheat oven to 350
  2. Coat a 9x13" pan with cooking spray (optional: line pan with aluminum first for ease of lifting out bars)
  3. Cream softened butter and sugars until fluffy
  4. Add in egg, salt and vanilla and mix until combined
  5. Add in flour and baking soda, and mix until just combined
  6. Add in pecans and peanut M&M's, and stir until combined evenly
  7. Press batter evenly and gently into pan
  8. Bake at 350F for 30-35 minutes, until golden
  9. Cool completely, cut into squares (can lift out of pan after 10 minutes if you lined pan with aluminum)

Wednesday, 6 March 2013

Chocolate Peppermint M&M Bars (Easy Things to Do with Cake Mix #4)


Better late than never! This is a Christmas recipe, three months late. Which means, in fact, that I am getting worse, because my Thanksgiving recipes were only two months late. Oh well.

Incidentally, I think I'm going to change the tagline of my blog to: "Good food...crappy pictures." Seriously. I have no sense of artistry. I snap my pics on my iPhone, in my garish kitchen light, on a messy counter, on a paper plate. If there are Seven Deadly Sins of Food Photography, I commit them all. Simultaneously.

But, don't let my lack of artistic flair deter you from making these bars, because they are super quick and yummy. And like Thanksgiving, with my new kiddo, quick and easy was the name of the game this year.


I didn't intend to make these bars. In fact, I was at a loss for what to make this year for Christmas. Normally, my mom and I make scads and scads of Christmas cookies, but this year, I knew it wouldn't happen. Frankly, I was an overwhelmed FTM, and I was lucky to make it to the shower every day, let alone coordinate the 15+ varieties (no exaggeration) of cookies and cake balls this year.

But then I saw these babies at Target:


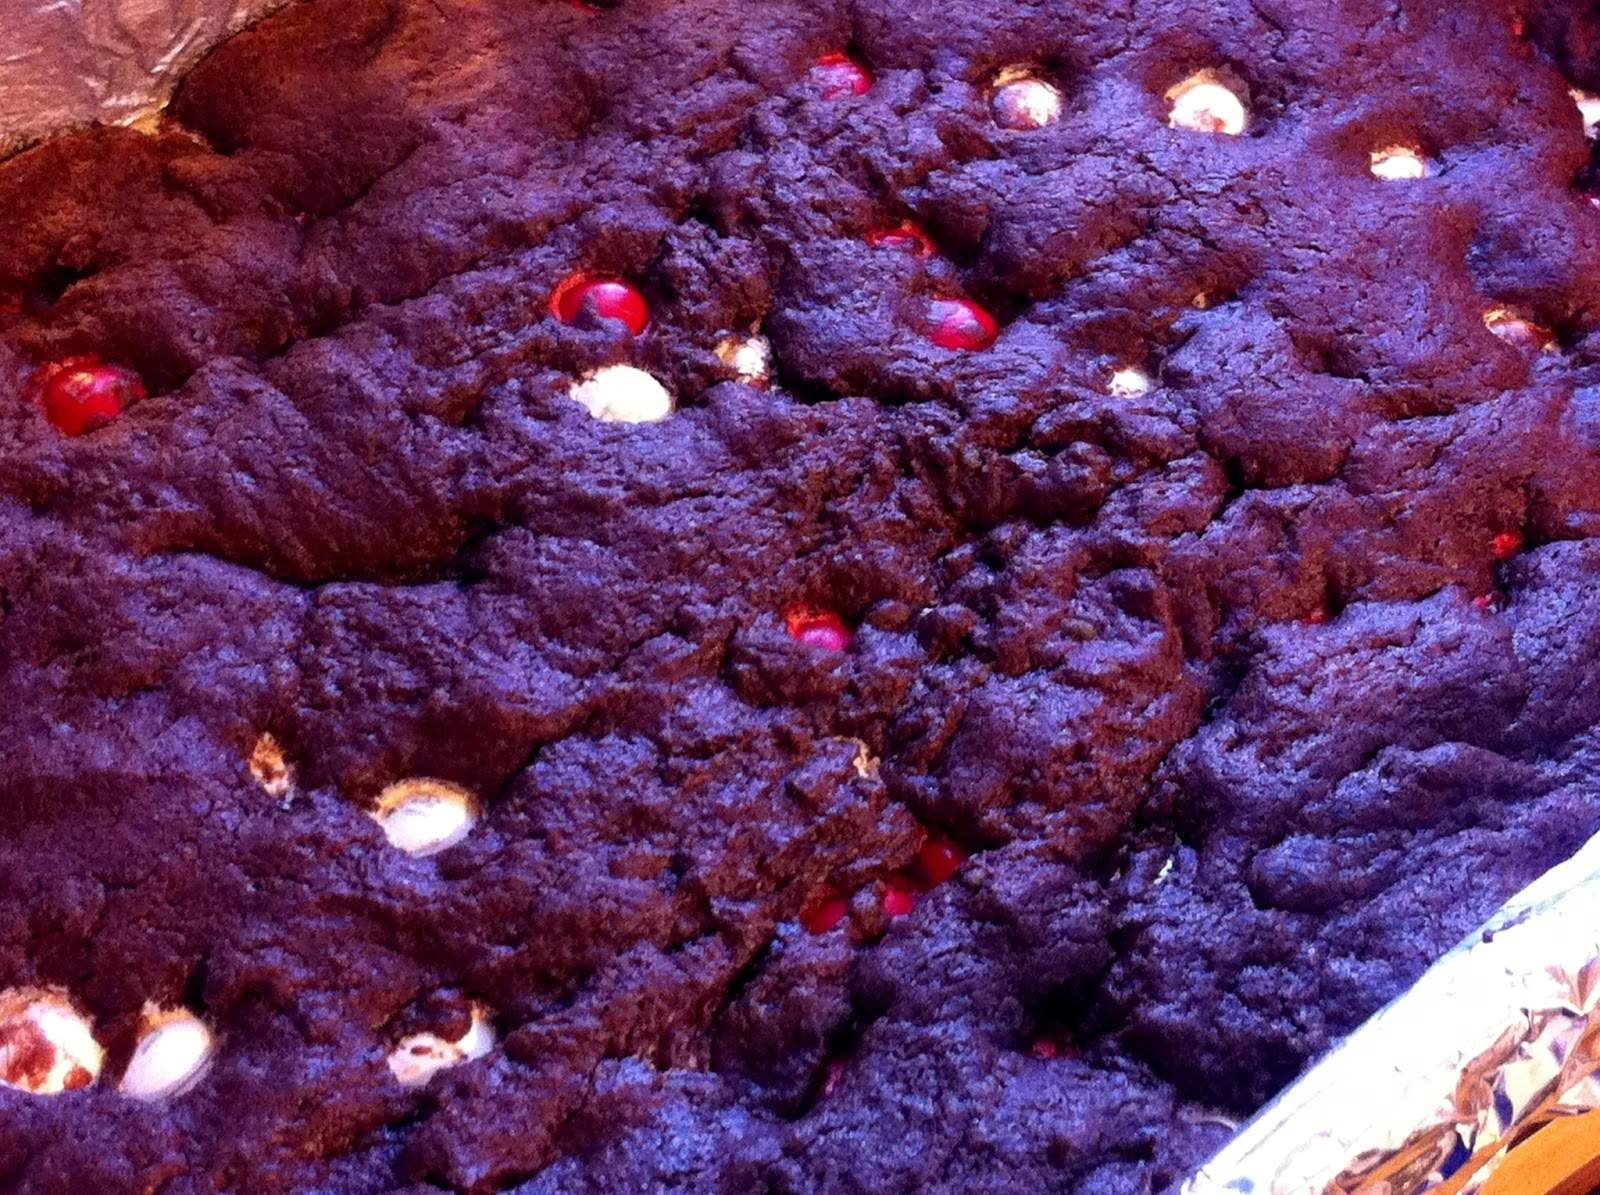
White chocolate peppermint M&Ms. Apparently they were a Target exclusive. So I snatched up a bag for baking without a clear idea of what I wanted to do with them. But then I decided to make bars -- they're easier than cookies because it involves one pan and one trip to the oven. And for these bars, I wanted to try something a little different, so I used Devil's Food cake mix as the base. Super easy!

Just combine cake mix, oil, an egg and water in a bowl and mix to combine (by hand is fine, I used a wooden spoon).


Then, add the mix-in, which in this case was the entire bag of M&Ms:

Note: the oil makes the batter, well, oily. The M&Ms get coated with oil and almost fall out of the batter as you mix. Don't worry, it will bake up just fine.
Then, spread it in a pan, bake, cool, and cut!


I managed to have the entire thing done before my little helper woke up!

Color-coordinated with Mommy's baking!
My family loved these things, they were quite tasty, and the bar consistency was perfect. Huge return on taste for a minimal time investment -- just the way I like it! The beauty is, you can use the basic cake mix recipe for any combo of batter and mix-ins! Next year, I think I will try white cake mix with these M&Ms, which should look stunning, visually. I'm also going to try a flavor variation for Easter which, based on my current posting schedule, probably won't make it onto the blog until Halloween. Oh well. Happy baking!

Chocolate Peppermint M&M Bars

Ingredients

  • 1 box chocolate cake mix (Devil's Food, Chocolate Fudge, etc)
  • 1/2 cup vegetable oil
  • 1/4 cup water
  • 1 egg
  • 1 bag of white chocolate peppermint M&Ms (or mix-on of your choice)
Directions
  1. Preheat oven to 350F
  2. Spray  9x13" pan with cooking spray (optional: line pan with aluminum foil before spraying, for easy lifting of bars from pan)
  3. Combine cake mix, egg, oil and water in bowl and mix well
  4. Add mix-ins
  5. Spread evenly in pan (you may have to press down a little to spread evenly) and bake for 20-25 minutes
  6. Cool and cut


Wednesday, 22 December 2010

Tiramisu

For Christmas, I always make at least one tiramisu, which I bring to my cousin's house. It has become something of a tradition, and I thought I'd share the recipe, since it always goes over so well. It is one of those things that is slightly labor-intensive, but so worth it. It is also one of those things that is heavily customizable, especially with regard to the choice of liquor used.


Tiramisu is a delectable dessert made of cookies dipped in coffee and liquor layered with sweetened mascarpone cheese. Mascarpone is a fresh triple-cream cheese, that is to say, a cheese that is over 75% butterfat by dry weight. In fact, it is not a true cheese at all, since it is not make with any rennet or starter, it is closer to a clotted cream. The process used to make it is most similar to the process used to make yogurt.

Although there are many town in Italy that claim to be the birthplace of tiramisu, the first documented mention of the dessert only dates to 1971.

There are a lot of varieties of mascarpone cheeses to choose from, especially around the holidays. I like Bel Gioioso the best, but see what is available in your local supermarket. I don't recommend it if you can find true mascarpone, but you can substitute regular cream cheese using the following method: 16oz cream cheese beaten with 1/3C sour cream and 1/4C heavy cream until smooth. But trust me, try to find the real deal if you can.

Start off by taking your yolks and sugar, and placing them in a heat-resistant bowl. You need to temper the yolks, so set the bowl over a pan of simmering water, and whisk continually until the temp of the yolks is 160F.

Then, place the yolks and sugar mixture into the bowl of an electric mixer and beat for several minutes until pale and fluffy.

Add in the mascarpone, and beat until combined.


Now, it is time to whip egg whites. Do this in a separate bowl, I normally use my hand mixer.  You can use regular egg whites if you wish, but I use the pasteurized whites for safety reasons.


If you decide to use pasteurized whites as well, use a tablespoon of merengue powder, to help them whip. Pasteurized whites definitely do not whip as nicely as regular whites.


Whip the whites until fluffy. This is easy in the case of regular whites, just fold them into the cheese when stiff peaks form.  However, fluffy is a relative term with pasteurized whites -- the bubbles will be really small, and they will triple in volume. For pasteurized whites, scoop fluffed whites from the top -- the bottom is hard to whip and will stay liquidy, so you will have to beat and scoop several times.


If there is a tablespoon or so of pasteurized whites that won't whip, don't worry. Just leave it in the bowl and don't mix it into the cheese.

Fold the whites into the cheese.


In the meantime, brew coffee -- about 30oz, or 5-6oz cups.


Put it into something that will be easy for you to dip from later. I use an 9"x13" pyrex casserole dish. To the coffee, add 2 tbls of espresso powder and 4 tbls sugar, plus 1/2C liquor.

I normally use a combination of brandy and chocolate liquor, but you can choose whatever you like.


Now, open your packages of ladyfingers. I prefer the hard imported dry ones with a tiny bit of sugar on top, not the soft and spongy ones.


Carefully, dip your ladyfingers into the coffee/liquor mixture. I do this with a fork supporting the bottom of the cookie. I dunk it in, flip it over, and then lift it out. Only leave it in for a few seconds, it absorbs quickly!

Layer the bottom of the pan you want to make your tiramisu in with the soaked ladyfingers. I make mine in a 9"x13"x3" so it will be high enough for 2 layers. But, you can make it in whatever you want.


After the ladyfingers go down, spread half the cheese mixture over them, covering completely. I ladle my cheese mixture over the ladyfingers, it is pretty liquidy at this point.


Sprinkle unsweetened cocoa powder over the cheese. You can also use dark chocolate cocoa or whatever else you have on hand.


Then, repeat! Ladyfingers:


Cheese:


Cocoa:


Then, store it in the fridge for at least 6 hours, although overnight is best. Let those flavors mingle and get happy.

The next day before you cut into it and serve it, sprinkle a little fresh cocoa powder on it.

Then, slice and serve.


This recipe is fantastic. It is very basic, very traditional, and huge on taste! Using pasteurized whites means that the final cheese filling is slightly less-structured than if you had just used regular whites, but it is a trade-off with safety, since you can't temper the whites. Whether to go pasteurized or regular whites is a decision I leave to you.


You can also use whichever liquor you like. My favorite is brandy and chocolate liquor, but I have on occasion used all chocolate liquor, as well as a mix of dark and white chocolate liquors. You could even use something a little non-traditional: Kahlua, Bailey's or Frangelico spring to mind. The cheese is a neutral taste, so anything that pairs well with coffee and chocolate will do well in this recipe. You can even leave it out all together if you wish, and add a little vanilla or coffee flavoring syrup to the coffee if you want a non-alcoholic version.


Whatever you decide, this recipe will be a great addition to your holiday dessert table!

Tiramisu
(Printable Recipe)

Ingredients
For cheese filling

  • 8 egg yolks
  • 1/2 C sugar
  • 1.5 lbs mascarpone cheese
  • 1 C pasteurized egg whites plus 1 tbls merenge powder or 3/4 C egg whites

For coffee/cookie layers

  • 30oz strong brewed coffee
  • 2 tbls instant espresso powder
  • 4 tbls sugar
  • 1/4 C brandy
  • 1/4 C chocolate liquor
  • 1 package ladyfingers
  • Unsweetened cocoa powder for dusting.

Directions


  1. Place and sugar in a heat-resistant bowl. Set the bowl over a pan of simmering water, and whisk continually until the temp of the yolks is 160F.
  2. Place the yolks and sugar mixture into the bowl of an electric mixer and beat for several minutes until pale and fluffy.
  3. Add in the mascarpone, and beat until combined.
  4. Whip whites in second bowl until peaks form.  See blog for additional notes about pasteurized whites.If you decide to use pasteurized whites as well, use a tablespoon of merengue powder as well, to help them whip. 
  5. Fold the whites into the cheese.
  6. In the meantime, brew coffee -- about 30oz, or 5-6oz cups. 
  7. Put it into something that will be easy for you to dip from later. 
  8.  To the coffee, add 2 tbls of espresso powder and 4 tbls sugar, plus 1/2C liquor.
  9. Carefully, dip ladyfingers into the coffee/liquor mixture. Only leave it in for a few seconds, it absorbs quickly!
  10. Layer the bottom of the pan you are using with the soaked ladyfingers.
  11. After the ladyfingers go down, spread half the cheese mixture over them, covering completely. 
  12. Sprinkle unsweetened cocoa powder over the cheese. 
  13. Then, repeat for a second layer, ending with cocoa
  14. Cover, and refrigerate for 6 hours or overnight
  15. Next day, sprinkle extra cocoa on before serving

Monday, 20 December 2010

Peanut Butter Pie (No Bake)

Here is an incredibly easy no-bake dessert that is great if you need a quick holiday treat: No Bake Peanut Butter Pie. It has few ingredients, and is a snap to put together! It has peanut butter, Hershey's Kisses, cream cheese and Cool Whip, all in a graham cracker crust. Pretty simple!

I have the original recipe from a "Hershey's Holiday Favorites" mini-mag from 2004, but it can also be found online here. I tweaked it just a bit, to be more peanut buttery!

The first thing you need for this easy dessert is a pre-made graham cracker crust, 6oz.


Then, you take 26 Hershey's kisses and a little milk, and melt them in the microwave. Melt them carefully, in 30 second intervals (stirring between each interval) until smooth.


Spread the chocolate on the bottom of the crust and chill in the fridge for about 30 minutes.


In the meantime, beat some softened cream cheese with some sugar until light and fluffy.


Then, plop in an entire 16 oz jar of peanut butter. Yes, the whole jar. Mix well!


Then, fold in about 8 oz of Cool Whip into the peanut butter mixture, stirring well to turn this:


into this:


Once everything is smooth and homogeneous, spread it in the pie crust on top of the chocolate, cover, and chill for several hours or overnight.


If you buy a 12 oz or larger Cool Whip, you can spread Cool Whip on the top, and decorate with leftover Kisses...

This recipe makes one dense peanut buttery pie. If you want an even stronger flavor, try natural peanut butter!

The major virtue of this pie, other than its peanut buttery goodness, is that it is super easy to assemble. It is a perfect dessert to put together during the holidays, especially if you are short on time!!

Peanut Butter Pie (No Bake)
(Printable Recipe)

Ingredients
  • 1-8" (6 oz) pre-made graham cracker pie crust
  • 1- 8 oz block of cream cheese, softened
  • 3/4 C sugar
  • 16 oz peanut butter
  • 16 oz tub of Cool Whip, thawed
  • Bag of Hershey's Kisses

Directions
  1. Melt 26 Kisses and 2 tbls milk in microwave in 30 second intervals, stirring between each interval until smooth
  2. Spread on the bottom of crust and refrigerate 30 minutes or until firm
  3. Beat cream cheese and sugar until luffy
  4. Add in peanut butter and beat until combined
  5. Fold in 8 oz Cool Whip and mix until combined
  6. Spread peanut butter mixture into crust and refrigerate several hours until firm
  7. Decorate with remaining Cool Whip and Kisses if desire