Showing posts with label coconut. Show all posts

Wednesday, 27 March 2013

Coconut Macaroons


I'm always on the lookout for a good coconut macaroon recipe, and this is definitely a great one. It is Alton Brown's Paradise Macaroon recipe (with minor modification), which was his contribution to Food Network's 12 Days of Christmas Cookies circa 2008.

Now, these are coconut macaroons, which are the most common kind of macaroon in the US, although I am sure everyone is also familiar with the French cookies of the same name as well. Why two such variant desserts under the same name? Well, it turns out that "macaroon" is a rather loose term: it can be used to describe a light, small cookie or cake(ish) baked good, commonly with egg whites, some kind of nut and/or almond paste, sometimes coconut, and sugar. The coconut macaroons are most common in the US, while French macaroons, also called macarons, are meringue cookies filled with some type of ganache or buttercream. People tend to use the term macaroon interchangeably for either the coconut or cookie macaroons, and while some people try to exclusively use macaron when talking about French-style macaroons, there isn't a universal convention for distinguishing between the two

These cookies are fairly easy to put together, although there is an egg-whipping step in the middle. Trust me, it is well worth the extra work.

First, combine the coconut, condensed milk, salt and vanilla, mixing well to coat.


Then, in a separate bowl, whip the eggs until foamy, the slowly incorporate the sugar, whipping until medium (aka firm) peaks form (the peak has a gentle curl to it when you lift the beaters out, check this out for a visual reference).  Fold the egg whites into the coconut mixture:


Using a tablespoon or a #40 scoop, scoop out the coconut mixture onto parchment-lined cookie sheets...


And bake for 20-25 minutes at 325 until golden brown.


Take them off the pan and put them on  wire rack to cool immediately, and let them cool down completely. Then, you can melt the chocolate and shortening together (I melted the chips in the microwave in 15-30 second increments,stirring after each time, with the oil), and dip the top of each completely cooled macaroon into the chocolate.

Before the chocolate sets, sprinkle on some chopped macadamia nuts, and DONE!


I used bittersweet chocolate, which I prefer to semi-sweet, and it was lovely. But semi-sweet is just fine, and if you want more of a sweet Almond Joy taste, you can even use milk chocolate. And almonds, for that matter. But I love macadamia nuts with coconut, so tropical!

These cookies are rich and decadent, and the chocolate/macadamia nut combo on the top adds just the right amount of contrast and salt. The extra whipped egg whites gives them a slightly lighter consistency than the usual wet, dense macaroon, but doesn't sacrifice any of the richness and flavor. You won't be disappointed in these!

Coconut Macaroons

Ingredients
  • 15-16 oz sweetened shredded coconut (depending on the size package(s) you find)
  • 2 oz sweetened condensed milk
  • Pinch kosher salt
  • 1 tsp vanilla 
  • 4 large egg whites
  • 5 oz sugar
  • 12 oz semisweet or bittersweet chocolate chips
  • 1 oz vegetable shortening
  • 2 oz finely chopped dry-roasted macadamia nuts
Directions

  1. Preheat oven to 325F
  2. Combine coconut, condensed milk, salt and vanilla in bowl, mixing well to combine
  3. Whip egg whites until foamy
  4. Add sugar slowly to egg whites, continuing to whip until medium (firm) peaks form, about 6 minutes
  5. Fold egg whites into coconut mixture
  6. Scoop coconut mixture onto parchment-lined cookie sheet using a #40 scoop or rounded tablespoons
  7. Bake 20-25 minutes, until golden brown
  8. Remove cookies/parchment immediately to wire rack and allow to cool completely before topping
  9. Melt chocolate (microwave is fine) and oil until smooth
  10. Dip the top of each macaroon into the chocolate, and sprinkle macadamia nuts over the chocolate before it sets
  11. Let chocolate set before storing and/or eating


Monday, 6 December 2010

Coconut Cake Balls

Since my previous koulourakia post was for something quite labor-intensive, I decided to follow-up with a post about an easy holiday treat!

This entry is yet another of the many variations on Bakerella's cake balls that I've come up with over the years, and one I mentioned offhandedly as a possibility in a previous post. But they are good enough that I decided to give them their very own post -- coconut cake balls! This post is very short, it is really more of an idea than a recipe, but they are easy and tasty, and for some reason, I always associate coconut confections with Christmas, so here is the workflow:


First, make and bake a white cake mix (brand of your choice) in a pan of your choosing (although I think 9"x13" is easiest), following the directions on the box.


Then, put the baked and cooled cake in a bowl, and mash it up with a tub of ready-made vanilla icing and a 14oz bag of sweetened shredded coconut until it is relatively homogeneous. If you don't plan on baking and rolling in the same day, you can store the cake wrapped in saran wrap for a day or two, or freeze it for later use.


Using a #60 scoop, scoop out the cake/icing mixture and roll into balls. Chill these balls in the freezer about 30 minutes or until firm, which could take up to an hour depending on the starting temperature of your cake. If the cake was frozen, it'll take closer to 30 minutes.


Then, dip the balls into candy coating wafers of your choice, thinned with some vegetable oil. I always use dark chocolate for these to simulate something along the lines of a Mounds bar, but vanilla melts will work just as well. You can also use real chocolate, but I find that it is easier to use the candy coating wafers because they melt more evenly and set up faster.After this coating hardens, drizzle on a contrasting color if you so desire.


And there you have it! Easy coconut cake balls for the holidays! I've made a lot of variations on cake balls, and these are definitely one of the best. The mix-in of actual coconut gives them a little something extra, they are tasty little truffles of coconut goodness. Plus, the recipe as written will yield over 5 dozen, so you will have plenty to take places or to give as gifts.

Wednesday, 31 March 2010

Key Lime Coconut Crumb Bars

My husband and I have this  deal, you see. He really isn’t into sweets, which is rather unfortunate since all I know how to do is bake.  He will, however, make an exception for several things that incorporate fruit, such as the thumbprint cookies from a previous posting. I promised, in keeping with the theme of the approaching summer, that all of my baking would include fruit until at least the end of August.
 
So when I saw this recipe on the Pioneer Woman Cooks, I knew I had to try it. After all, it’s Ree Drummond.  Have you met Ree? If not, then head on over to The Pioneer Woman ASAP. You’ll thank me. Not only does she bake, she cooks, and her recipes are insanely good, her writing is always entertaining, and her photos are gorgeous. 


Anyway, on Ree’s site, there was this darling recipe for lemon crumb squares. And it caught my eye, because I was just talking about lemon squares with my mother the other week. But we were talking about more traditional shortbread-bottomed, cooked pudding-topped lemon squares. Ree’s recipe is a variation that uses two layers of crumbs that are cousins to coffee cake crumbs, except without cinnamon…and way denser…and with oatmeal...with a delicious layer of lemon sandwiched between them. And then, the clincher:  Ree casually mentions at the bottom of her post that the recipe would also work for key limes.


Sold.


I hoofed it over to the supermarket and grabbed a few limes, a can of sweetened condensed milk, and a bottle of Nellie and Joe’s Famous Key West Lime Juice. Sometimes this is in the juice aisle, and sometimes it is in the baking aisle, so you might have to look around for it.  Why didn’t I just squeeze the nice limes I grabbed at the supermarket, you ask? I don’t know, “key lime” just sounds a little sexier. Key lime pie, Florida, summer, and all those other lovely word associations I made in my head. Besides, key limes are tarter than the average lime. But, this recipe will also work fine with the juice from the typical Persian limes found in your supermarket. So if you feel really bad about pitching a perfectly good lime after zesting it, you can do this. Or you can do how I do and use the key lime juice from the bottle, zest from the Persian lime, and then cut up the Persian lime into wedges suitable for Coronas. Problem solved, no more qualms of conscious here. Phew.


So anyway, you zest the sucker (if you don’t already have a microplane zester, you should look into it. I much prefer it to traditional zesters with the holes on one end), which is a good way to wake up in the morning, by the way.  The smell is amazing.

Then you take all that lovely zest, a can of sweetened condensed milk, and about ½ C of the lime juice, and beat it together. I’ve already made these bars a few times, since there is way more than ½ C of lime juice in the bottle I bought, and I’ve used both the whisk and paddle attachments to do this, and they both work great. The mixture will be a little runny no matter how you mix it, don’t be alarmed.


Next up, the crumbs. You cream slightly softened butter with brown sugar until it is nice and combined. Then you add in some oats. At this point, I diverged from Ree’s original recipe a little further, because I made the command decision that I wanted coconut in my key lime bars. Because they go together. There’s even a song about it that Kermit sings (okay, Harry Nilsson sang it first, but who can resist Kermit the Frog?). So add about a cup and a half of shredded sweetened coconut at this point as well, and mix it up. Then, sift in the flour, salt and baking powder.

Half the crumbs go down on the bottom of the pan (I used a disposable 8X12 pan; Ree used an 8X11 casserole dish; a 9X13 pan can also be used, the bars will just be thinner).  You can push the crumbs down with your hands, or the back of a measuring cup. 

Then, dump on all of that lovely lime filling on, and spread it around. 

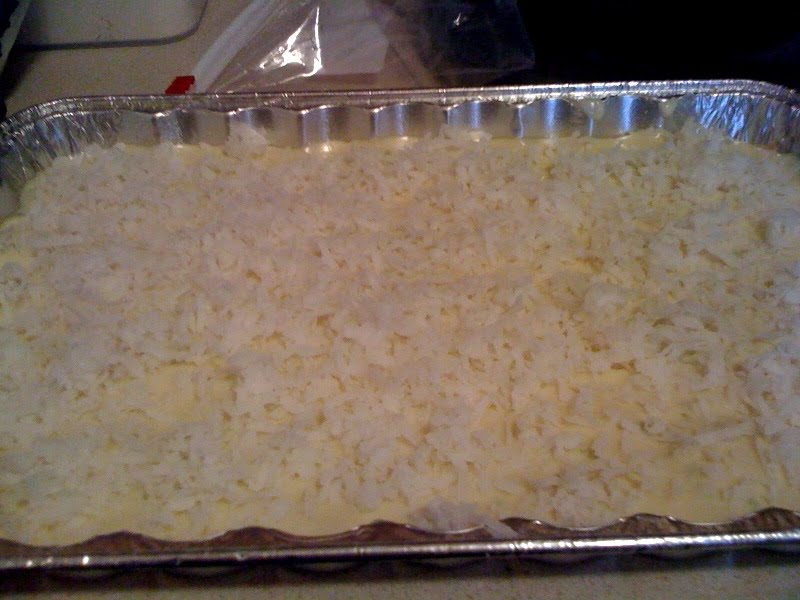
Then I decided to sprinkle more coconut on top of the lime layer, just by eye until I figured it was covered enough. 

And then, sprinkle on the other half of the crumbs. Don’t pat them down like with the bottom layer, just gently even them out. You don't want wayward crumbs standing tall, they will brown faster than the rest of the top layer, and may burn before the rest is done.


Then you bake it at 350F for about 25 minutes. When it comes out of the oven, let it rest at room temperature for about 30 minutes, to give the filling a chance to set up.   

Then, I would advise cutting the bars (leaving them in the pan) and then popping them in the fridge.  Trust me and cut them before you chill them – if you wait until after you chill the pan, the crumbs will be harder to cut through, and you will most likely destroy the top layer. 


 These bars are pretty fabulous, especially if you like citrus, and especially if you're ready for summer! They are easy to put together, and a definite crowd-pleaser! If you want lemon, that can be substituted as per Ree's original recipe. Personally, I'd like to try the lemon one with some blueberries sprinkled on top of the lemon layer, and maybe a dash of cinnamon in the crumbs.


Ingredients
  • 1-⅓ cup All-purpose Flour
  • ½ teaspoons Salt
  • 1 teaspoon Baking Powder
  • 1 stick (1/2 Cup) Butter, Slightly Softened
  • 1 cup Brown Sugar (lightly Packed)
  • 1 cup Oats
  • 1  ½ cup shredded Sweetened Coconut for crumbs, plus more for sprinkling
  • 1 can (14 Ounce) Sweetened Condensed Milk
  • ½ cups Key Lime Juice
  • Zest Of 1 Lime
Preparation Instructions
1. PREHEAT OVEN TO 350 DEGREES.

2. Mix butter and brown sugar until well combined. 

3. Add oats and coconut to the butter mixture and combine

4. Sift the flour, salt and baking powder together into the butter/sugar mixture and mix to combine. 

5. Press half of crumb mixture into the bottom of an 8 x 12 inch pan (or 8X11, 9X13, etc).

6. Mix together condensed milk, lemon juice, and lemon zest. Spread onto the bottom layer of the crumb mixture. 

7. Top with the other half of the crumb mixture, but don’t press.

8. Bake for 20 to 25 minutes, or until golden brown. 

9. Allow pan to sit on counter for 30 minutes after baking. Cut into squares and refrigerate for a couple of hours or until cool.

Serve cool.


Lime