Monday, 22 November 2010

Dumplings


These are actually Hugh's disastrous dumplings, but we ate all of my mum's dumplings so fast there was no time to take a photo, so this is just to give you the idea


Gay men don't like me. I've always suspected this but lately I've come to realise that it's just a fact.

Actually, it's not that they don't like me, it's that they are totally indifferent to me, which I think is in some way worse. I am to a gay man what a 65 year old woman is to a 23 year-old builder from Essex: invisible.

I used to try to be fabulous and bitchy and engaging and flamboyant, in a sort of desperate caricature of what I thought a gay man might want in a woman - and it briefly aroused a faint flicker of interest from one or two gay men. But it was unsustainable and I soon slid back into my natural persona: anti-social, chilly, beady, unsympathetic. And the loose grip I had on their interest melted away like the only two snowflakes of a mild winter on a warm car bonnet.

Everyone else I know has a gay friend - at least one. Everyone. Even my 85 year-old Swiss-German grandmother. "I vent to Lausanne last veekend," she will say. "Wiz my PANSY FRIEND Alain G-!" and she will shriek with delight at the thought of neat little Alain with his kerchief and lovely manners and expertise in early Renaissance ceramics.

Even my husband has a huge gay following and gay men have always thought he was great. At parties I usually find him talking to some very high-powered gay man, who will be standing there in a £5,000 suit laughing, showing off a lot of very perfect teeth and sighing and saying "Oh Giles." And then I come up and stand there and smile, feeling like a frump, and the high-powered gay man's eyes will slightly glaze over when I say something. And then eventually I'll excuse myself to the loo and let them get on with it.

"Yeah that's a surprise they don't like you," said my friend Wendy, who has, I think, almost exclusively gay friends. "Because, you know, you can be quite a bitch and they quite like that."

I ought to take lessons off my mother: she is a gay magnet extraordinaire. But she's not a bitch. She just LOVES gay men, or anyone camp or anyone fabulous. I'd say it's because she's an artist, but she's not like that - she's not all dope-smoking and far-out, man - she's just a very talented figurative draughtswoman. And by that I mean she draws things and they look like what they are. And sculpture, ooh you should her sculptures. But there must be a flamboyant, "modern", arty side to her that makes all these super dooper gay men flock to her door.

I ought to listen to my mother more, in general. Like the other day, I wanted to make dumplings for a stew but instead of ringing my mother, who makes great dumplings, I looked up a recipe in Hugh Fearnley-Whittingstall's Meat Book for a recipe and they were TERRIBLE! Hard and nasty.

So I meekly emailed my mother for her recipe and she sent it back and they came out perfectly - like little clouds. Perhaps now I can make dumplings like clouds a gay man will want to be my friend. But I doubt it.

My mother's dumplings
Makes about 8

"6oz SELF RAISING flour,
3oz suet.
Water.
Salt & pepper,
lots of parsley (optional, but good with stewed lamb).
Mix to a soft, not too dry consistency"

[N.B. how my mother uses CAPITAL LETTERS about the self-raising flour, as I would. DNA: not a made-up thing.]

You can either cook these in a steamer, if you've got one, for 25 minutes - or rest them on top of your stew for the last 25 minutes of its cooking time.

Friday, 19 November 2010

Pate de Canard en Croute Part II: Hubris


Oh dear, so - after all that fuss about how easy it all was, I cocked it up anyway.

Although I'd like to point out that this was an execution error and not a planning error - i.e. the pastry was fine, I just put it together slightly wrong. The pastry has split along the seam between the "basin" and the "lid" of the pastry - simple physics, really; an eggwash wasn't enough to stick the two bits together and the basin sagged under its own weight.

What I ought to have done was brought the basin pastry up and over the brow of the duck, so that it had something to rest on and then applied the lid as a sort of large piece of sellotape to hold it all together.

This means you can't execute Julia Child's final command on this, which is to cut round the lid of the pastry case, lift the duck out, untie the strings and then put it back. But I didn't do that anyway.

But still, it tasted jolly nice. I'm not sure phrases like "worth the effort" really apply here because nothing is worth that much effort. But, strangely enough, my husband went nuts for this - he thought it was really great and really special. Who'd have thought it? He wants me to make it for a festive Christmas Eve dinner. And, although I swore I'd never do it again, the look on his little face was so very winning that I might just have to.

Thursday, 18 November 2010

Pate de Canard en Croute Part I


WARNING: THIS POST CONTAINS YUCKY IMAGES OF BUTCHERY


The wrongness of this is quite overwhelming.

It's just so  typical of the French to do something like this. And I like the French, I really really do. I think they're great. I love loads of things about them, even the bad stuff. But to do this to a duck - to take all its bones out, stuff it and then wrap it in pastry - is just... wrong.

I suppose I'm just too modern, too new-generation about food to really understand why you'd want to do this. It strikes me as a thing you'd do if you were suffering from a glut and had eaten duck 50 different ways that week anyway and you were staring at your latest bird thinking "Hell, how am I going to liven this thing up?"

So instead of just spreading it with orange sauce (again), you decide to remove its skeleton, stuff it and then wrap it in pastry. Mental.

I'm really sorry that I proposed I would do this, I really am. I feel like a bad person for subjecting my innocent free range duck, which I purchased at vast expense (£20) to such frankly perverted kitchen practices. But I did, because I felt like I had to, if only so I could bang on about how wrong it all it.

This is not Julia Child's exact recipe because I wanted to do it my way (I'm getting a bit like that these days - a bit grand). I've basically wrapped it in rough puff pastry and changed the stuffing to a more Christmassy thing, whereas Child's recipe called for pastry made to American measurements - sticks and cups and all that unfathomable stuff - and a veal and pork stuffing that looked boring.

But the main event is the deboning of the bird, which Julie Powell's character makes such a fuss of in Julie and Julia.

Anyway, I was right, deboning a duck is easier than getting a book deal. But it's still a quite traumatisingly gross process. Those who feel sensitive about these things ought to look away now.


HOW TO DEBONE A DUCK

So, if you want to do this, and I can't imagine why you would, take your bird, apologise profusely and then lay it down on a board breast-side down. Then take the smallest, sharpest knife you can find and make a slit down the middle of the back.


Then, visualising what the bone structure of the duck looks like - i.e. a barrel-shaped, hollow thing, cut and scrape along the bones with your knife so that you remove as much of the duck along with the skin as you can, leaving the bones bare. It'll make sense once you're actually doing it.


You have to cut through the joints where the legs are attached to the main ribcage. Be firm. The main objective is just not to cut through any skin and the finesse with which you do the rest of it doesn't matter.

After the top of this is mostly clear, you have to release the ribcage from the breast-side of the duck, which is very fiddly, but you'll get there in the end. The picture below is just a horrifying mess, but it will be instructive if you're about to do this, or are in the middle of it.


I cut off most of the ribcage here so I could see what I was doing. Please, for the love of God, if you do this at least make a stock out of the bones so it's not a waste.

Detatching the last bit of the bonecage, at the top, which constitutes sort of the shoulders and the attachments to the wings, is really hard and I haven't got any advice other than be very careful. You'll do a lot of bending over and squinting and swearing at this point. Just cut very carefully as best you can see how around the bones, just bearing in mind all the time not to cut right through any skin.

Cut the wings off at the mid-joint (i.e. cut off most of the wing) and then carefully scrape round the bone to release it and pull it out. Child says you can leave the drumstick bones in, which I did because I so much wanted the whole awful process to be over, but I'd advise going that extra mile and taking those out too.


Ta da!

Then pile on your stuffing. I made mine out of 2 packets of Waitrose's finest chipolatas, skinned, 1/2 a cooking apple - diced, the zest and juice of half an orange, 5 prunes - finely diced, 1/4 tsp cinnamon, 1/4 tsp mace, about six scrapings of nutmeg and a lot of salt and pepper. You also slice off as much of the duckmeat from the breast and thigh that you can without tearing through the skin, dice it and add it to the stuffing.


Here you are supposed to sew it all together with a trussing needle and string, but I forgot to get it off my mum (despite going round to her house specifically for it - you know how it is) so I just had to tie it up with string, which worked okay.


Then you brown it all over


Then you wrap it in pastry


Decorate it, brush it all over with eggwash and stick a foil funnel in the top to let the steam escape


Tune in tomorrow to find out what happened next...

Wednesday, 17 November 2010

Pumpkin Pecan Cheesecake Pie


I. Love. Pumpkin. Pie. In fact, let’s be honest: I love pumpkin anything. But pumpkin pie is the very pinnacle of all pumpkin desserts as far as I’m concerned. I used to make a traditional pumpkin pie every year, but last year I went in a different direction, rolling out a brand-new type of pie, and haven’t looked back since. This new pie, the Pumpkin Pecan Cheesecake Pie, is my definitive holiday pie. It is like three desserts wrapped into one, and although it might sound busy, this pie has the most wonderful blending of flavors that results in my favorite Thanksgiving dessert.


I had always been intrigued with pumpkin cheesecakes, but I had never tried to make one before. The pie I am going to describe is a little different from a regular pumpkin cheesecake in that the cheesecake layer and the pumpkin pie layer are kept separate, with a pecan layer on top. This concept was originally inspired by Bakerella, who made a similar pie on her blog. But after reading the comments posted about that recipe, a lot of people complained that the recipe failed to give a filling that solidified properly. So I decided to try my hand at making this pie, keeping the distinct pumpkin, pecan and cheesecake layers, but completely revamping the recipe itself, starting from the ground up. The results I got were just wonderful, and that’s what I’ll be sharing in this post.

First, you need a pie crust. Deep dish if you can, there will be a lot of filling. I used the Sarah Lee 9” deep dish frozen pie crust, and it was still frozen when I filled it (although it sat on the counter after I had filled it with the cheesecake layer, and while I was assembling the pumpkin layer – maybe 10 minutes. Feel free to use your own recipe if you want, just keep a closer eye on how the crust browns, because my directions are for a crust that is partially frozen.

The first layer that goes down is the cream cheese. Start with your cheese softened, maybe sitting out at room temp for 30-45 minutes or so, cut up into cubes in your mixing bowl. Once the cheese is a little softer, you beat it with the sugar until it is well combined and not lumpy. 


Add the vanilla and a dollop of sour cream (a slightly rounded tablespoon), and beat until incorporated. Add the egg, and beat until combined and the lumps are pretty much gone. Try not to overbeat. Then, pour the cheesecake layer into the bottom of the crust.


Now for the pumpkin layer. I personally like adding each spice individually, as opposed to the pumpkin pie mix. I also freshly grate the nutmeg before I use it, and although that isn’t strictly necessary, it smells and tastes wonderful.  Combine the pumpkin, sugar, spices, salt, egg and whites in a bowl, and whisk until thoroughly combined. 

You can do that by hand, it is easy enough to combine. Then, layer the pumpkin mixture on top of the cheesecake mixture carefully. I would spoon it on gently, and then spread it out. Gently.


At this point, you put some aluminum on the crust to protect it from over-browning, and pop it into a 400F oven. After 5 minutes, and without opening the door, turn the oven down to 375F and keep baking for 25 minutes.

While it is baking, assemble the pecan topping. Combine the pecans, brown sugar and maple syrup in a bowl.


 Be sure to use real Grade A maple syrup, not the stuff you typically buy for pancakes. No Log Cabin or Aunt Jemima!

After the 25 minute bake time is up, take the pie out of the oven. You are going to be putting the pecan topping on quickly, you don’t want the pie to cool down too much. Remove the shield so that you can sprinkle pecans right to the edge of the crust, and start sprinkling the topping evenly all over the pie. I typically use all or almost all of the topping. Taking the shield off will also give you an idea of how much the crust still needs to brown. I leave those judgments up to you, because each crust and oven might be slightly different.


Put the shield back on if you think it is necessary, and pop the pie back in the over for another 20 minutes. After that time is up, try to take a peak (without opening the door if you can manage it) and see how the crust is doing. If you took the shield off, is it browning nicely or getting overdone. If it is getting overdone, put the shield back on. If you left the shield on, is it not browning enough? If not, take the shield off. This will really depend on your oven. Using the same exact crust, at my parents’ house, I had to leave the shield on the entire time to prevent excess browning, but in my apartment I took the shield off after the topping went on, and they both turned out great. The best advice I can give is just pay attention to the crust.

Let the pie bake for a further 10 minutes (so, 1 hr total bake time), then remove it from the oven and place it on a wire rack for cooling. 

Let the pie cool down at room temperature for at least an hour, if not more. If you cover it to put it in the fridge while it is too warm, you will end up with condensation building up on the inside of the cover, making the crust and pie top soggy. It doesn’t have to be completely 100% room temp before you put it in the fridge, but make sure the bottom is no more than slightly warm. If you are worried, you can do what I do and check the cover about an hour after I put it into the fridge. If there is condensation building, wipe it off with a paper towel.

This pie needs to chill for maybe 5 hours minimum, but I highly recommend overnight. It’ll make slicing and serving so much easier, plus, it just tastes better when it is thoroughly cold.


Again, this pie: my favorite rendition of pumpkin pie. The flavors are complex, and so are the textures, but you have the strong pumpkin coming through, complemented by everything else. If you are a pumpkin pie fan, consider adding this to your holiday baking list this year!


Pumpkin Pecan Cheesecake Pie

Ingredients
  •  1-9” deep dish pie crust, frozen or fresh (see notes in above text)

 Cheesecake Layer
  • 8 oz cream cheese, softened
  • 1/3 C sugar
  • 1 tsp vanilla
  • 1 slightly rounded tbls sour cream
  • 1 egg

 Pumpkin Layer
  • 15 oz can of pumpkin (not pumpkin pie filling)
  • ¾ C sugar
  • 2 tsp cinnamon
  • 1 tsp ginger
  • ½ tsp nutmeg
  • ¼ tsp allspice or cloves
  • ¼ tsp salt
  • 1/3 C evaporated milk
  • 1 egg
  • 2 egg whites

 Pecan Layer
  • 1 ½ C pecans, chopped
  • ½ C brown sugar, packed
  • 2 tbls pure maple syrup


Directions 
  1. Preheat oven to 400F
  2. Beat cream cheese with the sugar until it is well combined and not lumpy.
  3. Add the vanilla and a dollop of sour cream (a slightly rounded tablespoon), and beat until incorporated.
  4. Add the egg and whites, and beat until combined and the lumps are pretty much gone. Try not to overbeat.
  5. Pour the cheesecake layer into the bottom of the crust.
  6. Combine the pumpkin, sugar, spices, salt, egg and whites in a bowl, and whisk until thoroughly combined (can do by hand).
  7. Layer the pumpkin mixture on top of the cheesecake mixture carefully. Spoon it on gently, and then spread it out.
  8. Put some aluminum on the crust to protect it from over-browning.
  9. Bake it into a 400F oven for 5 minutes then, without opening the door, turn the oven down to 375F and keep baking for an additional 25 minutes.
  10. While it is baking, assemble the pecan topping. Combine the pecans, brown sugar and maple syrup in a bowl and stir to combine well.
  11. After the 25 minute bake time is up, take the pie out of the oven.
  12. Working quickly, remove the shield and start sprinkling the topping evenly all over the pie.
  13. Put the shield back on if you think it is necessary
  14. Put the pie back in the over to bake for another 20 minutes.
  15. After the time is up, try to take a peak (without opening the door if you can) and see how the crust is doing. Decide whether to use the shield or not based on the level of browning
  16. Let the pie bake for a further 10 minutes
  17. Remove it from the oven and place it on a wire rack for cooling.
  18. Let the pie cool down at room temperature for at least an hour before covering and storing in the fridge
  19. Overnight chilling yields the best results

Tuesday, 16 November 2010

Cranberry Upside Down Cake

This year, I decided to add some desserts to my Thanksgiving repertoire, and after spying this eye-appealing recipe on the Williams-Sonoma site, I decided to try my hand at a cranberry upside down cake. So with a few ideas taken from a similar recipe from Martha, I concocted my own version of this recipe that combined what I felt were the best elements of both, plus some additional mods from moi.

But before we get to that, let’s talk cranberries!


Cranberries get their name from the distinctive shape of their open flowers, which look like the head of a crane.  They are one of the three native fruits found in North America (the other two being blueberries and Concord grapes), and the Algonquins were among the first to harvest them, as components of both food and medicine. The first English settlers learned about cranberries from the Native Americans, and it is believed that they were served as the very first Thanksgiving dinner, and have been a holiday staple ever since. Here are some more fun facts:

The first NJ cranberry grower, John Webb, was also the first to notice that good cranberries bounce. He discovered this because, with his wooden leg, he had difficulty carrying his berries down the stairs, so he would drop them. Webb noticed that the good berries would bounce to the bottom, while the rotten berries would stay on the steps.  Incidentally, good berries bounce because they contain small pockets of air that rotten ones lack. These pockets of air are also what makes good cranberries float, the rationale behind the “wet harvest” you have probably seen pictures of in cranberry bogs filled with floating cranberries. Contrary to popular belief, cranberry beds are only flooded at harvest time.

White cranberries are the same species as red cranberries, they are just harvested before the deep red color has a chance to develop.

Ocean Spray, the largest manufacturer of cranberry-related products in the US, is actually owned as an agricultural cooperative of cranberry and grapefruit growers, and has been around since 1930.

Now, back to the cake!

Fair warning: cranberries are tart. Delicious. But tart. This may look like a cake with cherries on top, but it sure doesn’t taste like it. This cake is a mature flavor best suited for adults. Kids will love the look of the cake, but probably not the taste, so although I highly recommend this cake, I’d also recommend making sure it isn’t the only dessert offering if there are lots of kiddies at your holiday table. Fair enough? Good. Who ever heard of too many desserts anyway, right? Psssht. Not me, that’s for sure.

Now, this cake makes for a beautiful presentation that is actually very simple to assemble.  The whole process begins with an orange. Zest and juice it. Then, throw some of the juice and half the zest in a saucepan with some brown sugar and butter, which you keep on medium heat until the butter is melted and the sugar is dissolved. 


Throw in some cinnamon and a pinch of allspice right before you are done. Then, you pour it into a 9” round cake pan that has been butter sprayed, with a parchment round on the bottom that has also been butter sprayed. Trust me, you’ll thank me later on. I hardly ever heed directions that recommend parchment-lining cake pans, and honestly I rarely have an issue…but for this cake, I truly believe depanning it would be very difficult without the parchment round on the bottom. So, pour the sugar/butter/orange/spice mixture into the pan, and spread it over the entire bottom (you can probably just tilt the pan to do this, it worked fine for me). Once that layer is down, it is time to sprinkle on the cranberries. You will use nearly all of the ¾ lb bag, less a few berries. Sprinkle them on so that there is complete coverage over the bottom of the pan, but only a single layer of berries, like this:

Now, you can start assembling the dough. First, combine the dry ingredients (flour, baking powder, salt) in a bowl. Separately, cream together butter and sugar, then add yolks(one at a time), vanilla and the remaining orange juice and zest. Then,  start adding the dry ingredients, alternating each addition of the flour mixture with an addition of buttermilk.

Whip the whites and the cream of tartar with a hand mixer until stiff peaks form, and then fold the whites into the batter with your spatula or a wooden spoon. 


Then, spoon the batter over the cranberries and spread it evenly.


Bake at 350F for 55-60 minutes, until cake bounces back and a wooden skewer comes out clean. Now, when I made this, my batter overflowed just a tad. I’m not 100% sure why, and it was nominal, but do yourself a favor and put the pan on a cookie sheet while you are baking it.


Then, you cool it 15 minutes in the pan, invert it and leave it for another 5, and then finally de-pan it. Is all that necessary? I’m not sure, but I can tell you that the cranberry topping came out of the pan perfectly using this method, so I’m sticking to it!


Although it isn’t pictured, this cake is best served with some sweetened whipped cream (recipe below) or some Reddi-Wip, which will cut through the tartness of the berries.


This cake is quite tasty and definitely different. The orange comes through nicely and adds depth to the flavor, as does the hint of cinnamon and allspice in the berries, the cake is yummy and moist, and the cranberry layer combines both sweet and tart. Visually, the ruby red jewel-like topping is a stunner. Again, the cranberries are still on the tart side, even smothered in sugar and butter, because they are whole berries and not a sweetened sauce. But between the sugar, orange and whipped cream, I think the tartness is at an acceptable level (although this might vary from person to person). If you hate cranberries, this might not be your dessert. But if you want a little sumpin’ sumpin’ different from the usual offerings that still screams “holidays!” then this is it!

Cranberry Upside Down Cake

Ingredients
Topping
  • ¾ lb (12 oz) bag of fresh (or thawed frozen) whole cranberries
  • 1 C brown sugar
  • ½ stick unsalted butter
  • 2 tbls orange juice
  • Half of the orange zest
  • ½ tsp cinnamon
  • Pinch of allspice

 Batter
  • 1 ½ C AP flour
  • 2 tsp baking powder
  • ¼ tsp salt
  • 1 stick unsalted butter
  • 1 C sugar
  • 2 eggs, separated
  • 1 tsp vanilla
  • 2 tbls orange juice and remaining zest
  • ½ C buttermilk (you can clabber your own with 1/2 tbls of lemon juice or white vinegar and ½ C milk for about 10-15 minutes)
  • 1/8 tsp cream of tartar

 Whipped Cream
  • 1 C heavy cream
  • ¼ tsp vanilla extract
  • 1 tbls confectioner’s sugar


Directions
  
  1. Preheat oven to 350F
  2. Butter a 9”-round cake pan. Put a parchment round onto the bottom of the cake pan, and butter that as well
  3. Place brown sugar, ½ stick of butter, 2 tbls of orange juice and half of the zest of one orange in a saucepan. Heat on medium until butter melts and sugar dissolves. Add cinnamon and allspice about halfway through heating.
  4. Pour the topping into the bottom of the pan, and tilt pan to ensure full coverage
  5. Sprinkle a single layer of cranberries on top of the sugar/butter mixture, packed tightly, but no more than one berry layer thick
  6. Combine the flour, baking powder, and salt in a bowl and set aside
  7. Cream together the butter and sugar used for the batter. Add egg yolks one at a time and mix until thoroughly combined.  Add in the vanilla and remaining juice/zest, and mix until combined
  8. Add the flour mixture in 3 additions, alternating with the buttermilk, starting and ending with the flour. Beat each addition until just combined
  9. In a separate bowl, combine the egg whites and cream of tartar, and whip with a had mixer until still peaks form
  10. Fold whites into batter by hand, and spoon onto the cranberry layer, spreading batter until even and touching all sides of the pan
  11. Place pan on a cookie sheet, and bake for 50-60 minutes, until golden, cake springs back, and toothpick inserted comes out clean
  12. Transfer cake pan to wire rack and cool in-pan for 15 minutes
  13. Invert onto serving plate, and let stand inverted for 5 minutes before removing the pan
  14. For the whipped cream: Using the whisk attachment on your mixer, or a hand mixer, whip the cream until soft peaks form, then stir in the vanilla and sugar

    Cranberry

Honey Cornbread Muffins


I love multiple iterations of a holiday. You know, when you celebrate the same holiday several times in a given season? Take Thanksgiving, for example. I just celebrated it (with friends) last week, and I’ll be celebrating it again (with family) next week. In my family, because of everyone’s schedules and obligations, it isn’t unusual to celebrate Christmas, and then “Second Christmas” and occasionally “Third Christmas.” As an avid baker and budding chef, I relish the multiple opportunities to not only make the staples that people expect year after year, but also to change things up a bit or try out new recipes. Multiple holiday celebrations are like gigantic experiments where I can field test different creations.


Every year, my friends and I have our own Thanksgiving, typically one or two weeks before the real deal. This year was my first time hosting, since it was mine and my husband’s first November as a married couple (and the first where we had our own place). Traditionally in my circle of friends, the host provides the turkey, while the bulk of the side dishes are provided pot-luck style by the guests.

This was a daunting task for me…I’ve never made a turkey. Roasted a chicken, yes, but never a turkey. I was not intimidated, but I was a little stressed about the timing of everything. I was also in charge of making various desserts (including Nutella Balls, Pumpkin Cheesecake Pie, and Cranberry Upside Down Cake), and the cornbread.

Now, I don’t have the steps for what I did with the turkey, which is unfortunate since it turned out really well. But I was too hyper to think about recording what I was doing for future blogging – maybe for the real Thanksgiving I’ll be calmer. The reason I bring the turkey up at all was because I was anxious about space – oven space, that is. I had no idea how long the bird would take to cook, and no clue when the oven would be free. Now, normally for holidays I make a really easy and tasty cornbread pudding (which I will in fact be making next week), but I was afraid the oven wouldn’t be free to bake or reheat it, so I started looking for cornbread alternatives.

That’s when I stumbled on this:  Honey Cornbread Muffins, courtesy of the Neely’s. As a Yankee, I like my cornbread on the sweet side, plus this also looked like something that could be made the day before without too many repercussions, so I decided to give it a whirl. And let me tell you, I’m so glad I did! My only experience with cornbread comes out of the blue Jiffy box, but these from-scratch muffins are not only delicious but extremely easy to make. The only special ingredient they require is cornmeal, which is available at any supermarket I’ve ever been to, so it shouldn’t be hard to get a hold of. I tweaked the recipe just a tad, with more honey, and it came out wonderfully.

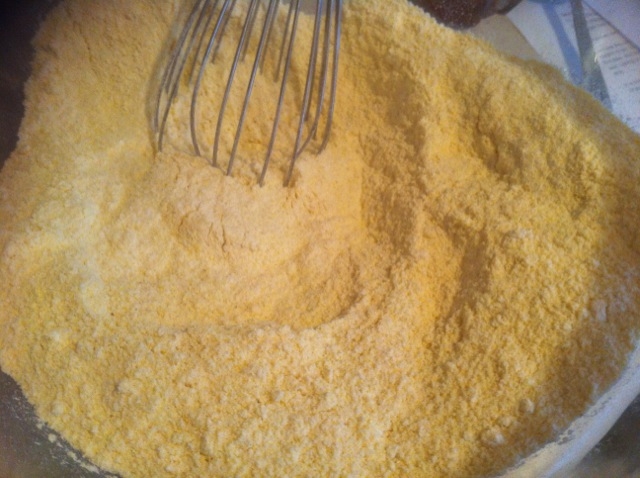
The process is very simple. First, you mix together the dry ingredients: corn meal, flour, baking powder, sugar and salt.

Then, you whisk together the wet ingredients: melted butter, milk, eggs and honey. Dump the wet ingredients into the dry and whisk around until well combined. Literally. I did not bother with a mixer, the whisk works just great.

Then, you evenly distribute the batter amongst a paper-lined muffin tin, and bake for about 15 minutes.


When they come out, they will be nice and golden, with a beautiful consistency. Serve up with some whipped butter, and mmmm mmmm!


Now, everyone has their own ideas about how cornbread should taste. Me, I like it a little sweeter. If you know you don’t like it sweet, you can halve the honey for just a hint of sweetness.


This recipe is easy, yummy, and a definite keeper. Obviously, they are best the day of baking, and they only take 15 minutes, so it is doable once the turkey comes out of the oven. But, they can also be made at least one day ahead (and probably more if you freeze them) so consider adding them to your baking arsenal as a convenient and delicious addition to any holiday meal. 


Honey Cornbread Muffins
(Printable recipe) (recipe makes 24 muffins, but is easy to halve if you want only 12)

Ingredients
  • 2 C cornmeal
  • 2 C AP flour
  • 2 tbls baking powder
  • 1 C sugar
  • 2 tsp salt
  • 1 C whole milk
  • 4 eggs
  • 1 stick of butter, melted
  • 1 C honey

 Directions
  1. Preheat oven to 400F
  2. Line 2-12 C muffin pans with paper liners
  3. Combine dry ingredients (cornmeal, flour, salt, baking powder, sugar) in a bowl
  4. Whisk together wet ingredients (melted butter, milk, eggs, honey)
  5. Add wet ingredients to dry ingredients and whisk until combined
  6. Distribute batter evenly amongst liners
  7. Bake for 12-15 minutes, until golden

Stuffed boned duck

I've been doing this for a while, now. Recipe Rifle's first birthday came and went in October without me even really noticing. I'm not especially sentimental about things like that. Although I realise I'm going to have to be a bit sentimental about the child's first birthday or people will just be, like, so judgmental.

Anyway, quite a lot of people have started saying to me "are you going to turn it into a book..?" or, if they're feeling mean "I suppose you'll be wanting to turn it into a book."

And the idea that all you need to do to get a book deal is write a fucking blog really really makes me laugh. Bitterly. "Ha!" I say. "Ha ha haaaaaaaarghhhhhghgh."

I have in fact written a book and it's great and I love it. In fact, it's the best thing I've ever written or probably will ever write. It's perfect. It's as good as Edmund: A Butler's Tale, with fewer sizzling gypsies. But no agent or publisher will touch it.

Why? Because it's a short comic homage to Kingley Amis's Lucky Jim. And the publishing world is like "What the fucking fuck do you want us to do with that? Is it a misery memoir? No. Is it about a dead toddler? No. Are you Michael fucking Macintyre? NO! Get out of my office, kid."
That's how they talk in publishing, seriously.

Except for a nice man, whose name I can't remember, who works at my husband's publisher. He asked me if I was writing a book and when I told him what it was, this short comic homage to Lucky Jim, set in a school, he made a face like a surgeon looking at a really nasty X-Ray. Then, with the bedside manner of a private doctor telling someone they're going to die, and quite soon, he explained very nicely why it was never going to get published. But I knew that already.

Occasionally a sympathetic friend who also has literary pretensions will demand to read this magnificent octopus. And I always refuse. And they say "Why?"

And I say "Because my book is like Centrepoint?"
And they say "Centrepoint the office block in Tottenham Court Road?"
And I say "Yes."
And they say "?"

And I say "Well, you're probably too young to remember all this, but after Centrepoint was built in 1966 by the property tycoon Harry Hyams, it was left empty for years. No-one could understand why. There was all this excellent office space just empty. What was Hyams thinking? Well, what he was thinking was that Centrepoint was more valuable to him empty than it was rented out - because the money he could levy against the potential rental income of the office space was more useful to him than the income itself.

"In the same way, sort of, if no-one ever reads my book, it can remain potentially the best short comic homage to Lucky Jim, set in a school, ever written. But once a lot of people read it, they'll start having all sorts of opinions about it and say it doesn't live up to the hype and stuff like that. So it's more valuable to me un-read than read."

People usually make their excuses and leave at this point.

But I tell you who did get a book deal out of writing a blog: Julie Powell of Julie & Julia fame. And I was reminded of how irritating she is while watching the eponymous film the other evening. The fuss she makes about boning a duck. Honestly. The scene when she says to her husband "Can you even conceive of boning a duck?" while waggling her fingers infuriates me. Illiterate French pot-bashers can do it, for fuck's sake. Stop whining.

So I thought I'd make that ludicrous and revolting-sounding stuffed boned duck in pastry thing just because that scene pissed me off so much. And just because I want to prove that however hard it might sound, boning a duck is so much easier than getting a book deal.

But I haven't done it yet because I need to pop out for all the ingredients. So bear with me.